Blog - Martin Pierce

orchid cabinet knobs

Floral Developments – Simple Mold Making Lost Wax or cold cast resin

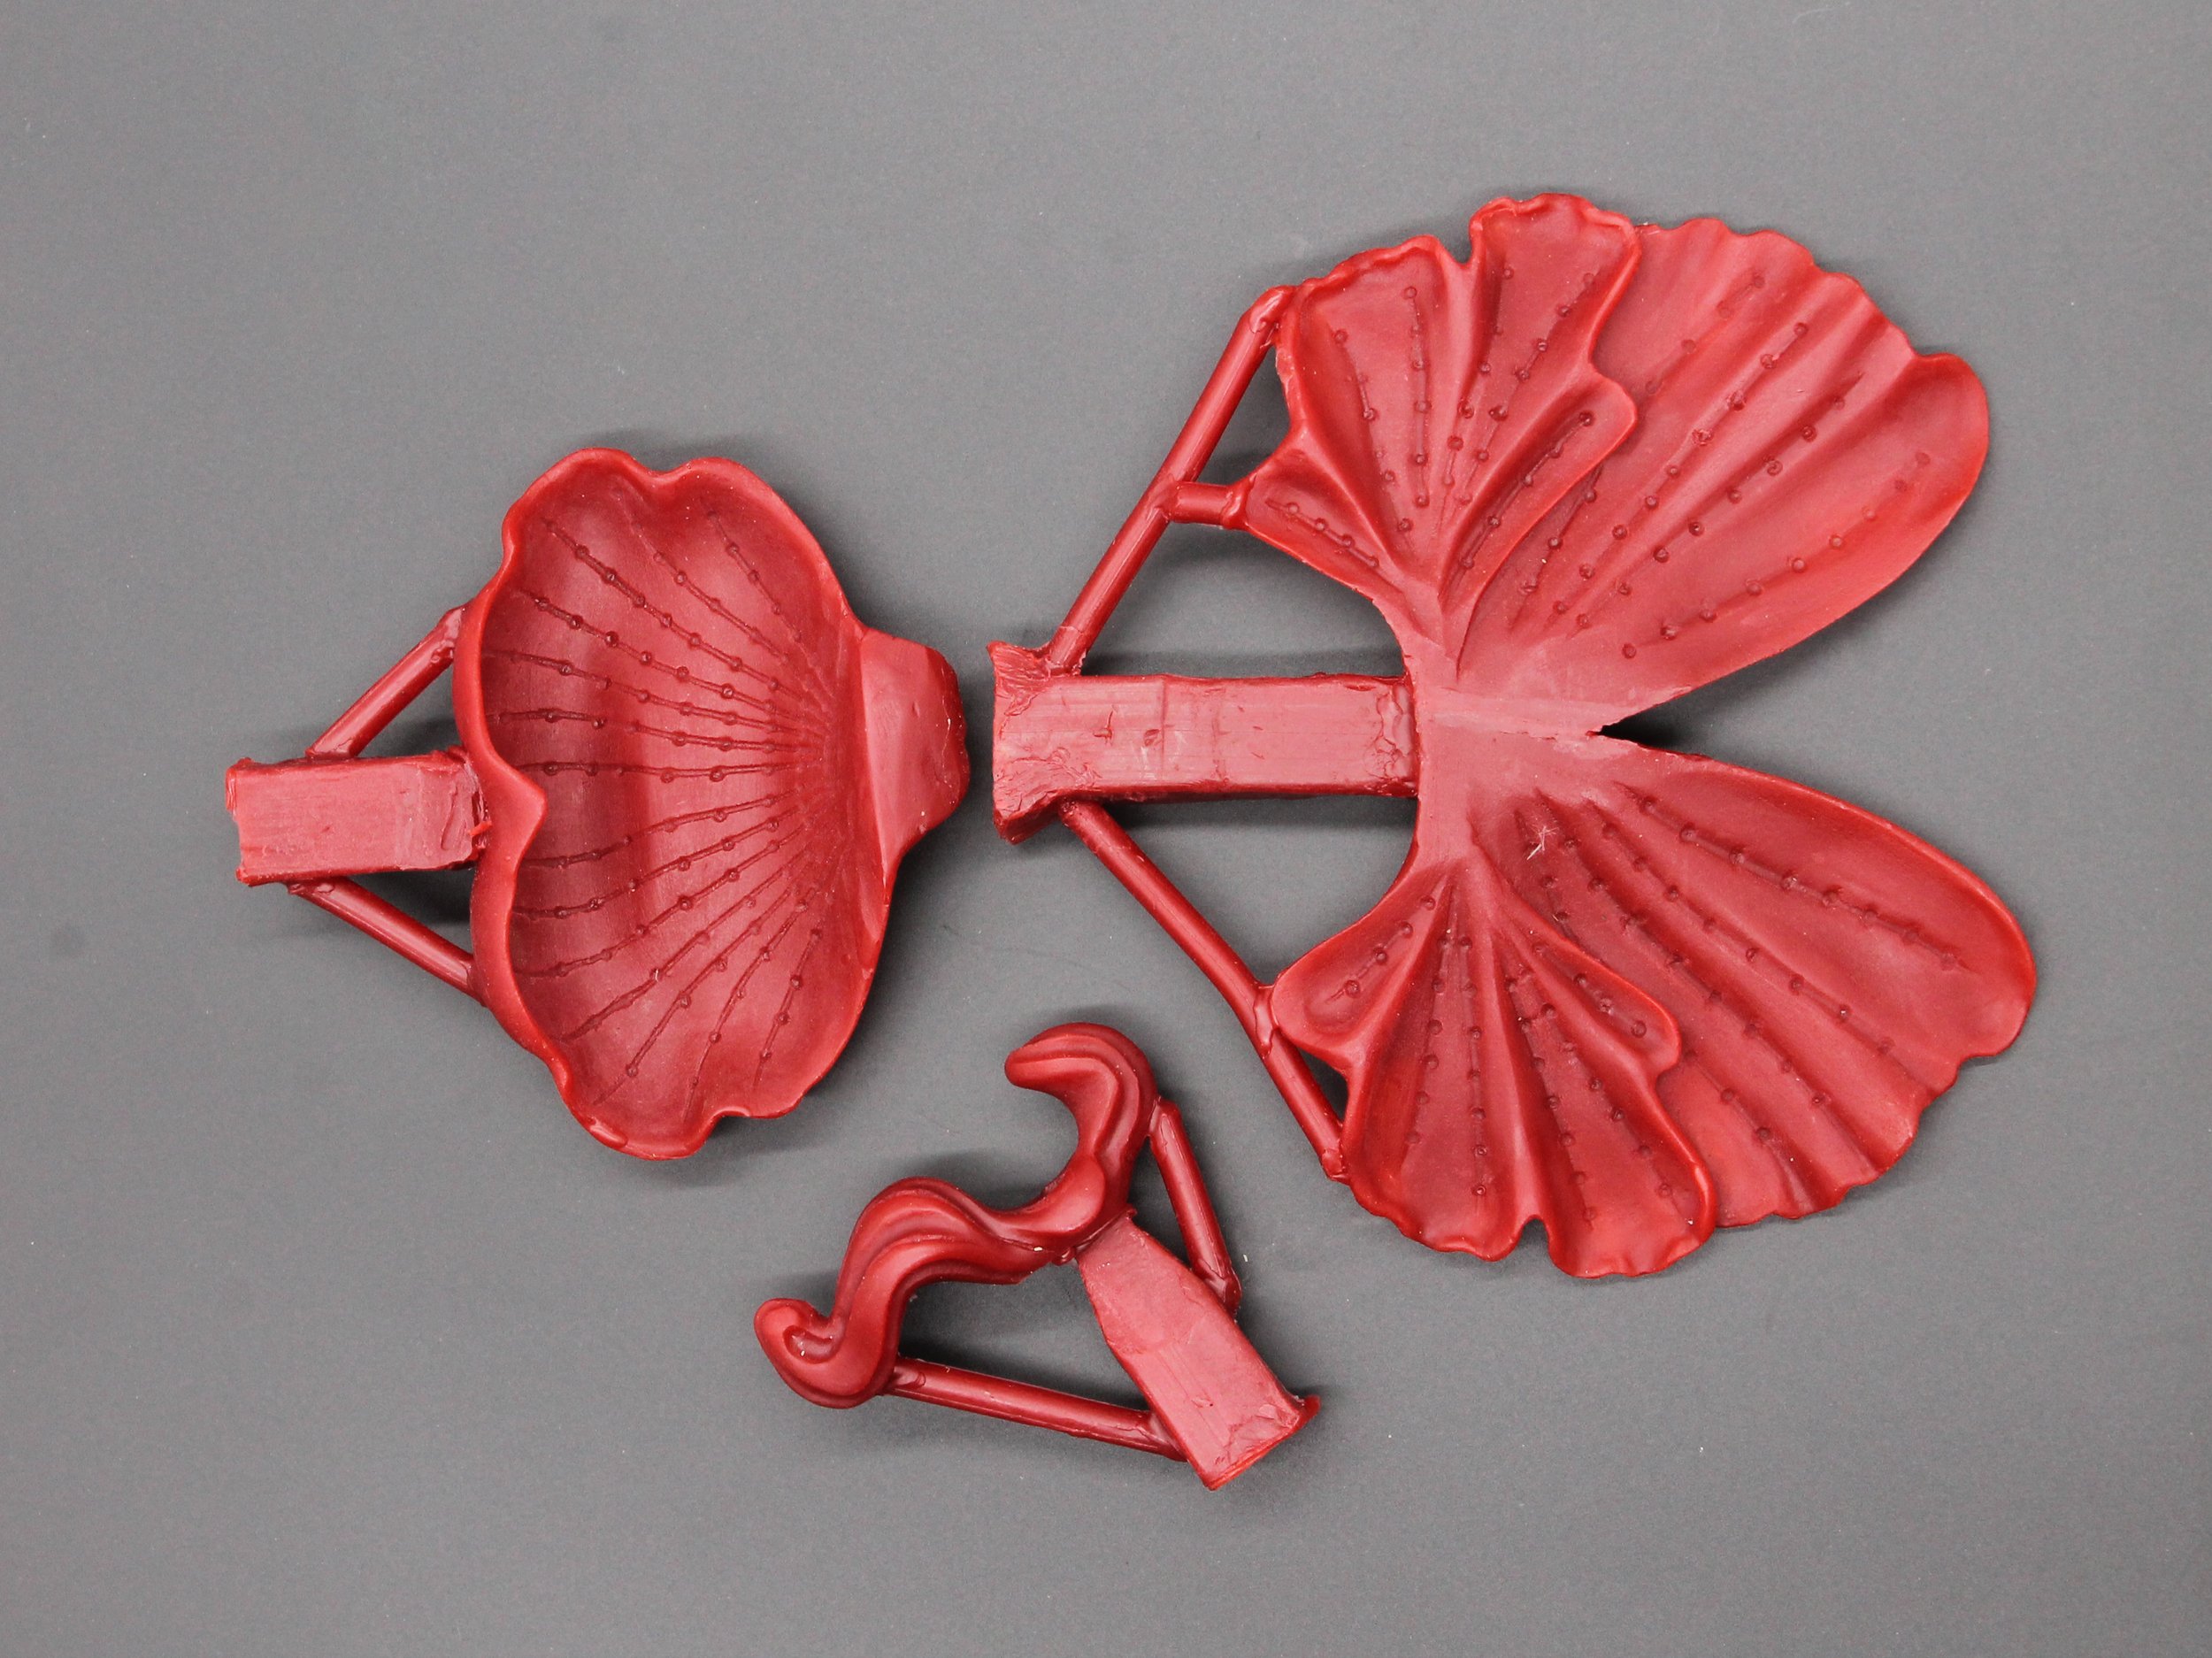
In the previous post we documented the designing and pattern creation process for our new large orchid pull. Next, we make 3  two-part molds, one for each of the stamen, labellum, and petals.

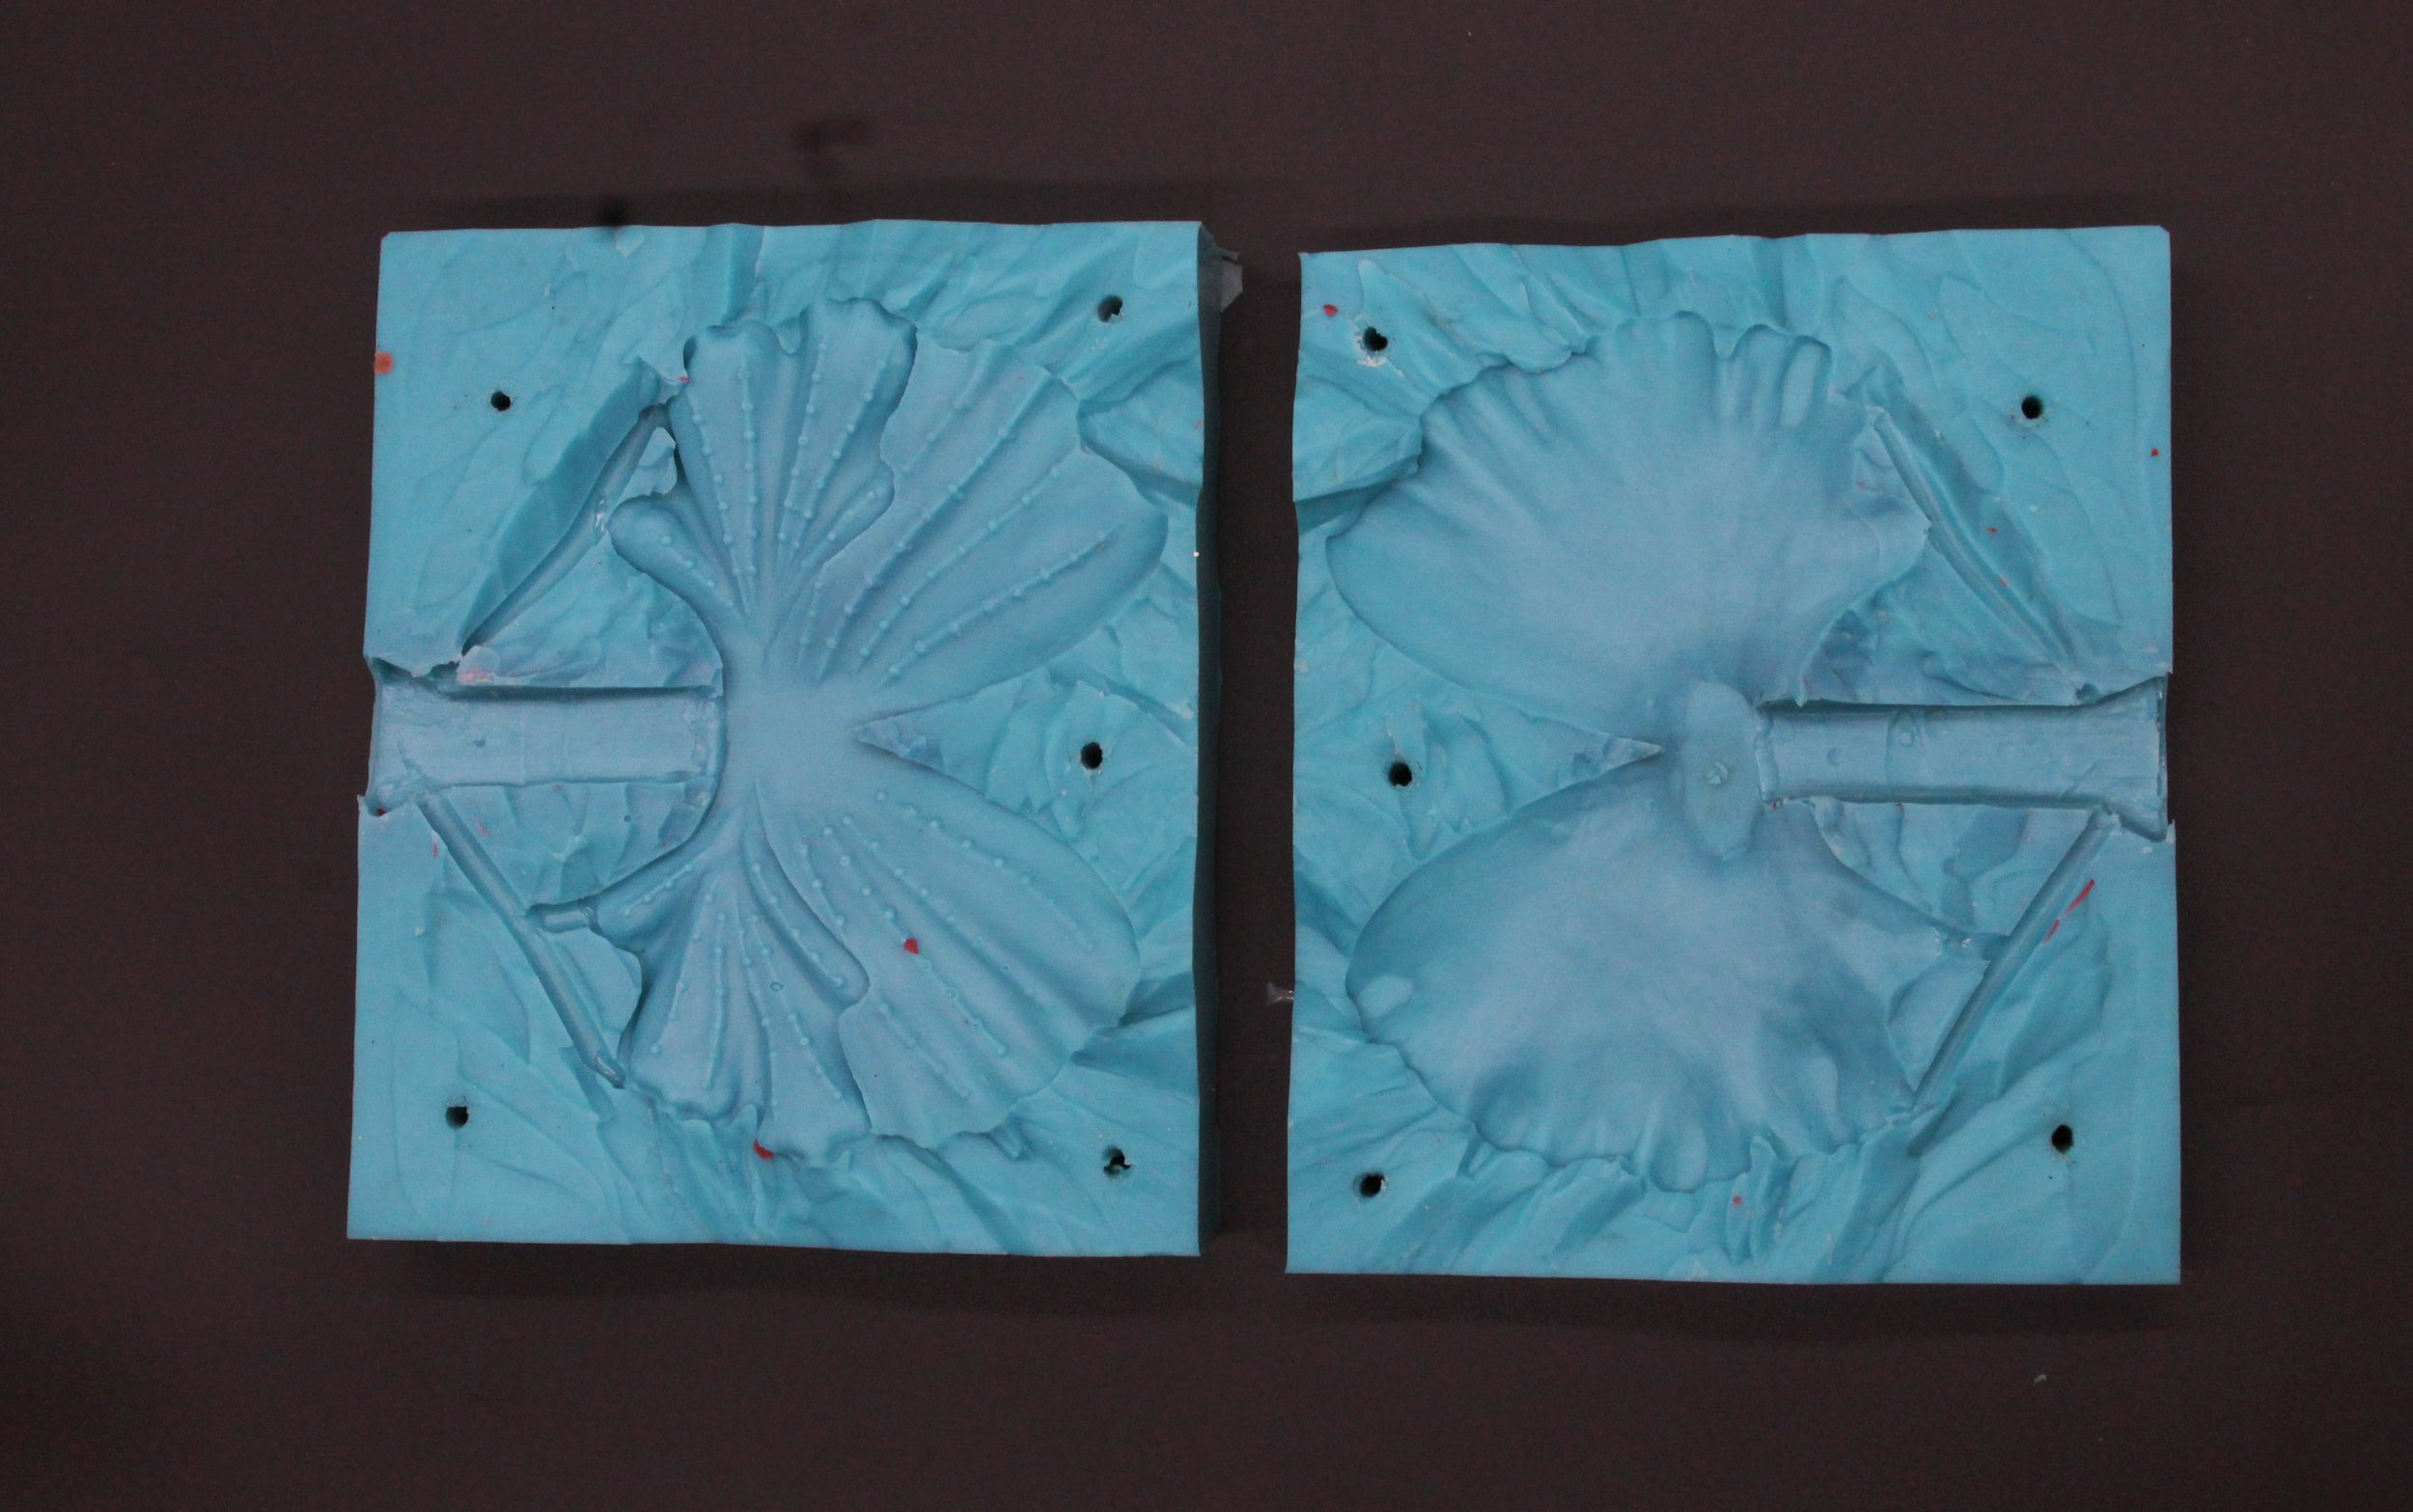
Our mold is made using a 2-part silicone rubber solution Mold Star distributed by Reynolds Rubber.

The wax sections are assembled so that we will have template to guide how we weld the 3 parts.

Mold Star is available in different degrees of pot life, meaning the amount of time it takes before the mixed solution sets. Mold Star 16 has a shorter pot life and quicker curing time than Mold Star 15 and is the rubber we prefer using. For large area with more volume of rubber we add another Reynolds product, Slo-Jo that slows the curing time. As the silicone rubber is curing and especially for larger dense molds there is a tendency for gas pockets to form. The pockets may not be visible but when wax is subsequently poured into the silicone mold the pockets will create small holes in the wax. To prevent this, we place the thoroughly mixed silicone into a vacuum chamber and pump out the air and gases that form and when the remaining bubbles are extremely small, we then pour the solution over our pattern to create the mold.

The 3 sections will be cast separately and will be welded together once cast

These are simple 2-part molds that most hobbyists could make with a little time and practice. As the patterns are not too deep, they will be cast in solid bronze rather than as hollow castings. Our molds are used to create wax replicas for use in lost wax casting but the same type of mold could be used to create fiberglass or resin pieces. Gates and a central sprue are added to the pattern and these will become  the channels for the poured bronze. The gated pattern is placed in a tight-fitting container and the silicone solution is poured over it and left to set. Once set, we insert a sharp blade into the side of the mold and cut around the outer edge and gently pull the mold apart to release the pattern. The cavity that has been formed around the pattern is then filled with hot wax which passes through a central hole in the mold. The 2 halves of the mold are firmly held together with 2 pieces of bolted plywood that will keep the mold rigid when the wax is being poured. Once the wax has set the plywood is unbolted, the 2 parts of the mold are pulled apart and the wax replica is ready to be shelled. If you were casting your piece in resin, you would omit the gate and sprues and your product would be complete after the resin had set.

2 Part mold for petals these are held together with bolted plywood when wax is being poured

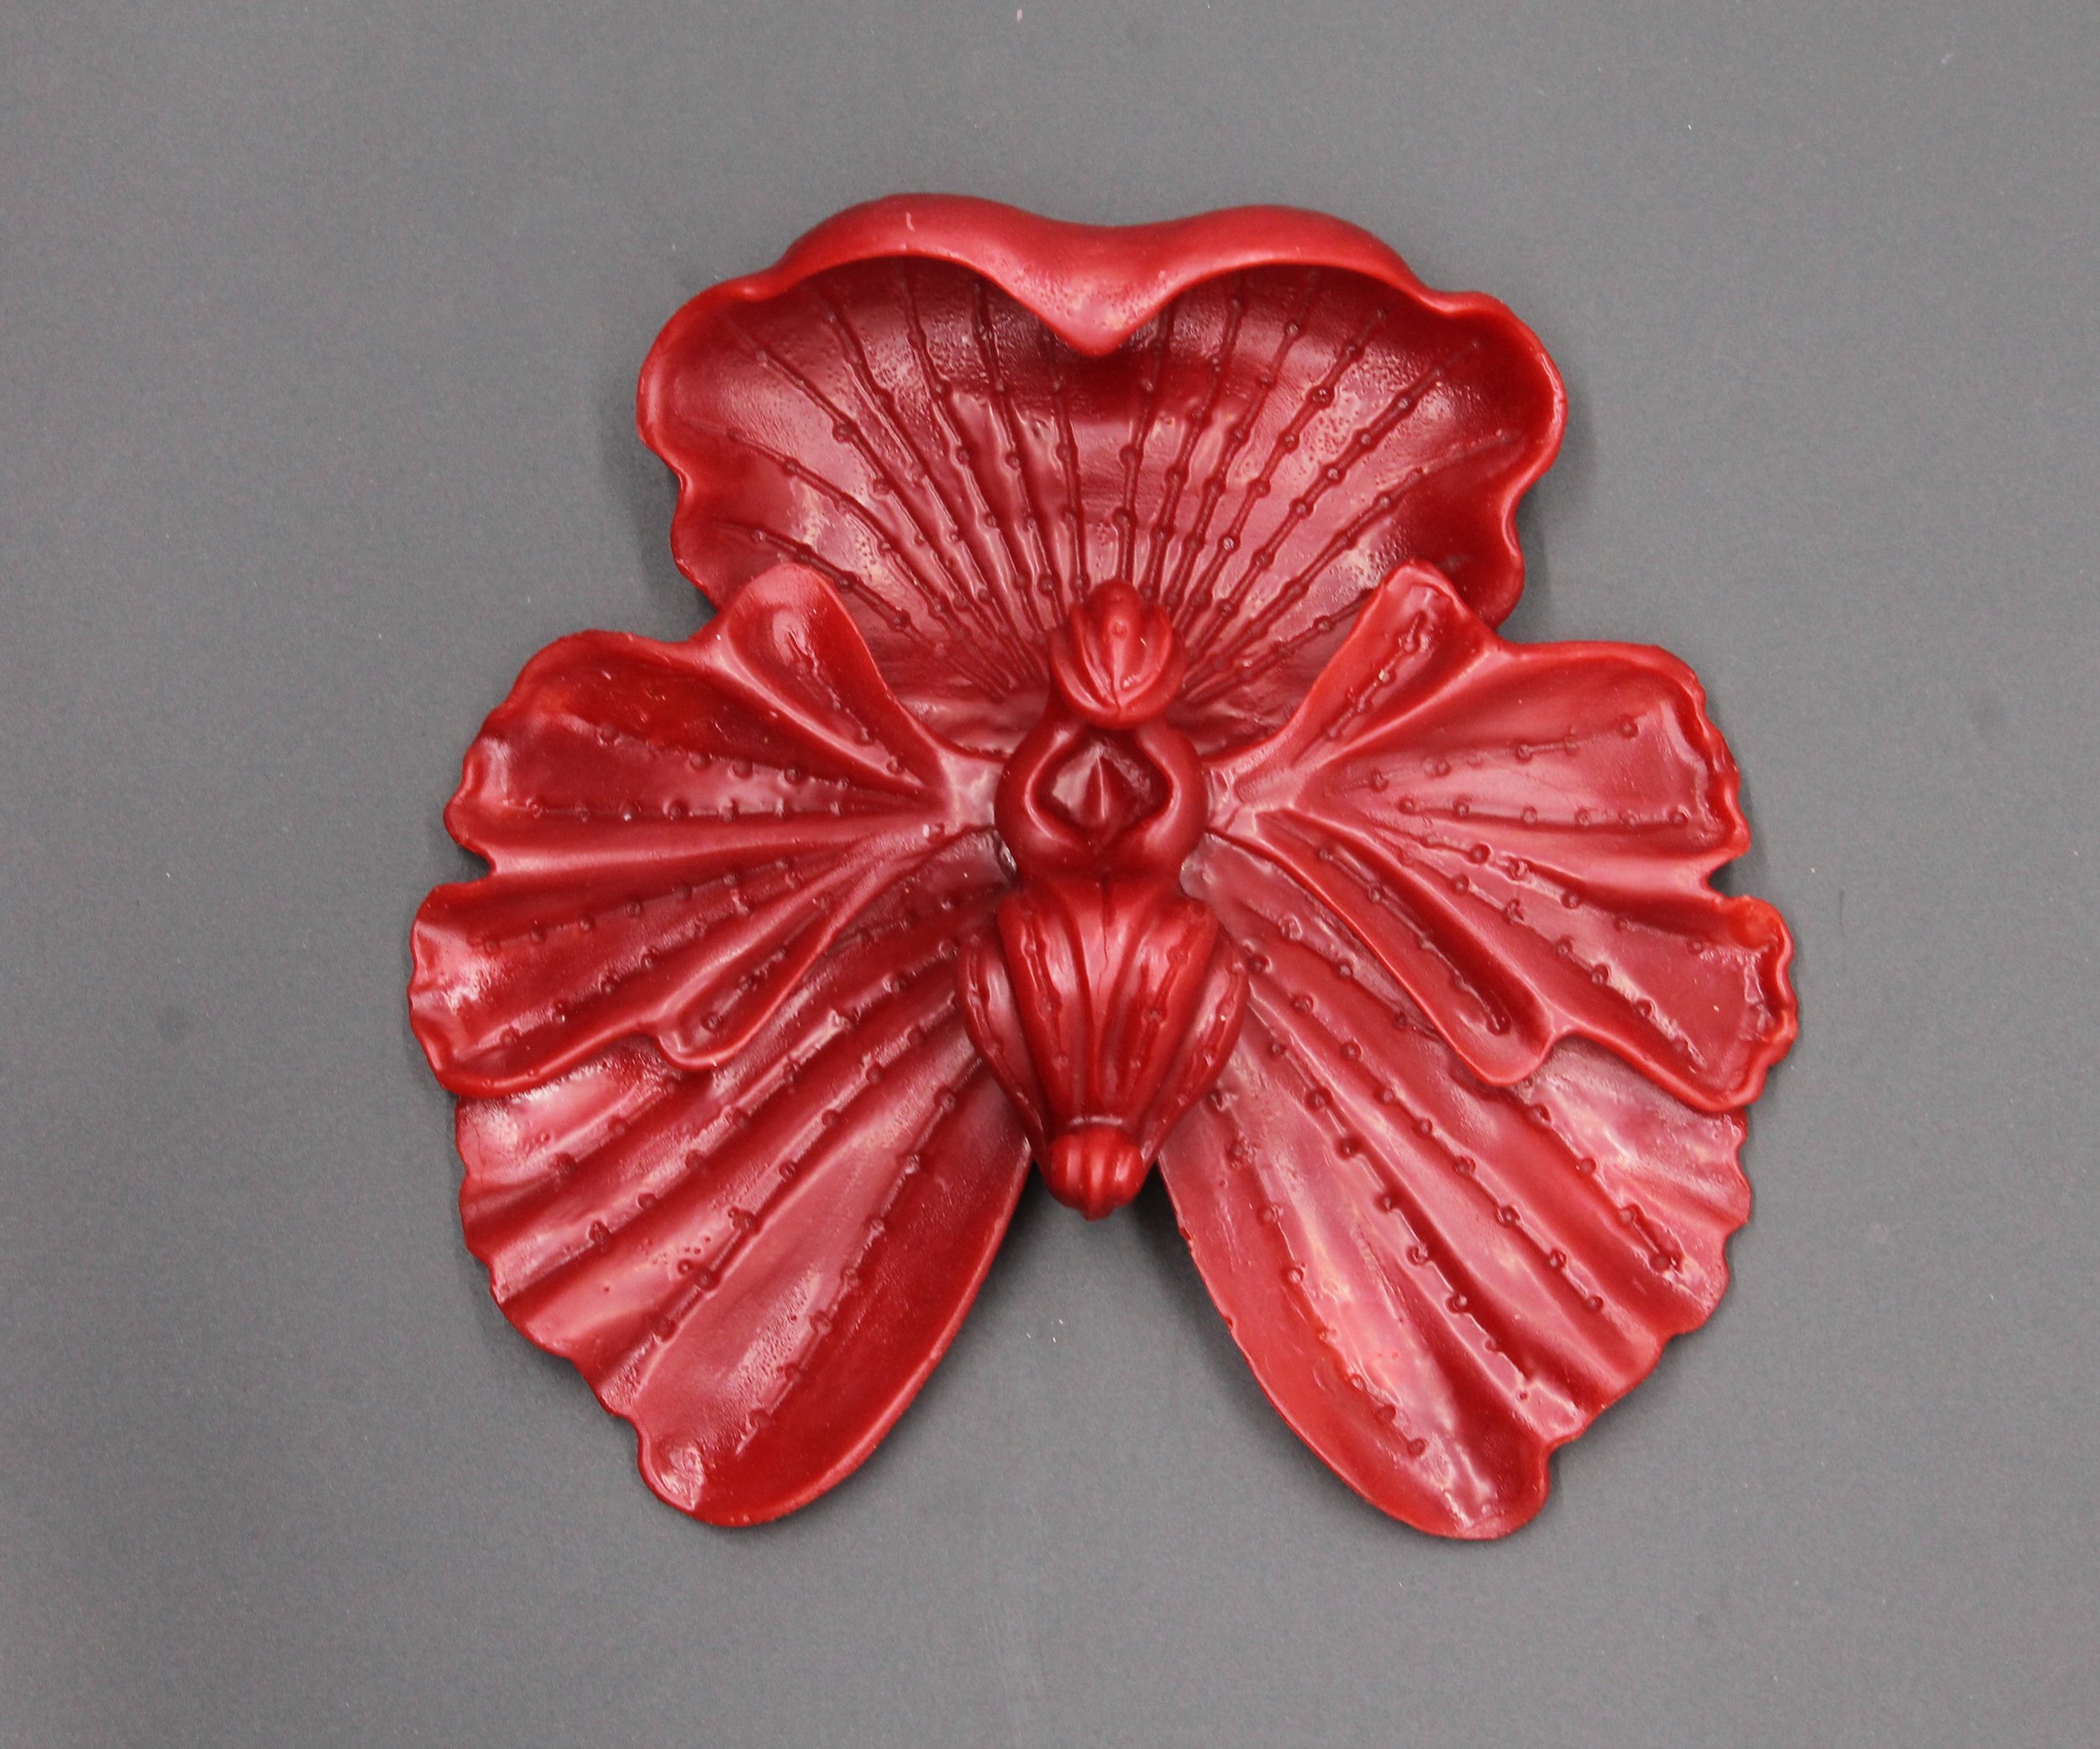
The orchid is assembled in wax as a guide we will use when welding the bronze sections together. The piece could not be cast as a single flower as there are too many undercuts and the bronze would not pour easily.

Bolts keep the 2 plywood formers in place while red wax is poured

New orchid design for dramatic entry door takes shape

Our Orchid cabinet knobs and pulls are popular pieces and often used as accent statements in kitchens and bathrooms. I suspect the appeal lies in their realism although the designs are not a literal portrayal of any particular orchid. The closest type of orchid is possibly the Paphiopedilum (Venus Slipper) or the Phalaenopsis (Moth) but with over 20,000 species and hybrids there may well be and exact match that left it’s imprint on Martin Pierce’s retina.

 Orchid Cabinet Knobs and Stems

The orchid knob has a 3/4” stem post that allows the flower head to be easily gripped and pulled. The same clearance for fingers is given to the orchid spray by the curved stem that connects the 2 orchid flowers.

New Orchid for grand statement

The new orchid is scaled to make a dramatic door statement and like our Willow heroic pull we see it being placed in the center of the door and not on the door stile. The end result will be cast in solid bronze and measure 6” x 6” x 1 ¼” and it may lend itself to being either nickel plated or artistically patinaed with differing hot green, red or yellow oxides. Unlike the smaller cabinet pulls there will not be a stem post mounting as the orchid perimeter petals will be flush with the door face. As the orchid is loosely based on the Venus slipper orchid it has a large stamen and labellum and together these will serve as the gripping point for the thumb and index fingers.

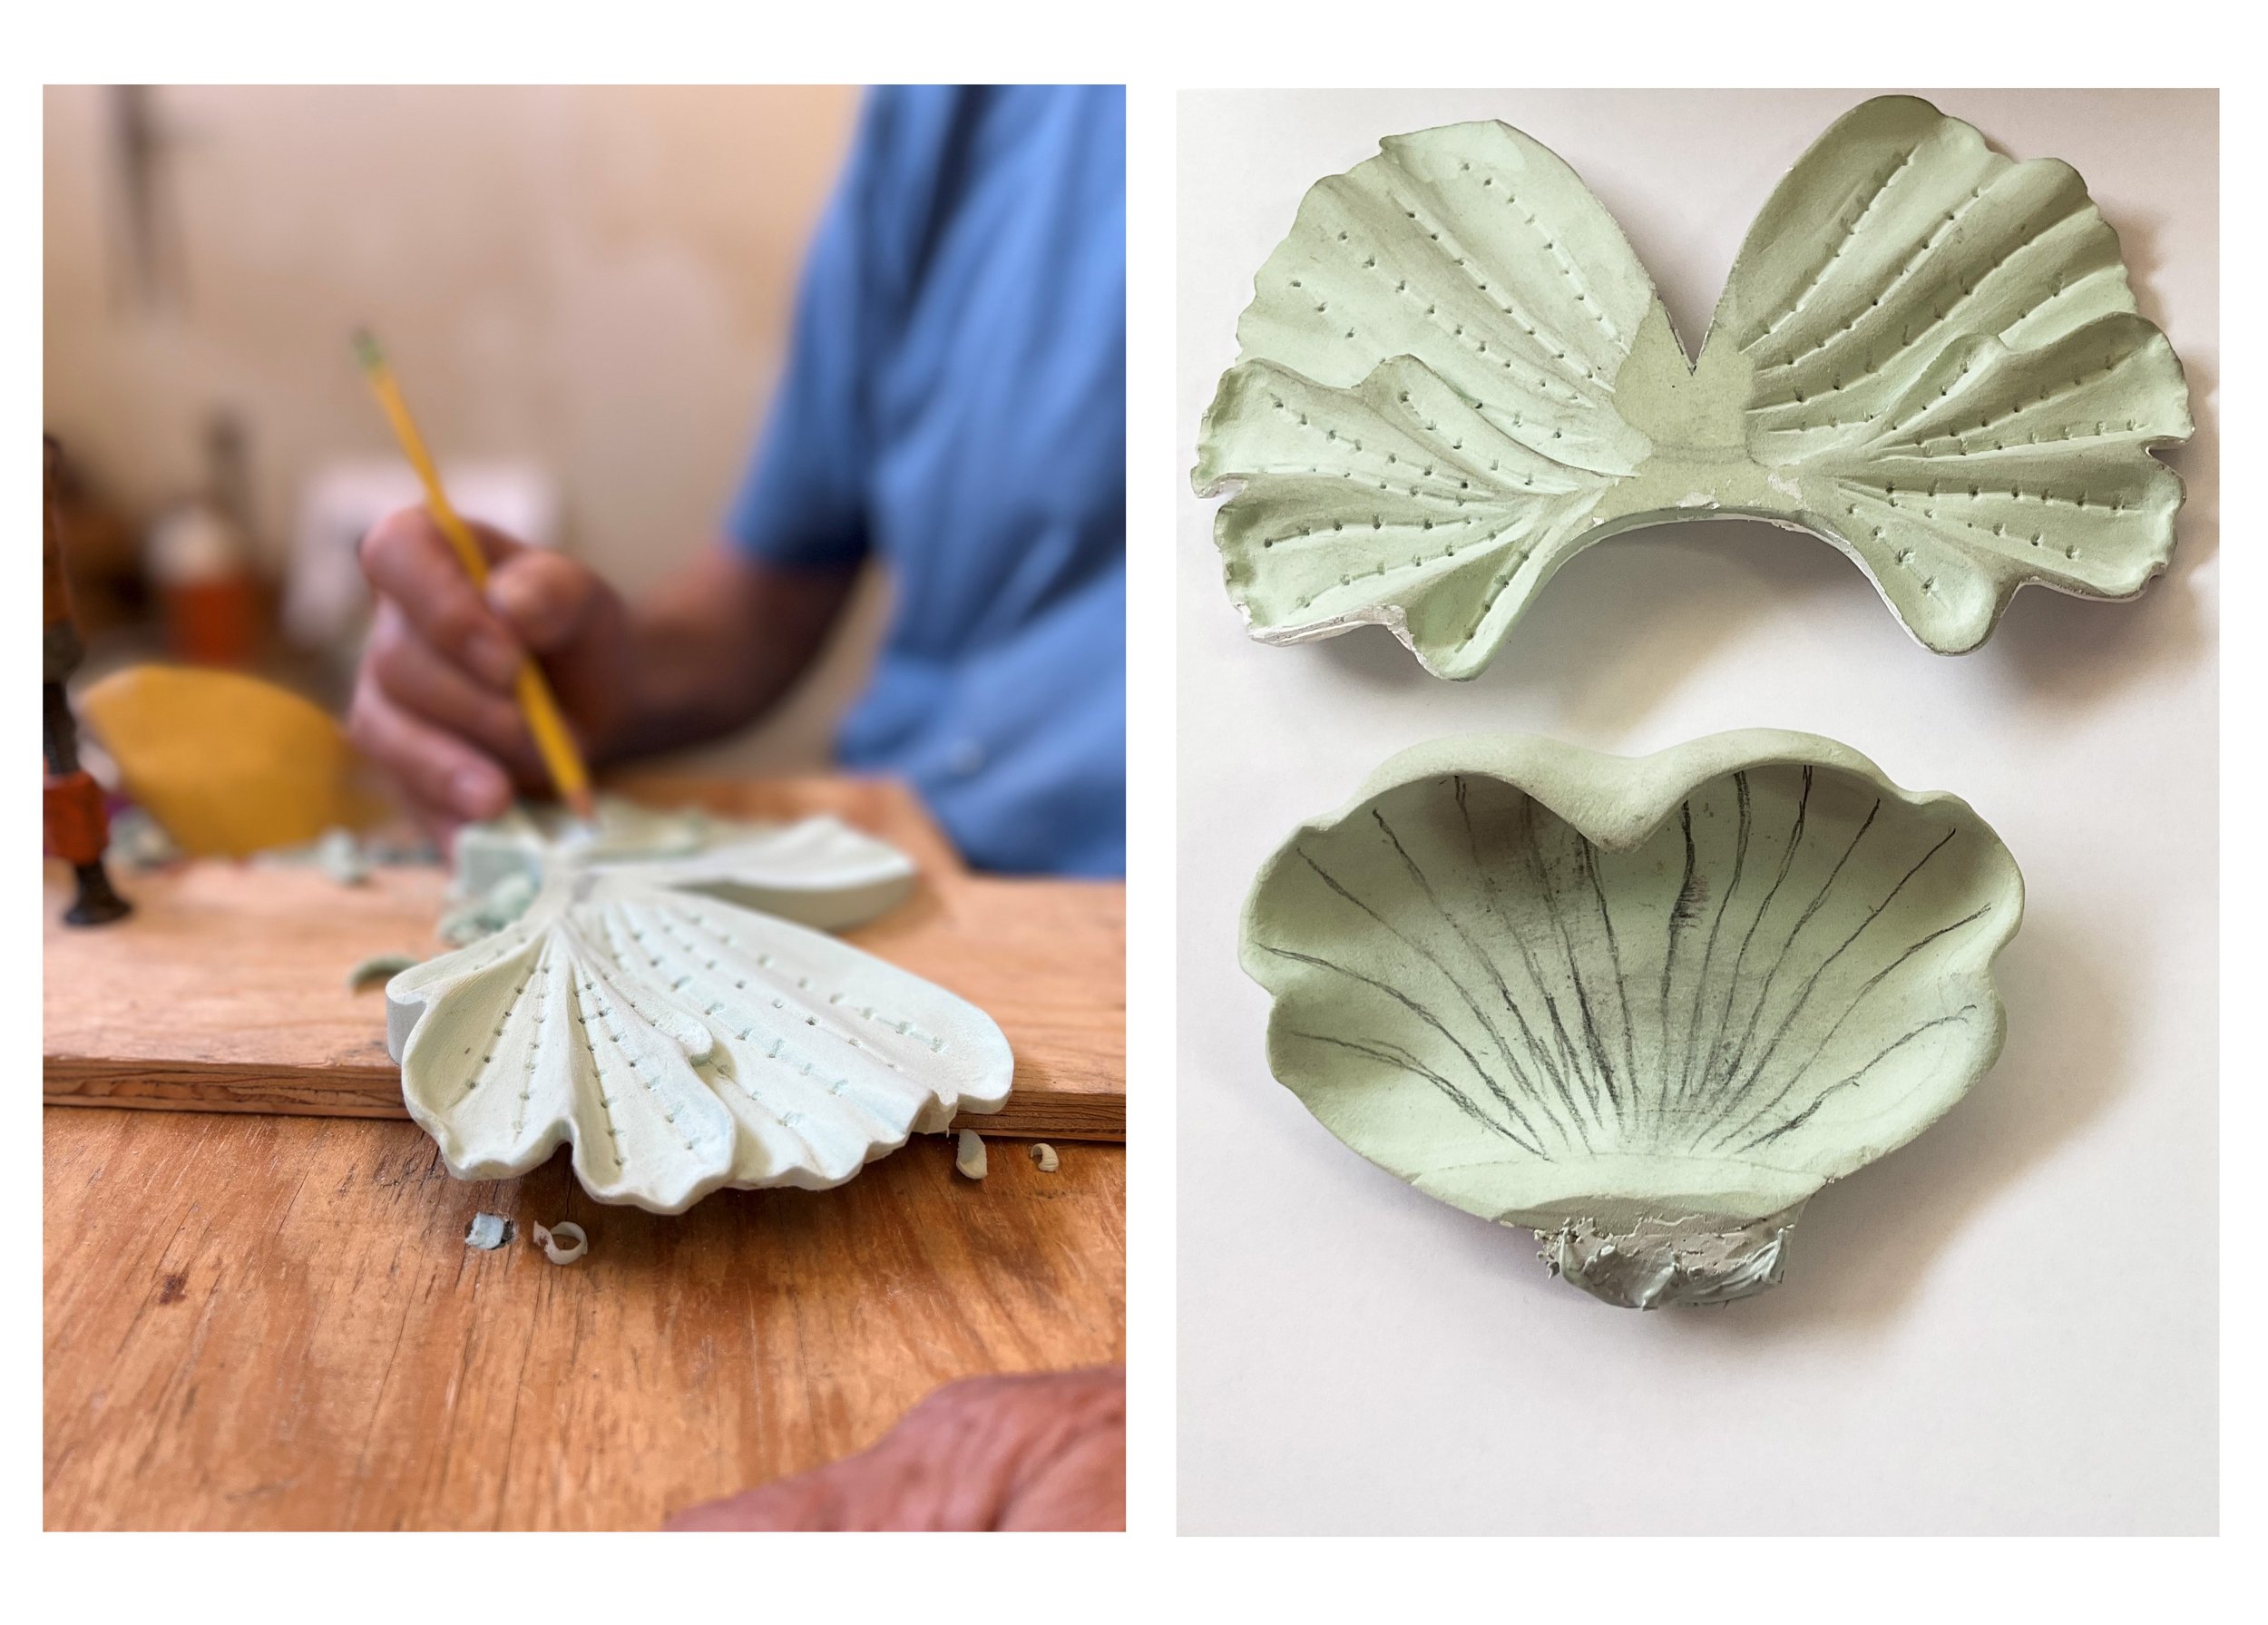
 Martin as readers will know begins a new piece with a front and side view drawn free hand on paper and this becomes the guide used to roughly cut the patterns in high density foam. The drawing details are then copied on to the rough patterns and then carved to create a three-dimensional piece. The new orchid will be cast in 3 pieces which will be welded together to create a single knob.


Why Would We Plate Beautiful Orchid Knobs with Nickel?

Our cabinet knobs are cast either in silicon bronze or 316 stainless steel and viewers will know that both are exceptionally durable rust resistant and quite beautiful alloys so why then would we opt to have an order of orchid knobs nickel plated?


Nickel is a metallic element and is one of the elements present in 316 stainless steel. Nickel has a silvery white appearance that is not dissimilar to stainless steel and when both are finished to a brushed satin luster the visual difference is minimal. Why then would we choose to nickel plate a bronze cabinet knob rather than cast it 316 stainless steel? The answer lies in the hardness of 316 steel which makes it a much more difficult alloy to machine and polish and in the subtle difference in appearance of nickel versus stainless steel.

The custom orchid cabinet pulls that have been described in earlier posts were cast in bronze which being a softer more malleable alloy allowed the nooks and crevices of these detailed pieces to be buffed and brushed to remove scratches and imperfections. If the pieces had been cast in 316 stainless steel the hardness of the steel would have made this process far more labor intensive. As the orchids are being installed in a room with several nickel fixtures, we opted to nickel plated so that the pieces would blend well.


F & H Plating is a valuable Los Angeles source and one well known in the interior design and jewelry industries for their gold, silver, nickel, and copper plating. Ron, the founder of F & H is a knowledgeable mine of information on plating techniques and his site describes the electroplating process. We were seeking a satin finish for our orchid pulls, so we buffed and refined the castings to give them a soft sheen. F & H then chemically cleaned the bronze orchids to remove any contaminants, gently re-buffed them back to their satin luster and dipped them in nickel solution which when electrically charged caused the nickel content to bond with the surface of the bronze. Once dried the pieces were very gently buffed to the desired luster and ready to install

Nickel electroplating is a useful process if you have a metal that is prone to rust as even a thin layer of nickel will improve the rust resistance of the base metal.


Making A Custom Cabinet Pull from Wax to Bronze

Following on from last week’s post I will be showing how we tackle the task of changing the direction of an orchid cabinet pull from left to right. Down-stream we will be making a new mold that will allow us to create a right facing orchid stem directly from the mold with each wax section emerging from the mold as a component for a right facing pull. Until demand warrants the time and cost of making a permanent mold we will need to re-work the stem and flower sections at the wax stage to create a new right pull. This process will be repeated for each pull ordered and as we have 8 pulls to make with each pull requiring 3 wax sections, we will be investing a considerable amount of time modelling by hand all 24 wax sections. The waxes will then be shelled with silica and eventually will be melted out in an autoclave and fired to create a hollow shell which will be invested with molten bronze. The wax that is burnt out is the reason this casting method is often referred to as “lost wax” casting. Rather than making wax replicas one could map the original left pattern to create a file for a right pull and then print each section or possibly the complete piece as a 3D print. To create the print, successive layers of photo-reactive resin are built up and allowed to solidify, a process that would also take hours. Given the extremely detailed nature of the pull the 3D print would still require some cleaning up before it could be shelled, making it a less viable method of production.

Left to Right: Flower 2 parts, Assembled in wax, Front View, Profile View

In Photoshop it is easy using the edit function to flip an image horizontally so that it is shown as the mirror opposite and so change a left directional piece to a right in directional one. However, in the real 3D world this would not work and in the case of the orchid stem rotating the pull right would result in the 2 flower heads facing down making for an upside- down pull. To achieve a right facing pull the curve of the sprig as well as the flower heads and buds need to be cut and re-positioned.

Orchid Components - left facing buds and flowers re-positioned and shaped to become right facing

Orchid Components - left facing buds and flowers re-positioned and shaped to become right facing

Orchid cabinet pulls - from wooden origins to bronze gems

As any orchid lover knows, these seductive clever plants have over time developed both their beauty and ingenuity to lure pollinators. The color and shape of each family type is used to seduce particular types of pollinators to them, be they bees, birds, moths or flies. The bright colorful orchids use their red, yellow and orange patterned flowers to attract day time pollinators while browner duller orchids use their powerful scent, not always pleasant, to attract nocturnal visitors like moths. Orchid families are further defined by their shape and this too determines the type of pollinator. The Cochiloda family for example has a narrow long lip that is easily accessed by the hummingbirds’ retractable tongue. By comparison the Cypripedium family have a flattened rim to their bulbous lips which makes a prefect landing spot for bees and insects.

Orchid and Black Bee square.jpg

Orchids have always been one of Martin’s favorite plants and back in 1979 he sculpted an oversized 3’ sculpture with an imaginary orchid carved in cherry wood and with a realistic bee carved in ebony. More recently Martin has created a more realistic bronze orchid flower and stem as cabinet pulls. The orchid flower, while relatively small is one of our most difficult and time-consuming pieces to make. Based on the anatomy of the Phalaenopsis family the flower has 3 sepals, 2 petals, a protruding lip and a central column. To do justice to the detail and depth of the orchid, the flower is cast from 3 molds to create 3 castings, one for the sepals and petals, a second for the bulbous lip and a third for the inner column. When making a sprig of orchids a total of 7 individual castings are welded to create this 8” wide pull.

Orchid anatomy.jpg
Orchid construction.jpg

For a more in-depth analysis of how different orchids and their pollinators have adapted to each other over time to create a mutually beneficial relationship follow the link below.