architectural hardware

Color and luster when choosing cabinet handles

 Silicon bronze is the preferred alloy for many of our cabinet pull castings and it’s high 96% copper level explains it’s red brown tones. The remaining 4% is made up primarily of silicon which is added to increase the strength and durability of the casting.

 When choosing a complimentary pull for a cabinet while the alloy sets the stage for color the luster of the alloy plays an important part as this will determine how much light is reflected and how much color is perceived.

To a skilled designer neither the alloy color or luster are left to chance but are carefully balanced against the cabinet color and other hardware to create a pleasing setting.

Photo Courtesy of Anjali Pollack Design

Finish of Sprig Pull: Satin Bronze

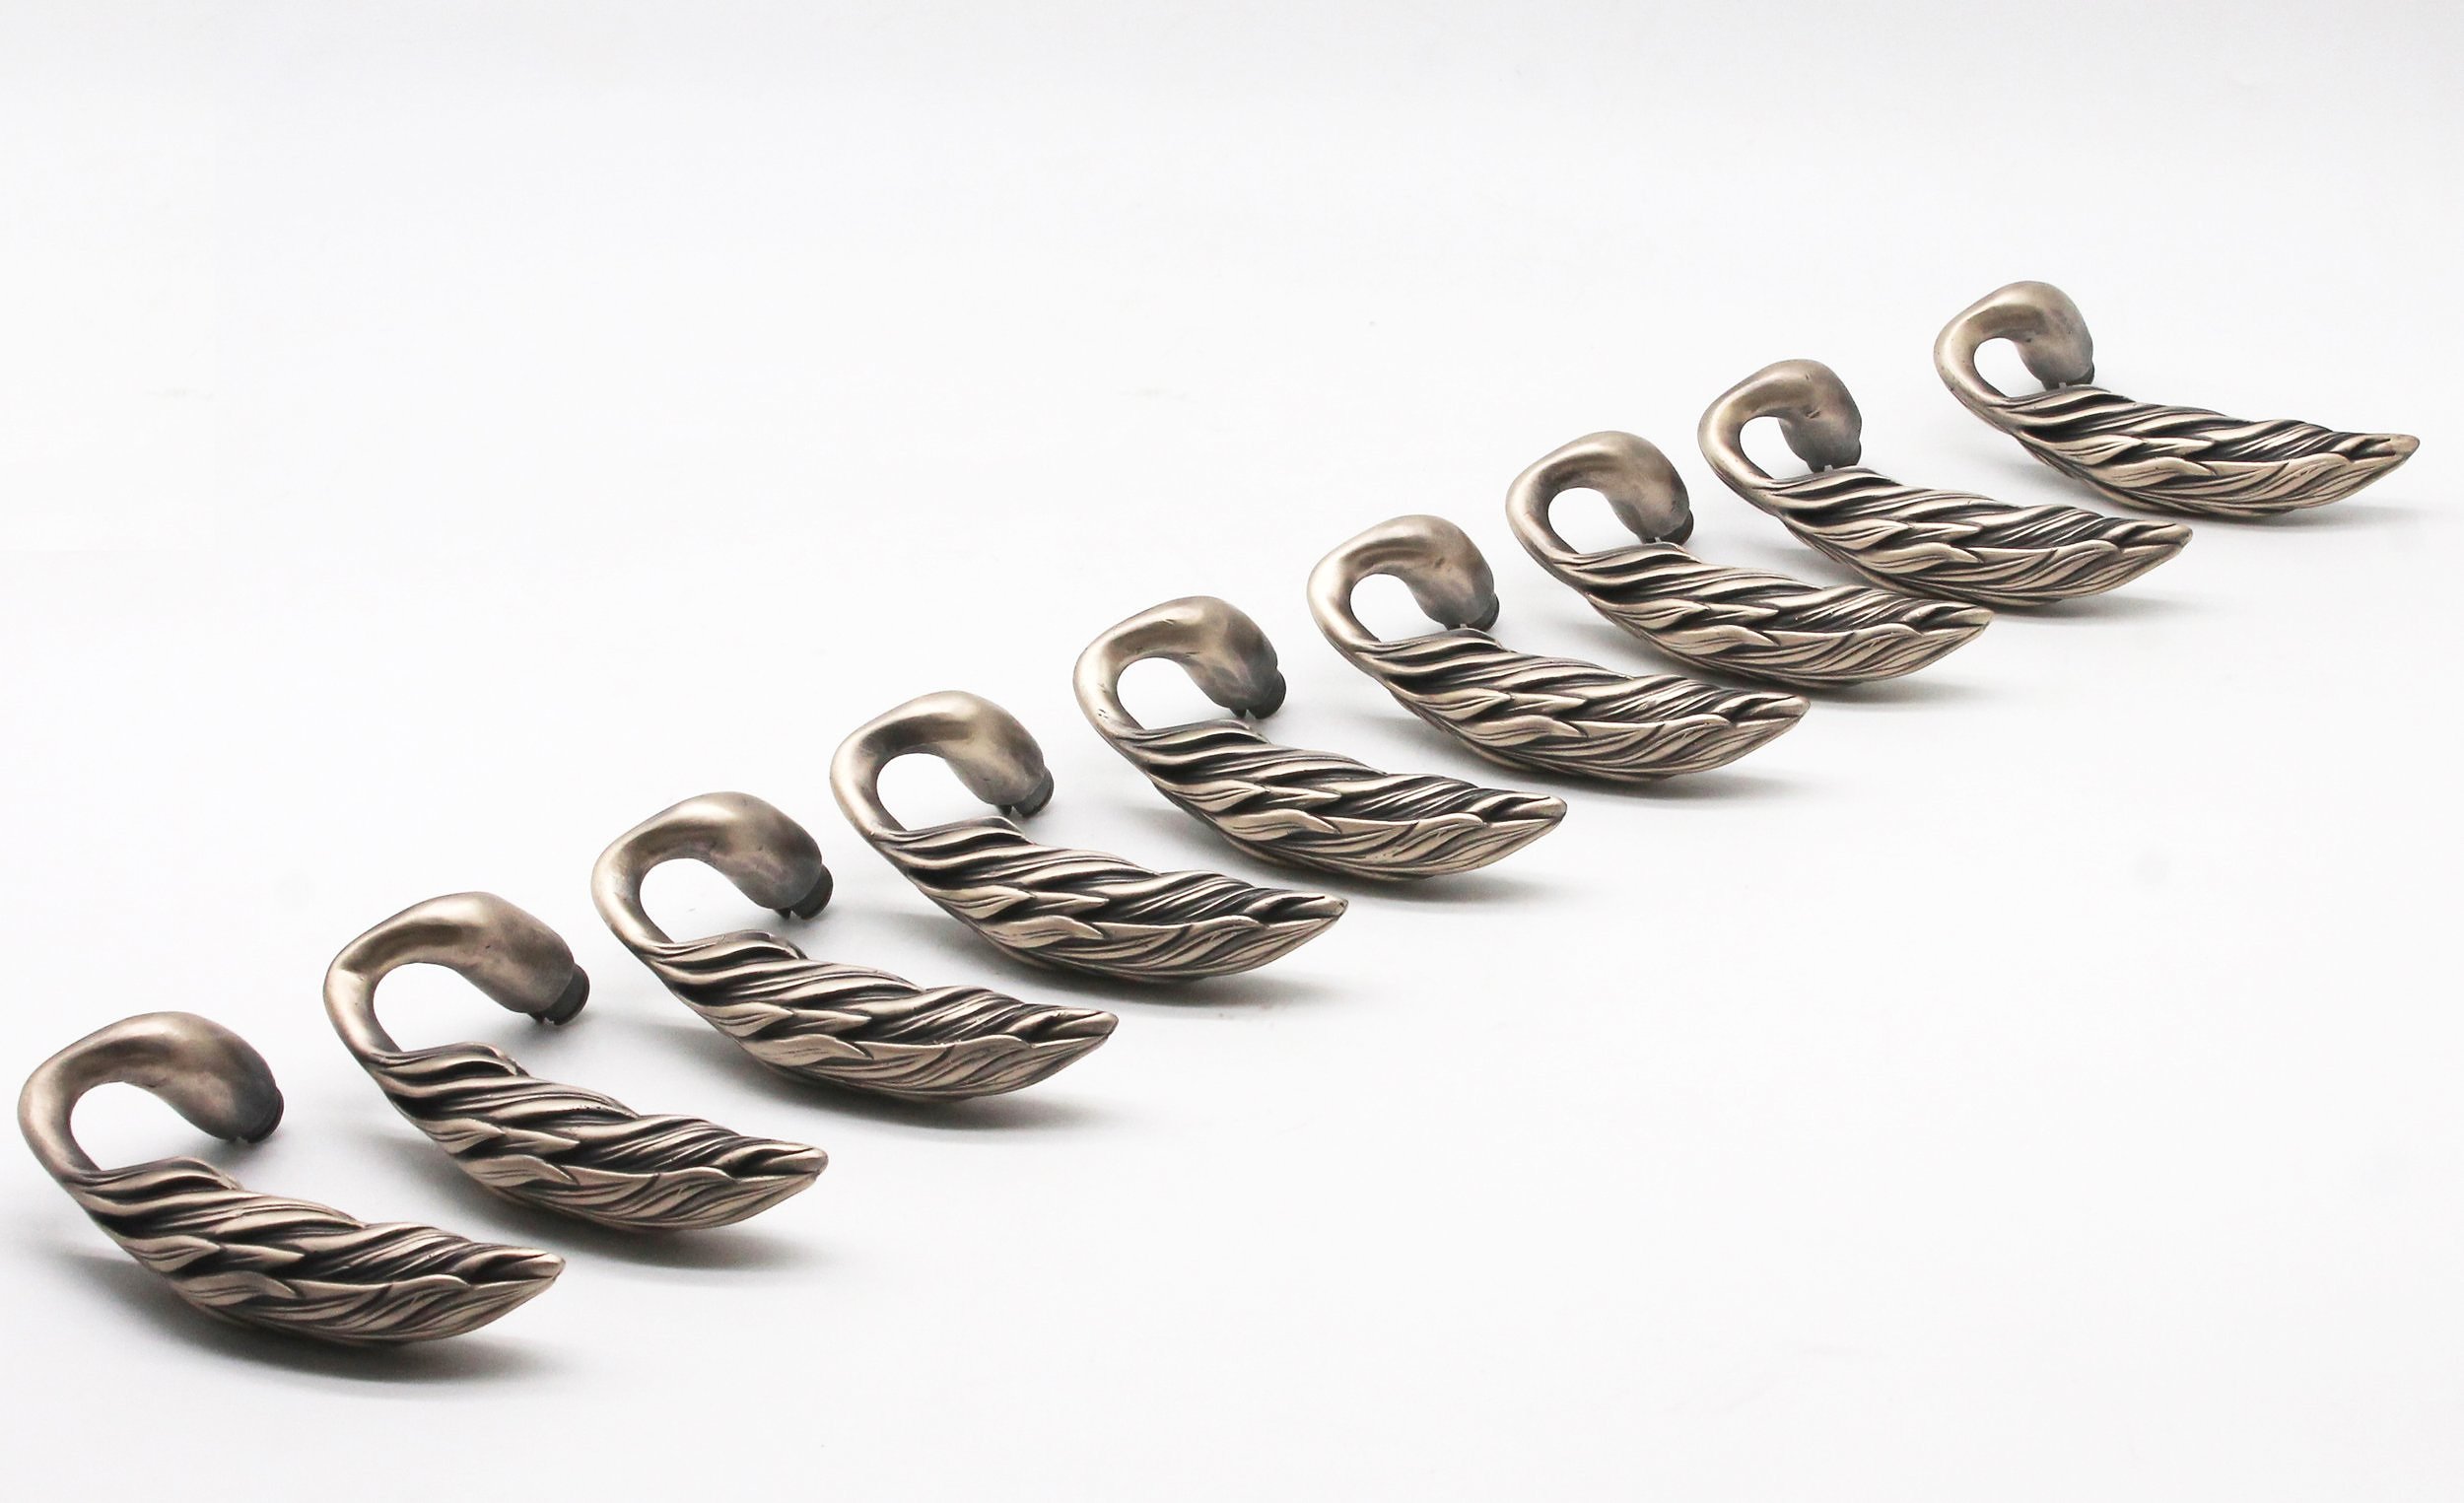
 Anjali Pollack, a well known international designer based in New York recently shared with me photos she took of the Willow sprigs she commissioned in bronze for a wet bar in a Manhattan residence. When choosing, Anjali Pollack considered the sprig in light and dark patinas and lusters ranging from brushed to polished. The result is a sophisticated welcoming wet bar come art nook. The sink and faucet are both in a satin nickel finish and the top is inset with  an antique highly reflective glass.

Finish top to bottom; Polished, Satin,Light Antique patina on Satin, Dark Antique on Satin.

 The sprig pull is a collections of willow leaves that are directional and make a left or right hand cabinet door pull. The leaves form deep crevices which are accentuated when the sprig is finished with a dark patina. The dark patina absorbs light and does not reflect the color of surrounding color, contrast this with the satin lightly polished finish chosen by Anjali Pollack which beautifully picks up the surrounding green grey and tones of the cabinet and walls.

Brushed, satin and polished finishes in metal are created by applying different grades of abrasive compounds to the surface of the piece and by moving the belt sander in a circular or directional way. As you progress from coarse to finer grits, so to do the machine lines left in the surface until an extremely fine grit leaves almost no visible surface line resulting in a highly polished finish.

Color Patinas For bronze

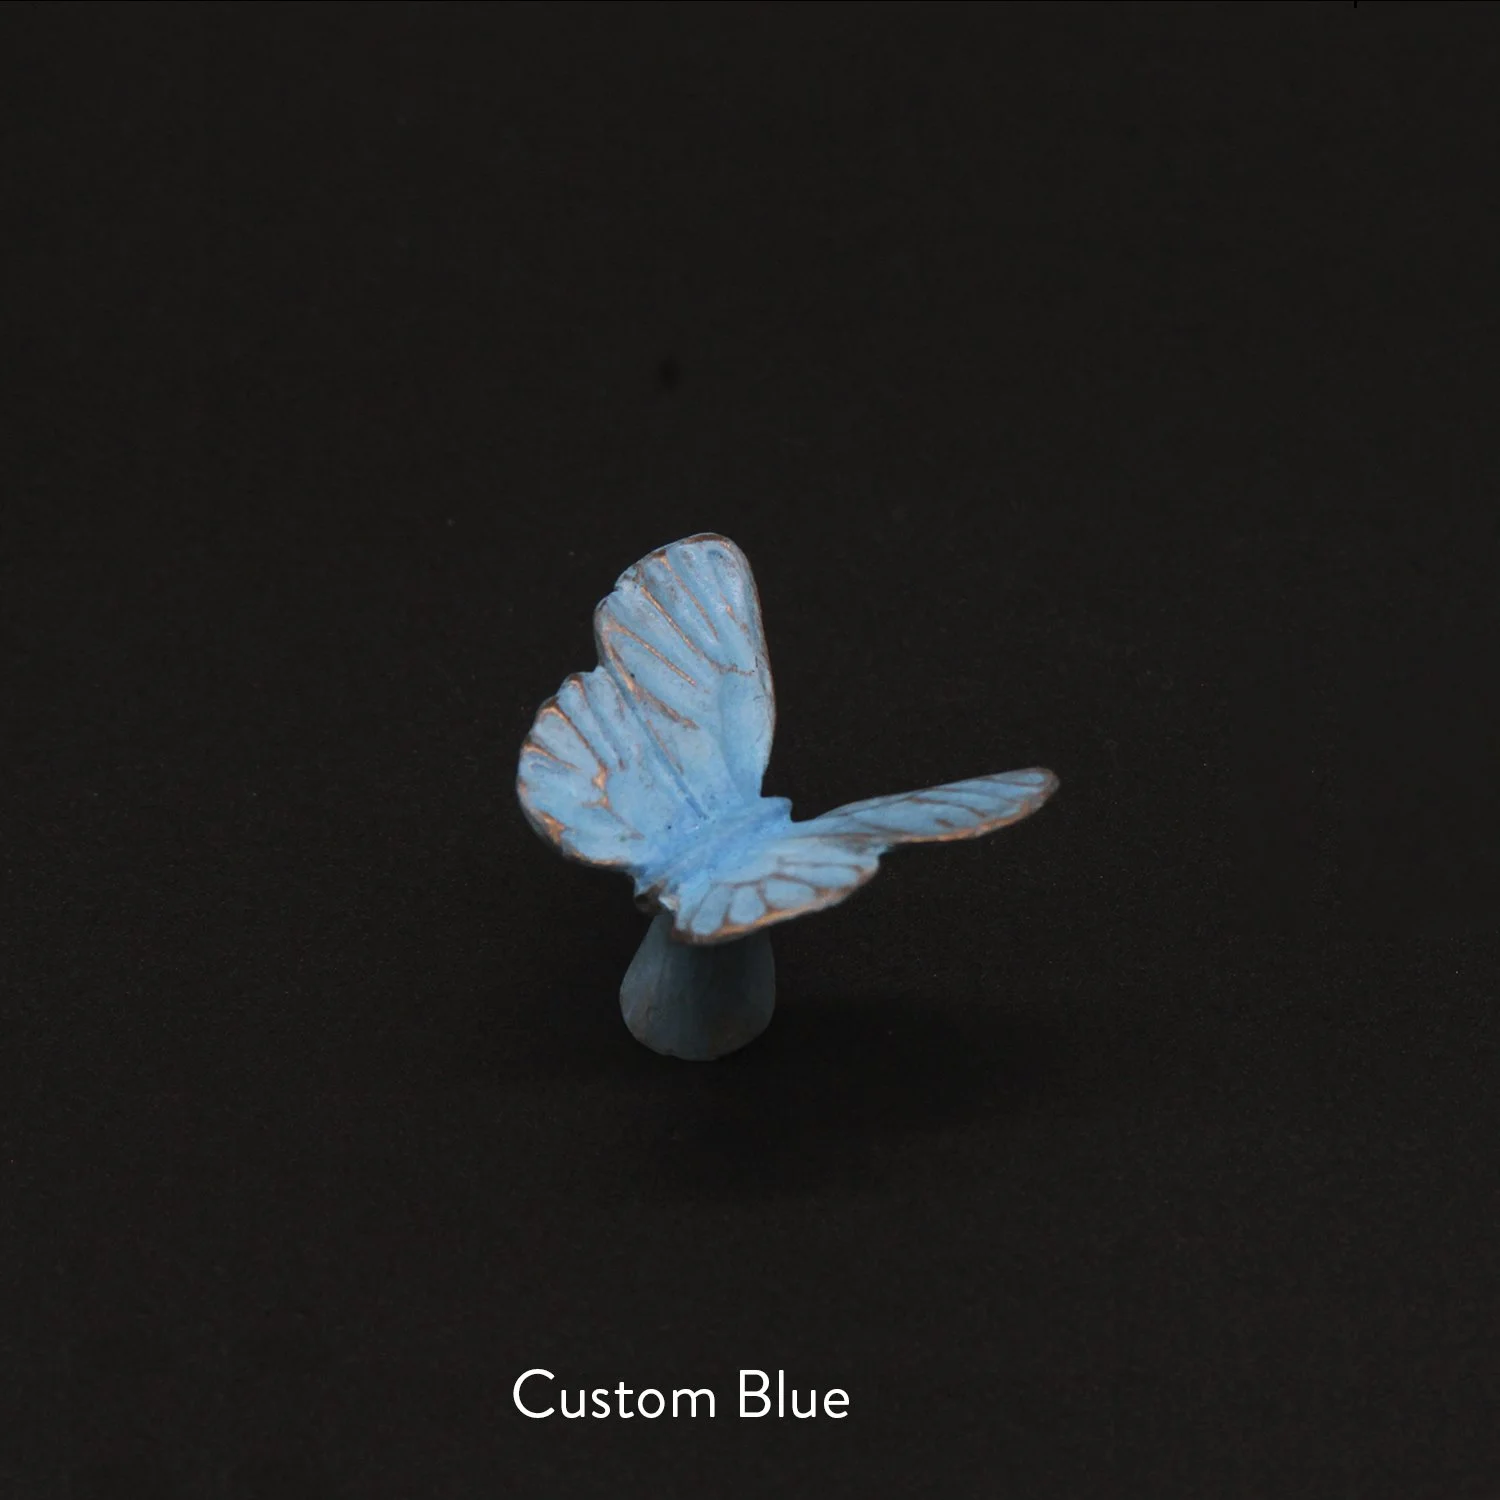
The intense colors of spring have inspired a new range of hot patinas that can be custom ordered for select insects pulls.

Dragonfly

The blue dasher is part the dragonfly family which is one of the largest insect groups in the world. Dragonflies are part of the skimmer family a name that aptly describes how they hover over water when mating and laying their eggs.

The red veined darter inspired our first dragonfly cabinet pull and the original carving and first castings were made in 1995. The first pieces in the cabinet pull collection were designed for our Ascot and Aspen limited edition furniture designs.

Common Blue Butterfly

Is a small butterfly most seen in the U.K and Ireland where it favors cool grassy meadows and woodlands.

Green long winged butterfly

The striking green- black markings of this long-winged butterfly were the basis for a new custom hot patina shown here. Butterflies and moths often display a distinctive array of colored patterns, and their geometry and repetition inspired our first butterfly pull which we used as cabinet door pulls on our Seicho style buffet.

Yellow Black bumble bee

Sadly, this bee, like many other insects is in decline through loss of habitat, pesticides, and inbreeding.


Hot patinas reason for minimum order

Creating a hot patina requires dexterity, a blow torch and keen concentration. The surface of the bronze needs to be finely sand blasted so that the surface has a slightly pitted texture. The pitted texture prevents the patina from sloughing off which is what would happen on a highly polished surface. Once sand blasted, the piece is firmly held with pliers and heated with a blow torch. Once hot the colored dye oxide is applied with a fine brush. During this process the piece must be repeatedly torched to maintain the temperature. The heat acts to open the surface pores of the metal thereby allowing the oxide to penetrate. The temperature is critical as too much heat will cause the oxide to crystallize and burn. The preparation of the piece and of the work area and tools are all time consuming and for this reason we require a minimum of 3 pieces for each order.


Art of fine bronze casting

When a pristine door handle is viewed it may be difficult to grasp just how much time and skill is devoted to cleaning and fine tuning the details of the casting before it is patinaed. This process takes hours and sometimes days and some of the steps are shown below.

In the lost wax method of casting wax replicas are “gated” and wax runners or rods are attached to the wax patterns at various points so that the molten bronze can flow through these connections and pass through the gates and  fill the cavity of the shelled piece. Once cast, the runners that connect the individual castings are cut and the bronze can be recycled but a small gate end is left, and this is removed using a cut-off wheel on a hand held grinder.

The casting may contain tiny silica fragments  that were left after the wax piece was shelled that need to be removed. A handheld metal burnisher with a flap wheel made of scotch brite and sand paper is used to remove shell fragments as well as scratches, blemishes and bubbles buried beneath the surface of the casting. When bronze is poured tiny pockets of air underneath the surface are  sometimes created and are only seen once the casting is buffed when they show themselves as tiny dimples or voids. To fill the void a silicon bronze rod is melted with a TIG welder and drops of melted rod fill these voids.

Below left a grinder with coarse grade cut-off wheel. Below right a handheld burnisher with a medium coarse wheel flap and a green very coarse wheel flap.

While the burnisher is an extremely effective tool it takes a fine dremel to get into the veins and undercuts of a casting. The image here shows the tip of the dremel burr as it removes residual white shell from the leaf vein. A  dremel is an invaluable tool for fine detail and a good one will come with several burrs, rasps and files. The dremel bits are made from tungsten carbide steel and fit into the dremel socket which when rotating at a high speed can cut and grind silicon bronze and even 316 stainless steel.

A fixed buffing machine with coarse and fine scotch brite disks is used to clean remaining marks or scratches. The casting is pushed into the path of the rotating disk which removes a small amount of the surface. A consistent and even pressure needs to be applied with the buffing disk to avoid unwanted grooves and directional marks.

New Orchid Handle

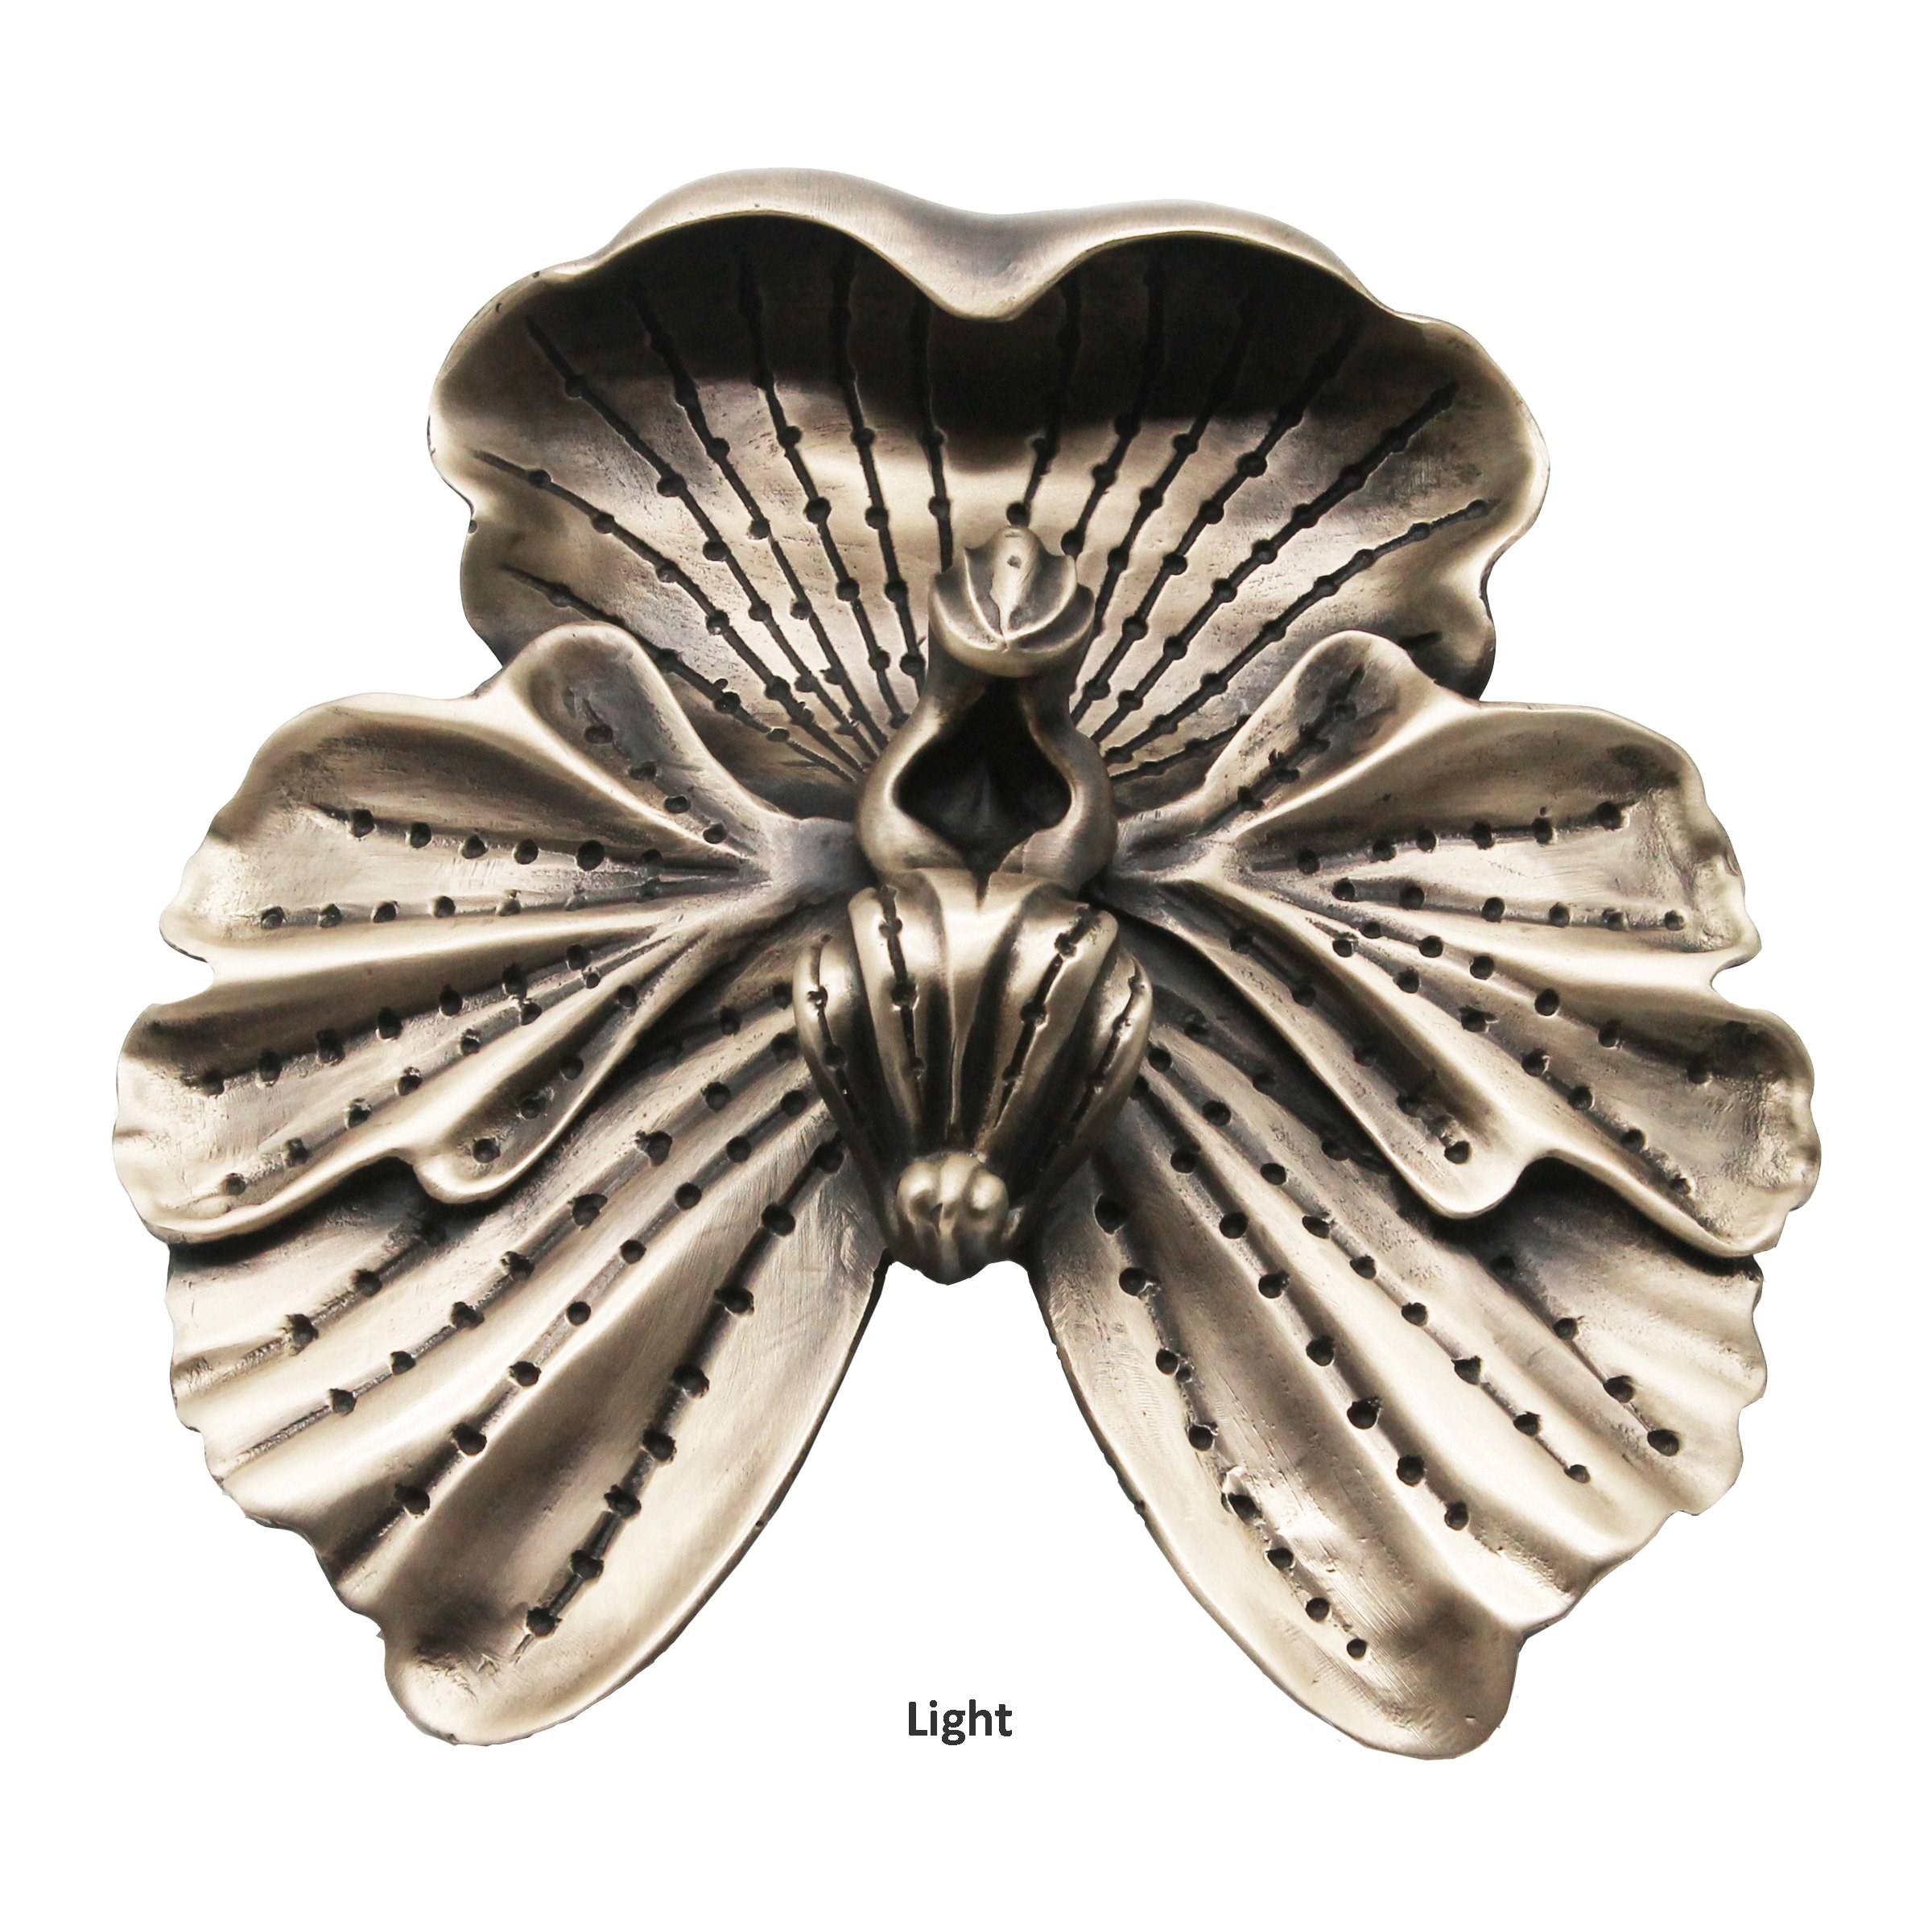
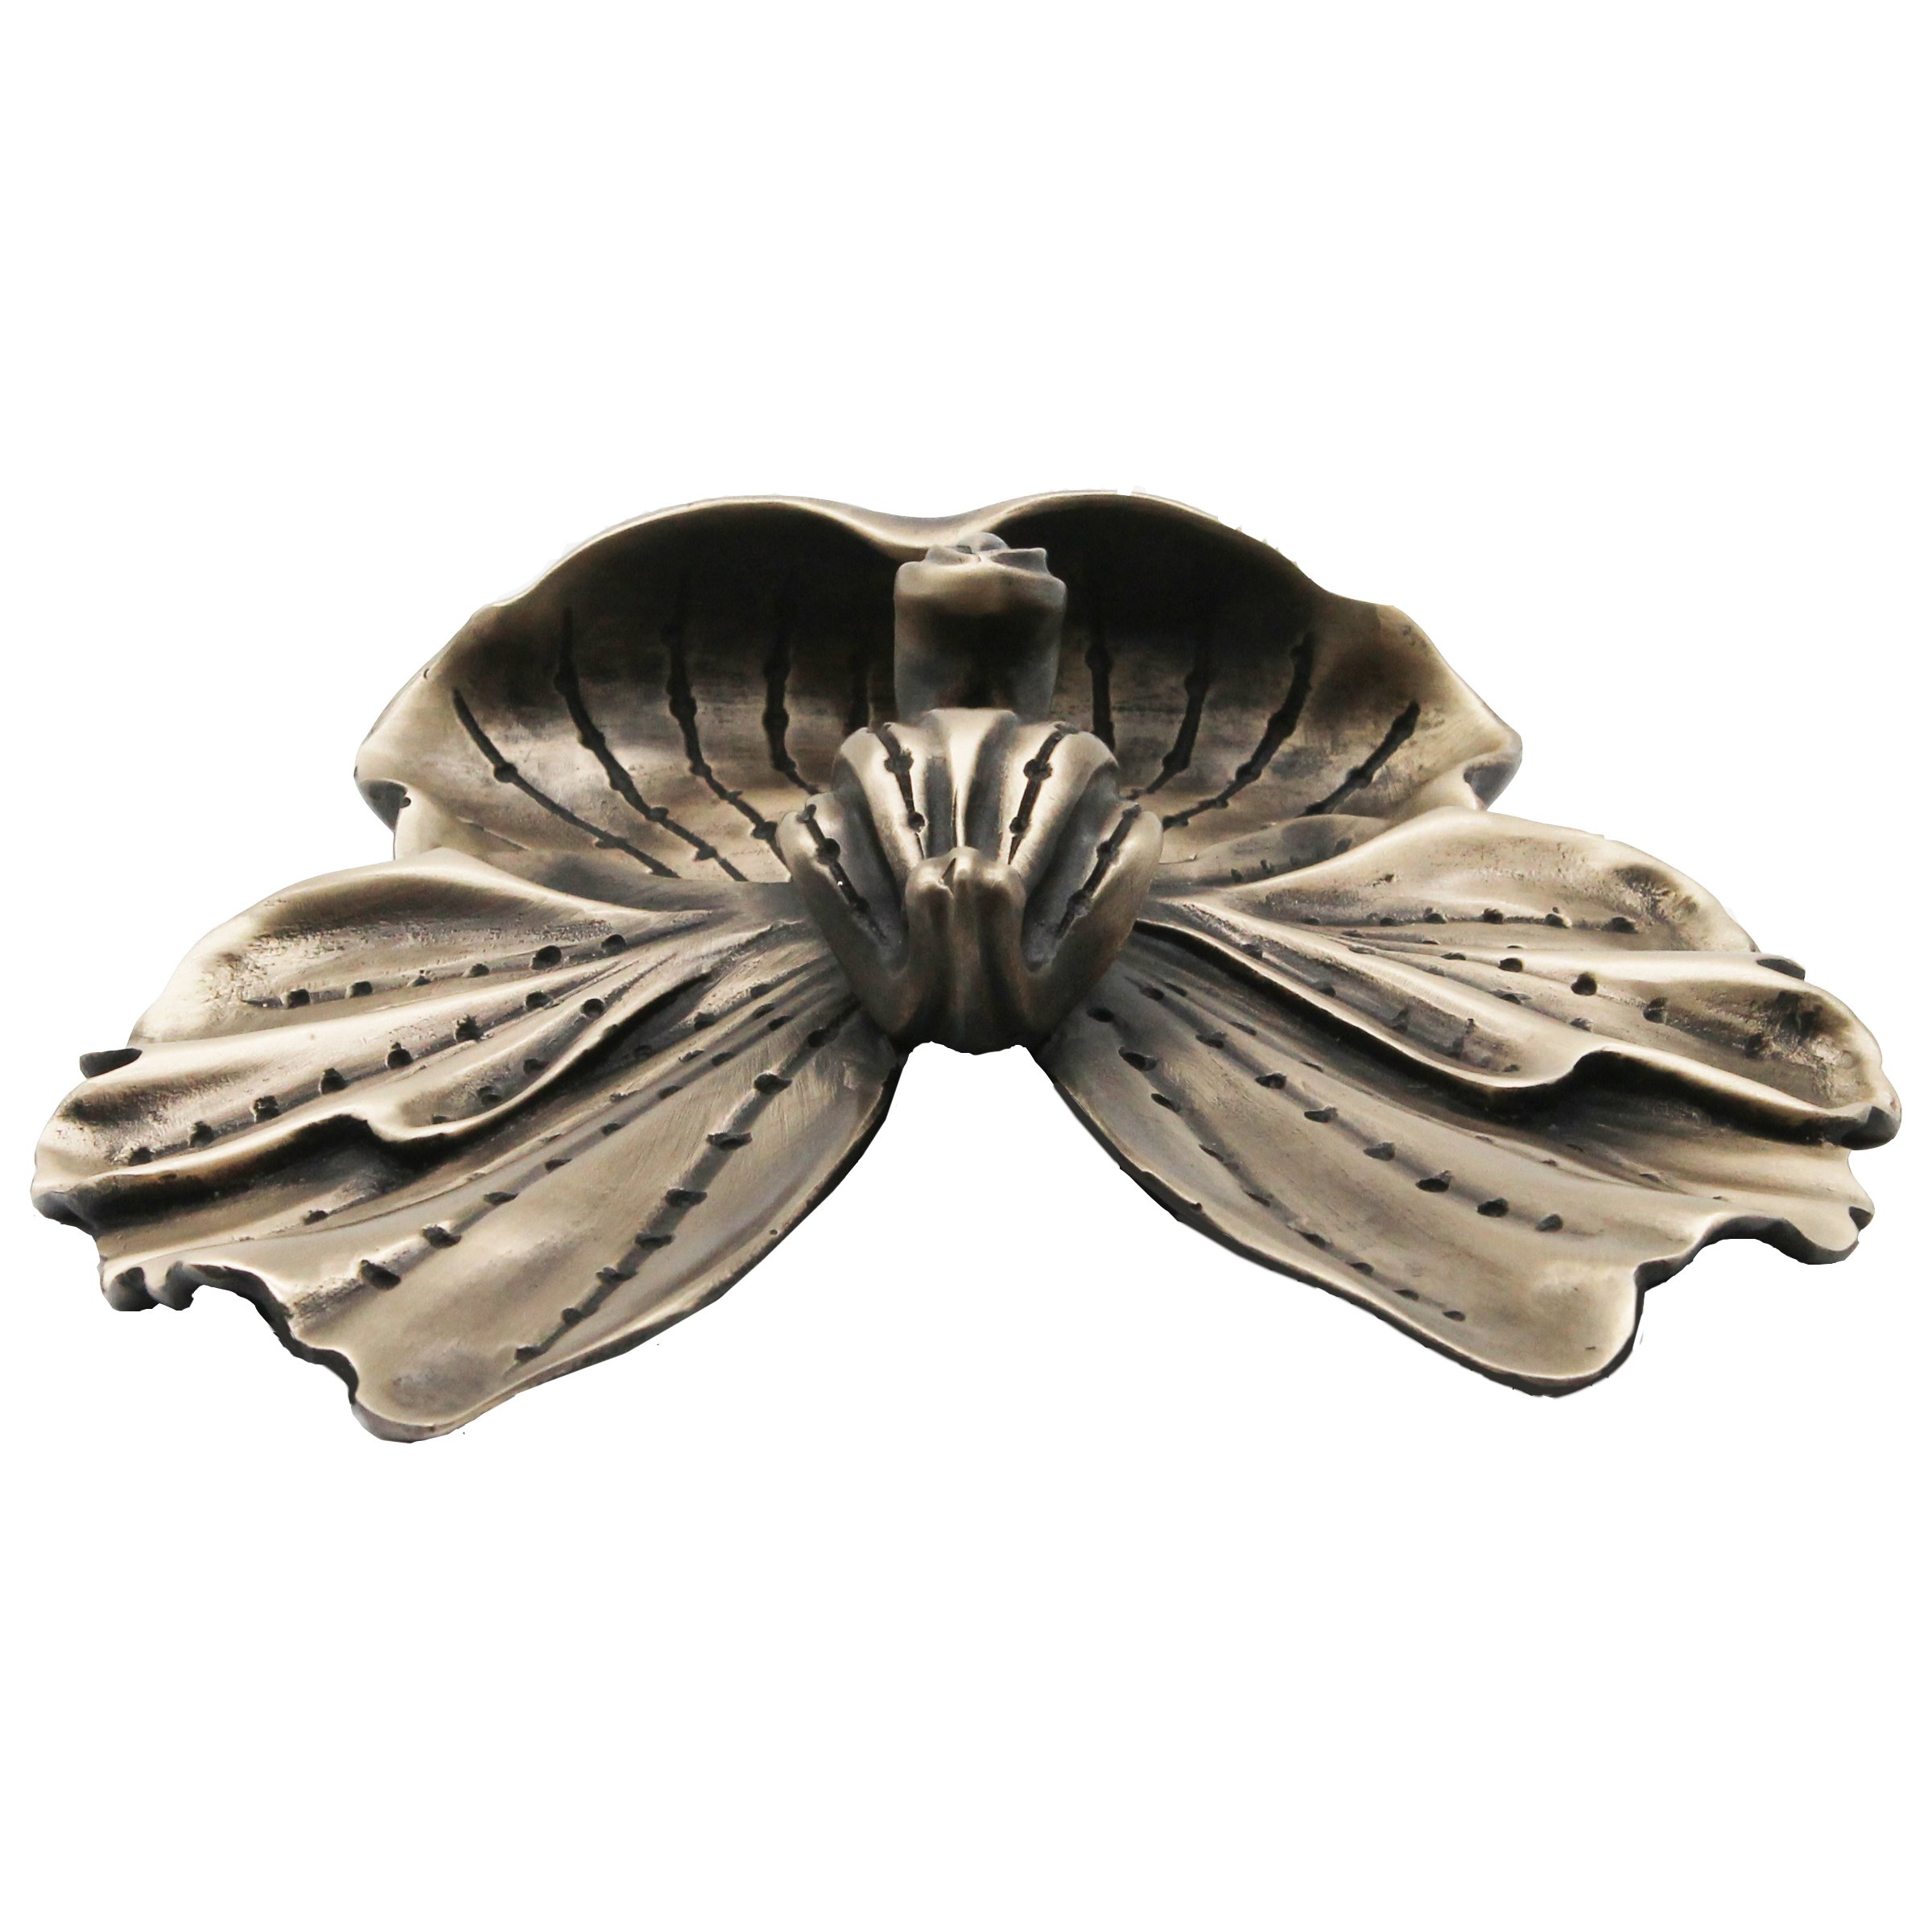
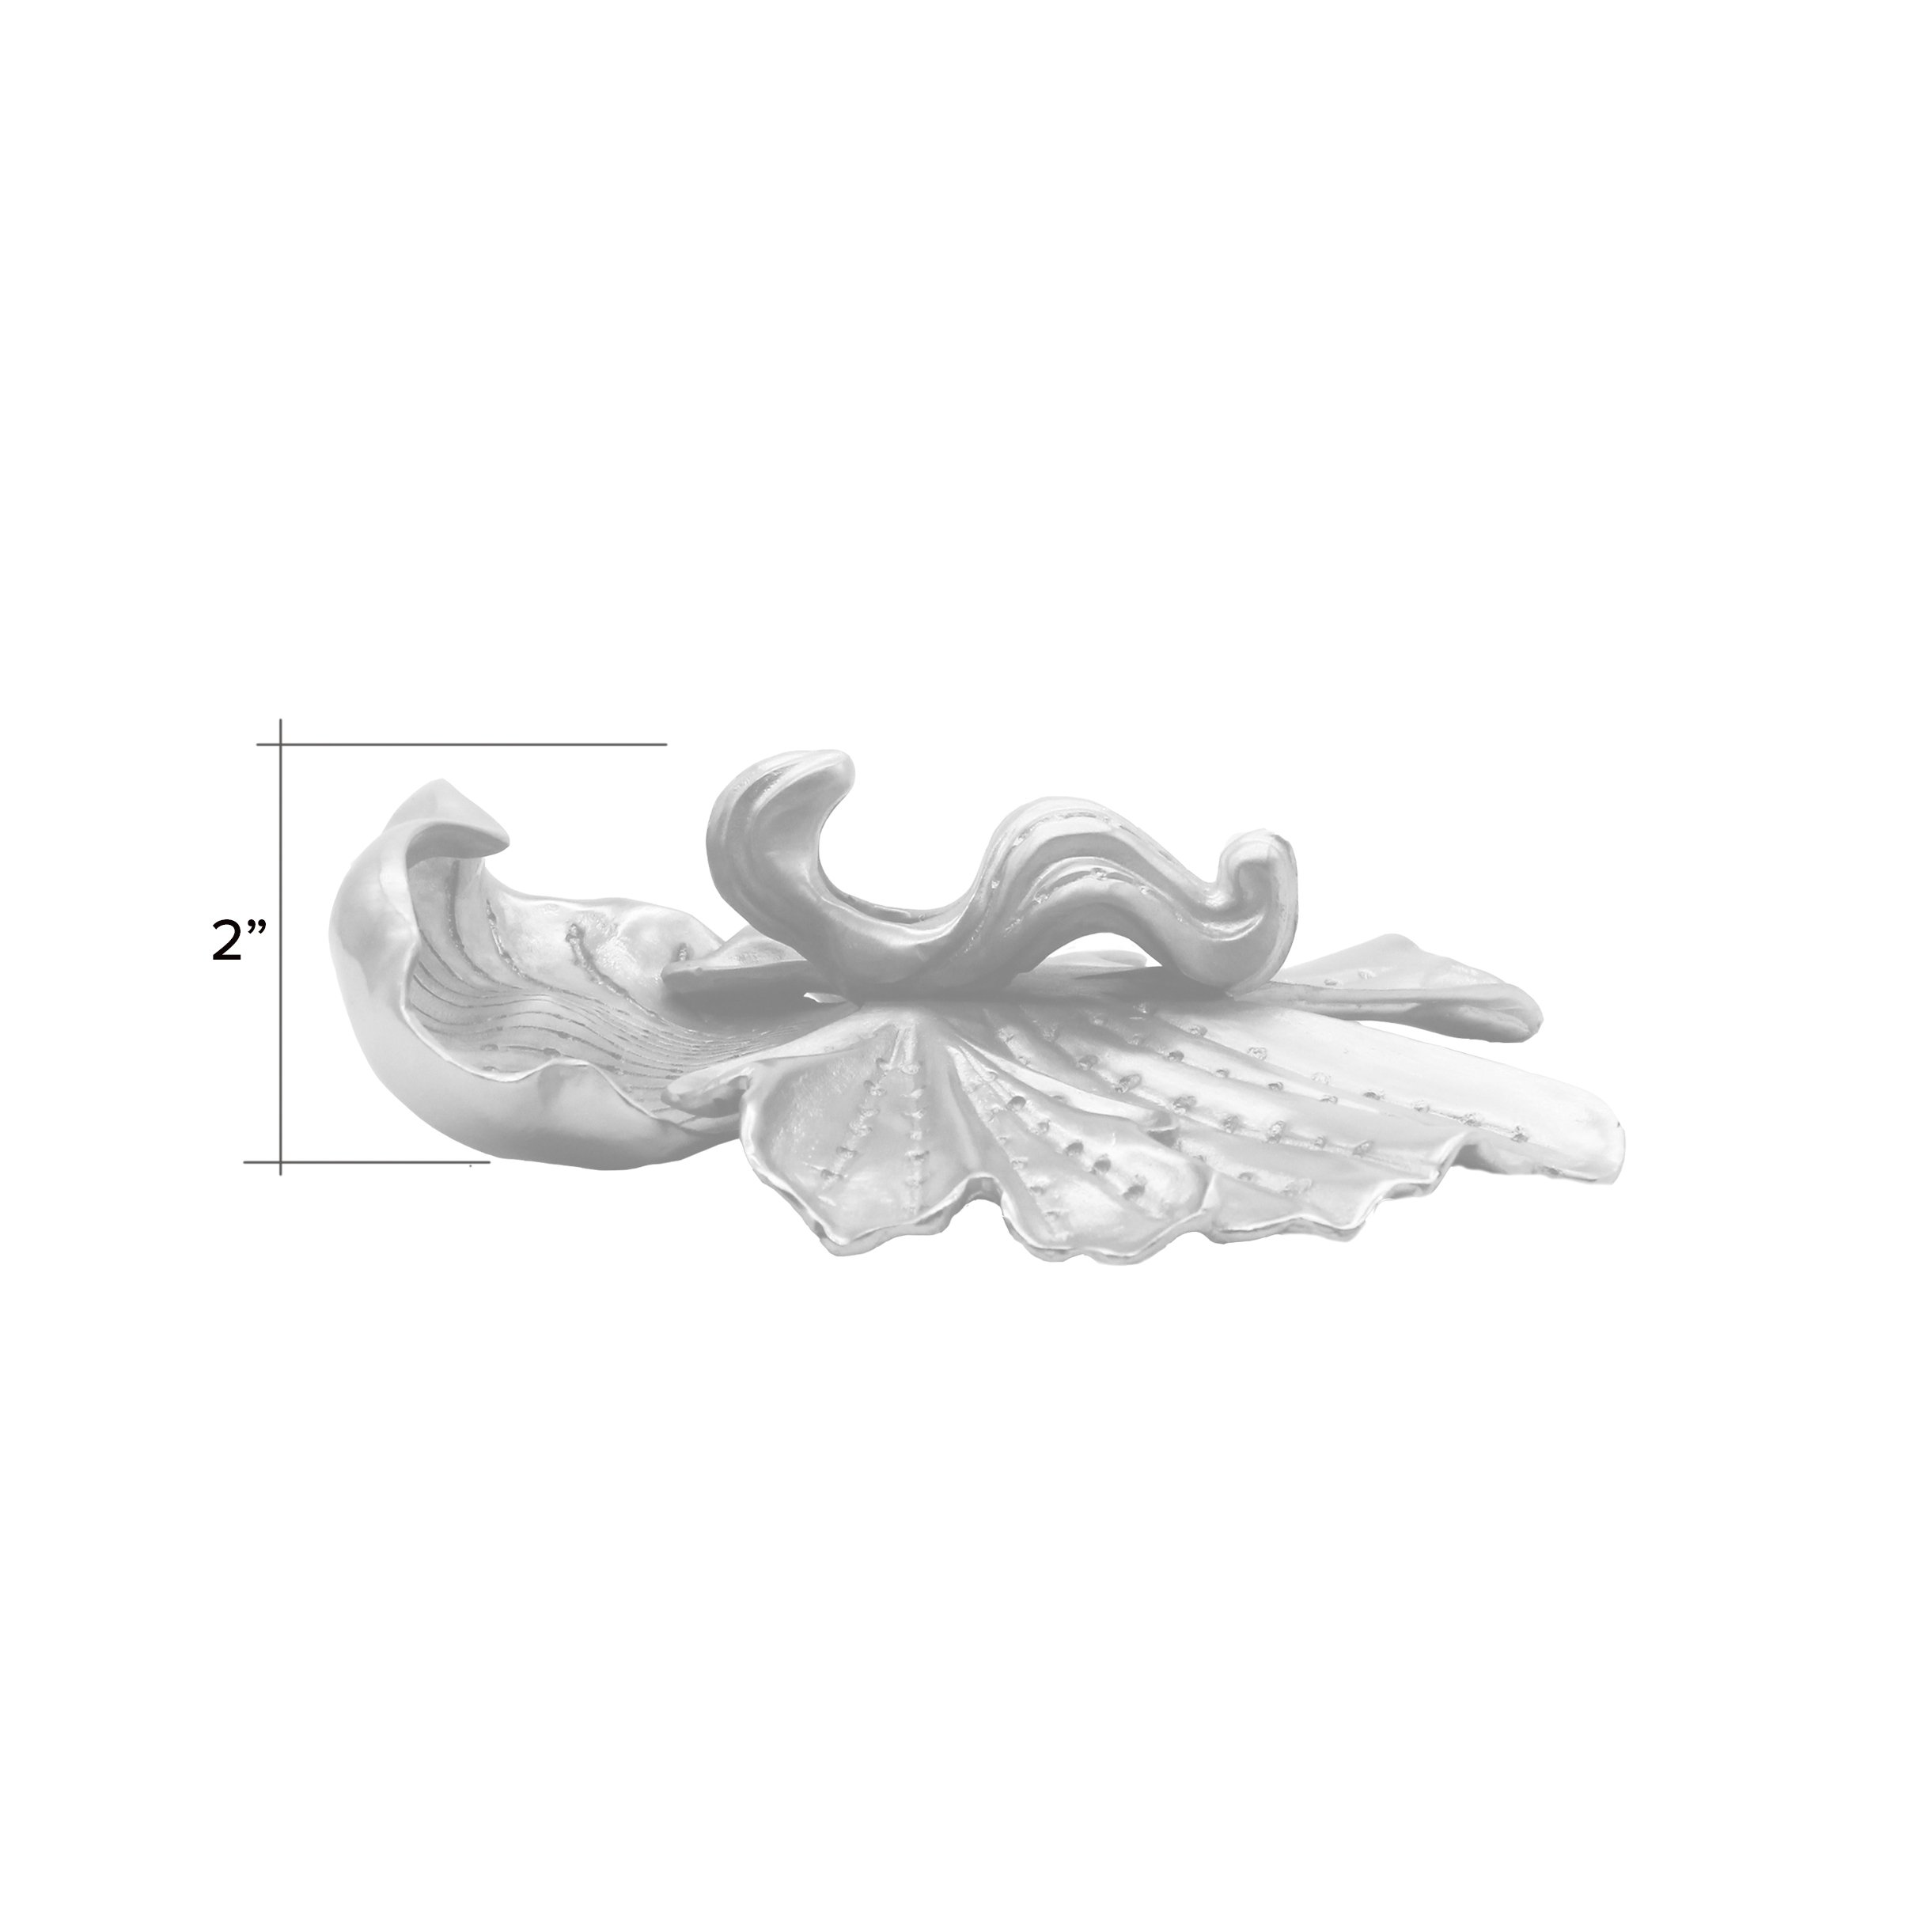
The Orchid collection of cabinet and vanity pulls has a new member, the hanging orchid door pull. The piece is a hybrid orchid and loosely based on the large full leaves of the lepantes orchid and the lush flowers of the cymbidium family. Many cymbidium members have large protruding labellum (lip) balanced by full side and top sepals. While all orchids are arguably beautiful the  cymbidium’s balance and fullness give it an undeniable elegance and the sturdy leaves of the lepantes when cast in bronze or stainless steel make for a perfect flower mount as well as back-plate. The back-plate curves outwards to support the flowers and the tapered and flat ends each have a threaded post for easy screwing from the back of the door. The posts have a 15” center to center and the overall length is 16”. We chose to finish the supporting leaf in dark antique oil and to make the flowers and center leaf ridge a lighter finish and have now created a hybrid finish code DLA to describe this appearance.


Other members of this collection were inspired by the Venus Slipper and Moth orchid  with sizes ranging from small 2'“W orchid knobs to 8”W orchid stem pulls. The image below shows the larger pieces in a brushed bronze with light antique finish with the small knob in a brushed nickel finish.

The small knob and leaf from the hanging orchid can be used to create a custom spray for vanities as wide 6’.

Artistic Barn Door Hardware

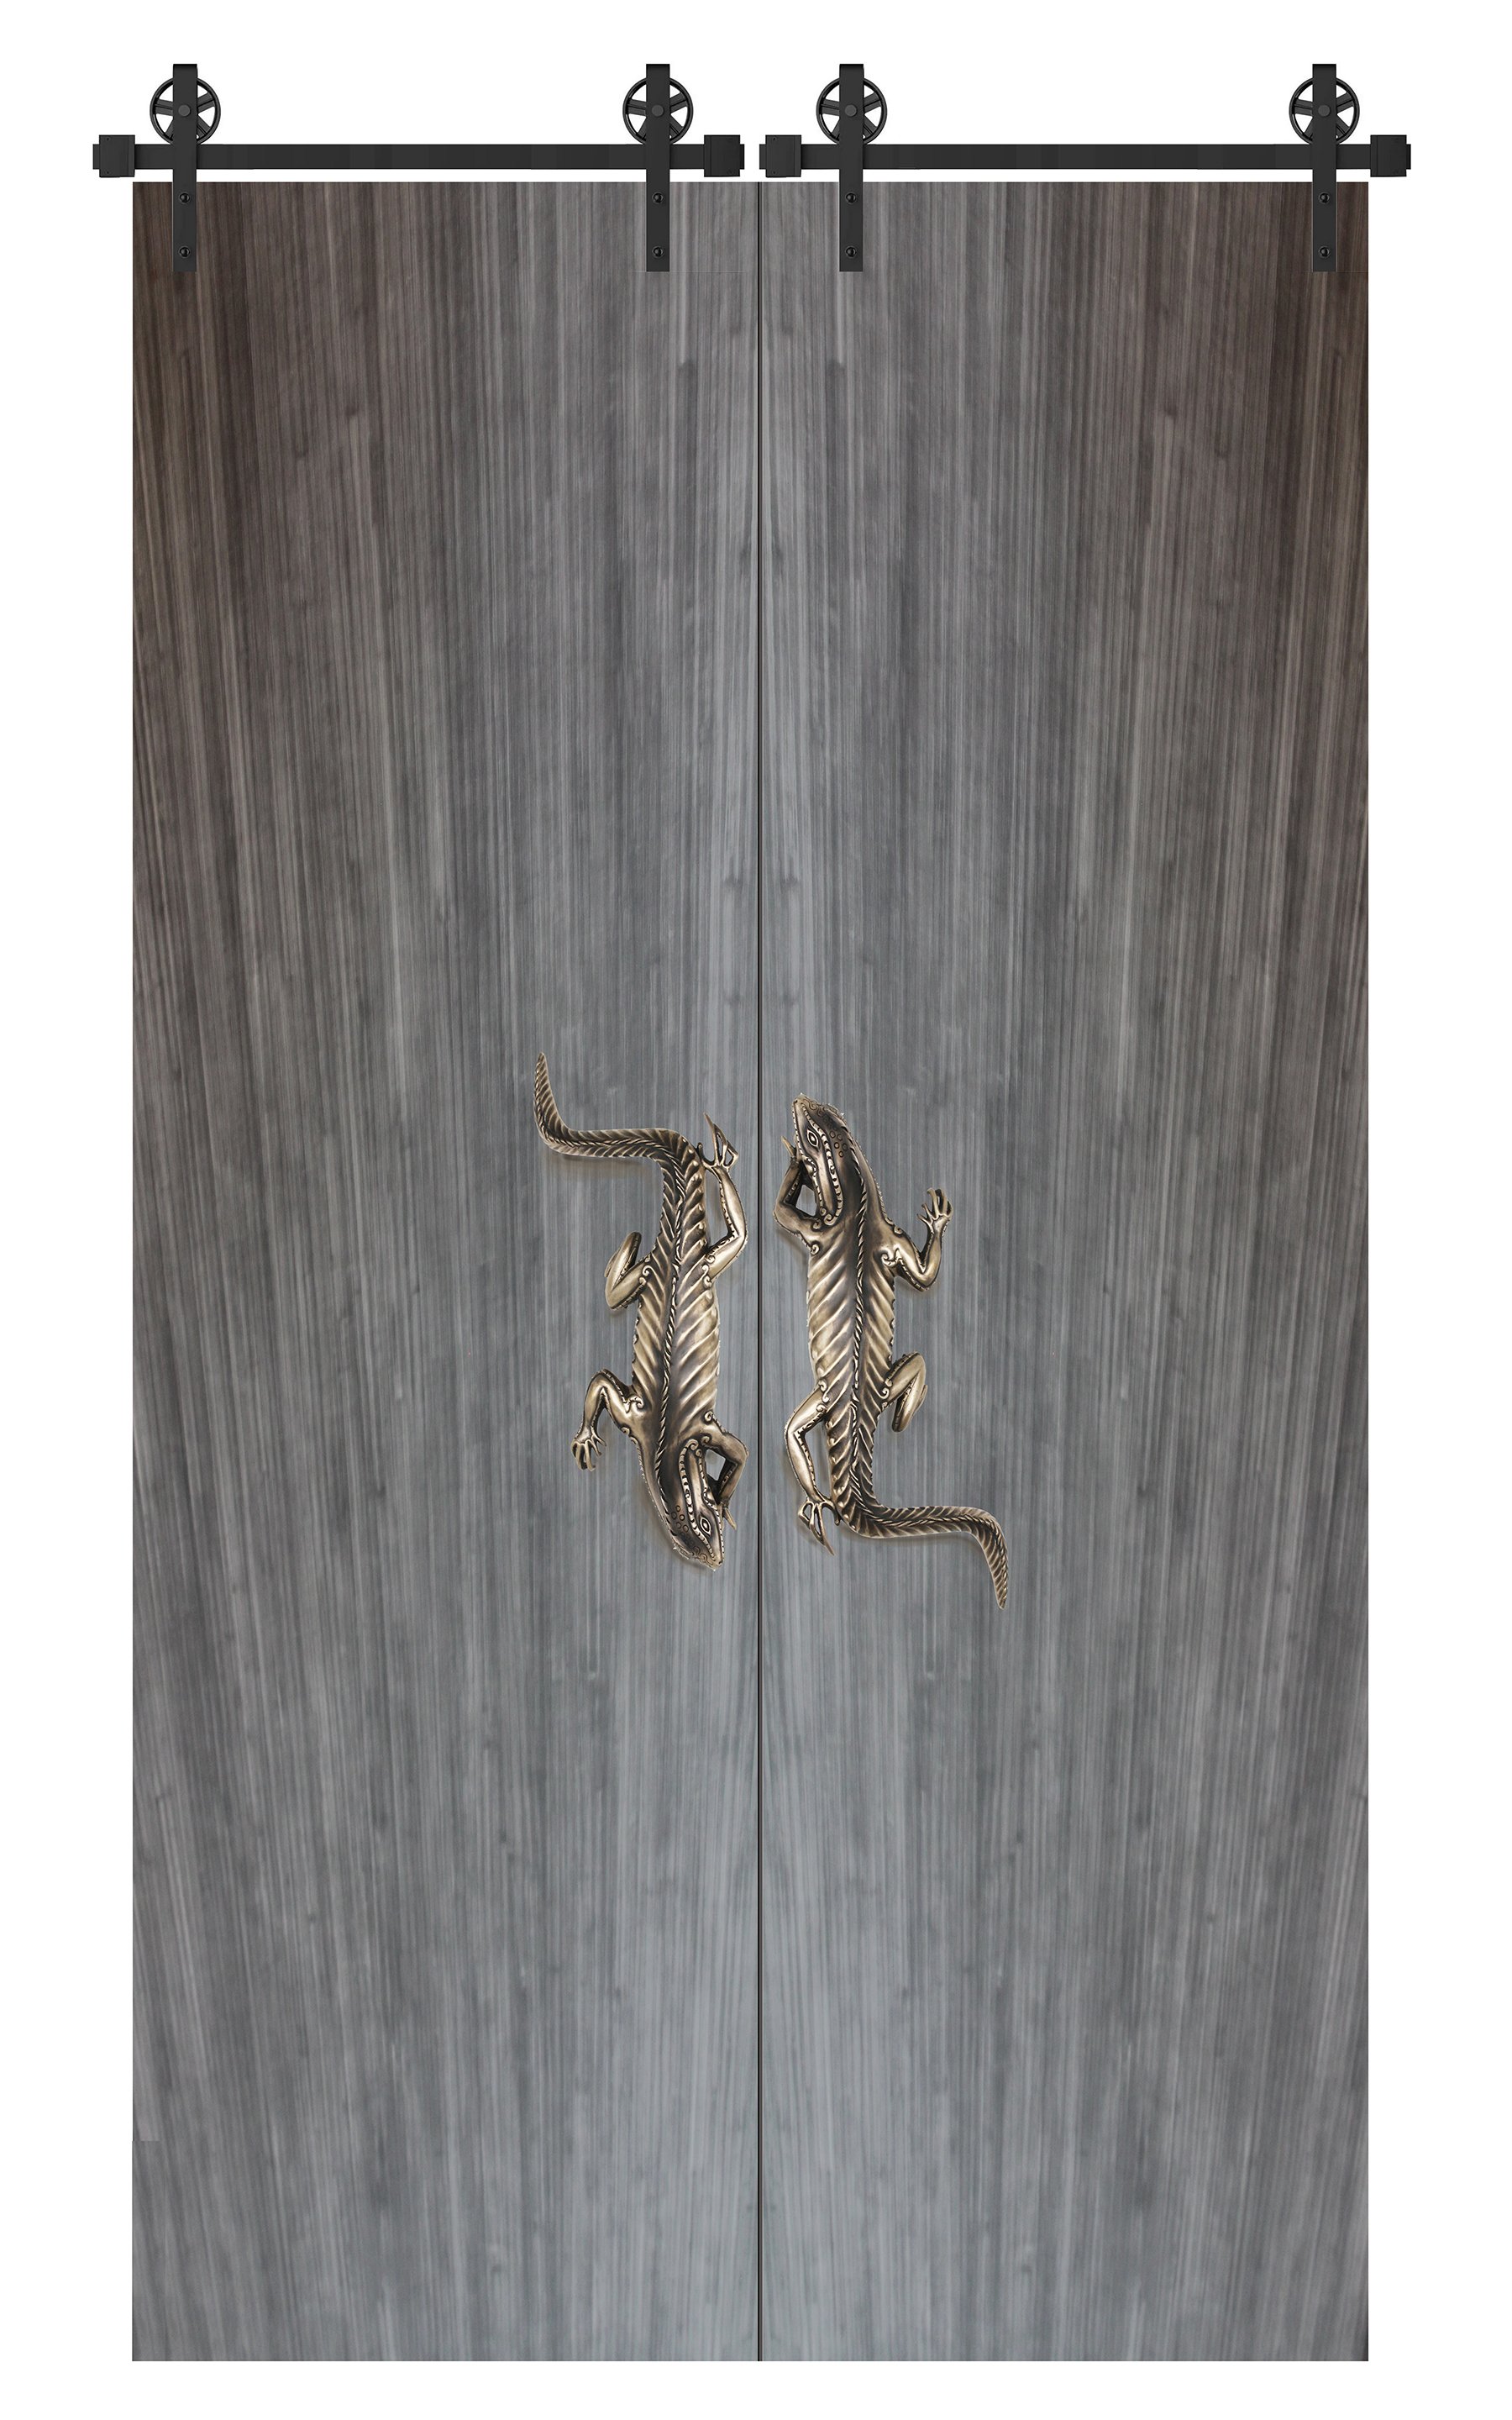
Sliding doors or barn doors are the perfect blank canvas for dramatic hardware. When the wall opening permits, double doors make a large statement that can be artfully used to separate rooms. Case in point is a recent order for double doors that separated the dining room from the living room by making an artistic reptilian statement.

The iguana door handle is 17”high  7” wide and 3”deep and the scale makes a substantial statement. The piece was designed to be used as a pair for double sliding doors with each  iguana facing the opposite direction to it’s partner. The stylized design has a spiky decorative ridge that extends over the nose and then wraps around the eyes and trails down the front legs.

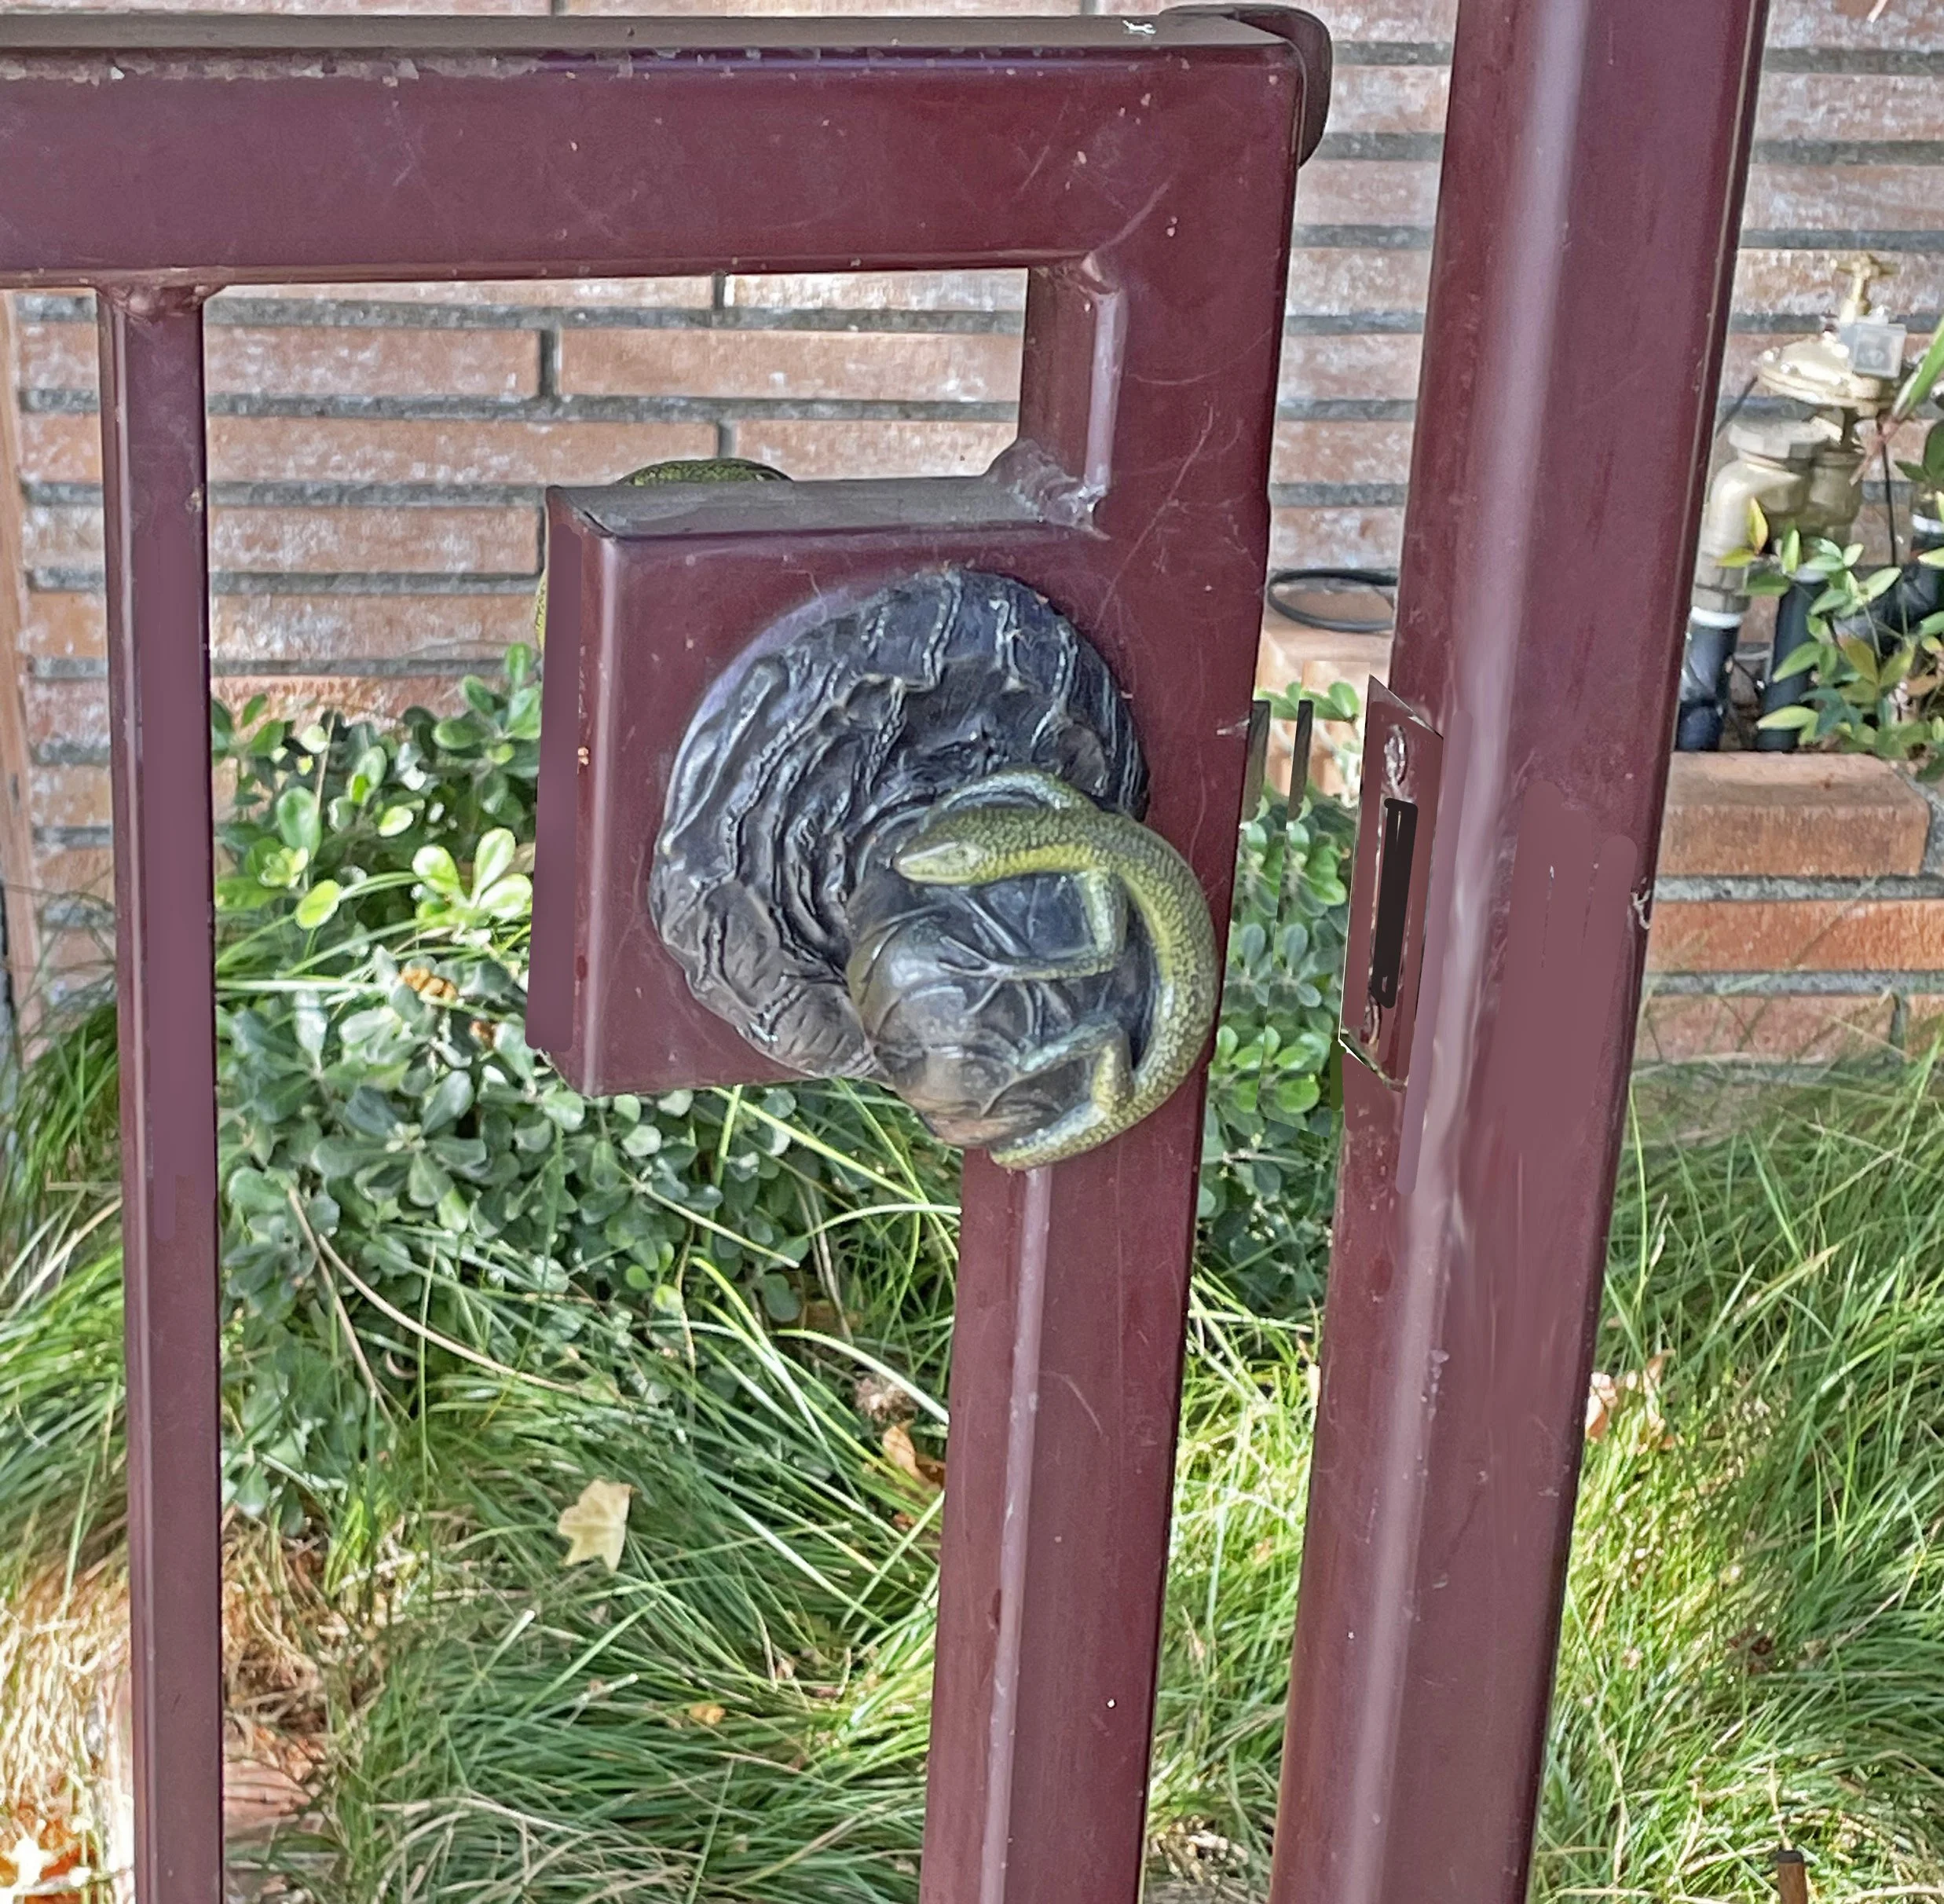
 The original design was very much influenced by Polynesian art and is not based on any particular type of iguana but does reflect a certain stance or attitude that Martin imagines when he thinks about iguanas. The iguana handle is a relative of the other handles and cabinet pulls that make up the lizard collection of door hardware.  For cabinet sliding doors the iguanas can be mounted so they entwine head to toe with their partner, a positioning that could be problematic on room doors where the tail and feet could catch on clothing.

Barn doors are more easily installed than traditional hinged doors requiring only a simple bracket to be attached to the top of the door and to a wheel that travels along a track screwed to the wall above the door. They also use a simple garden gate or hook style of latch that can be surface mounted as opposed to the tubular latch used on a hinged door that requires the door to be pre-drilled at time of manufacture.

Huntington Gardens - Shoya House

Our annual visit to the Huntington Gardens brought us to the new Shoya House Exhibit in the grounds adjacent to the Bonsai and Zen courts of the Japanese garden. It has taken only seven years to relocate this wood and clay house, section by section, using the same carpentry methods and hand tools as those used by the original craftsman. The house was built around 1700 and was both a family home and administrative center for the farming community.

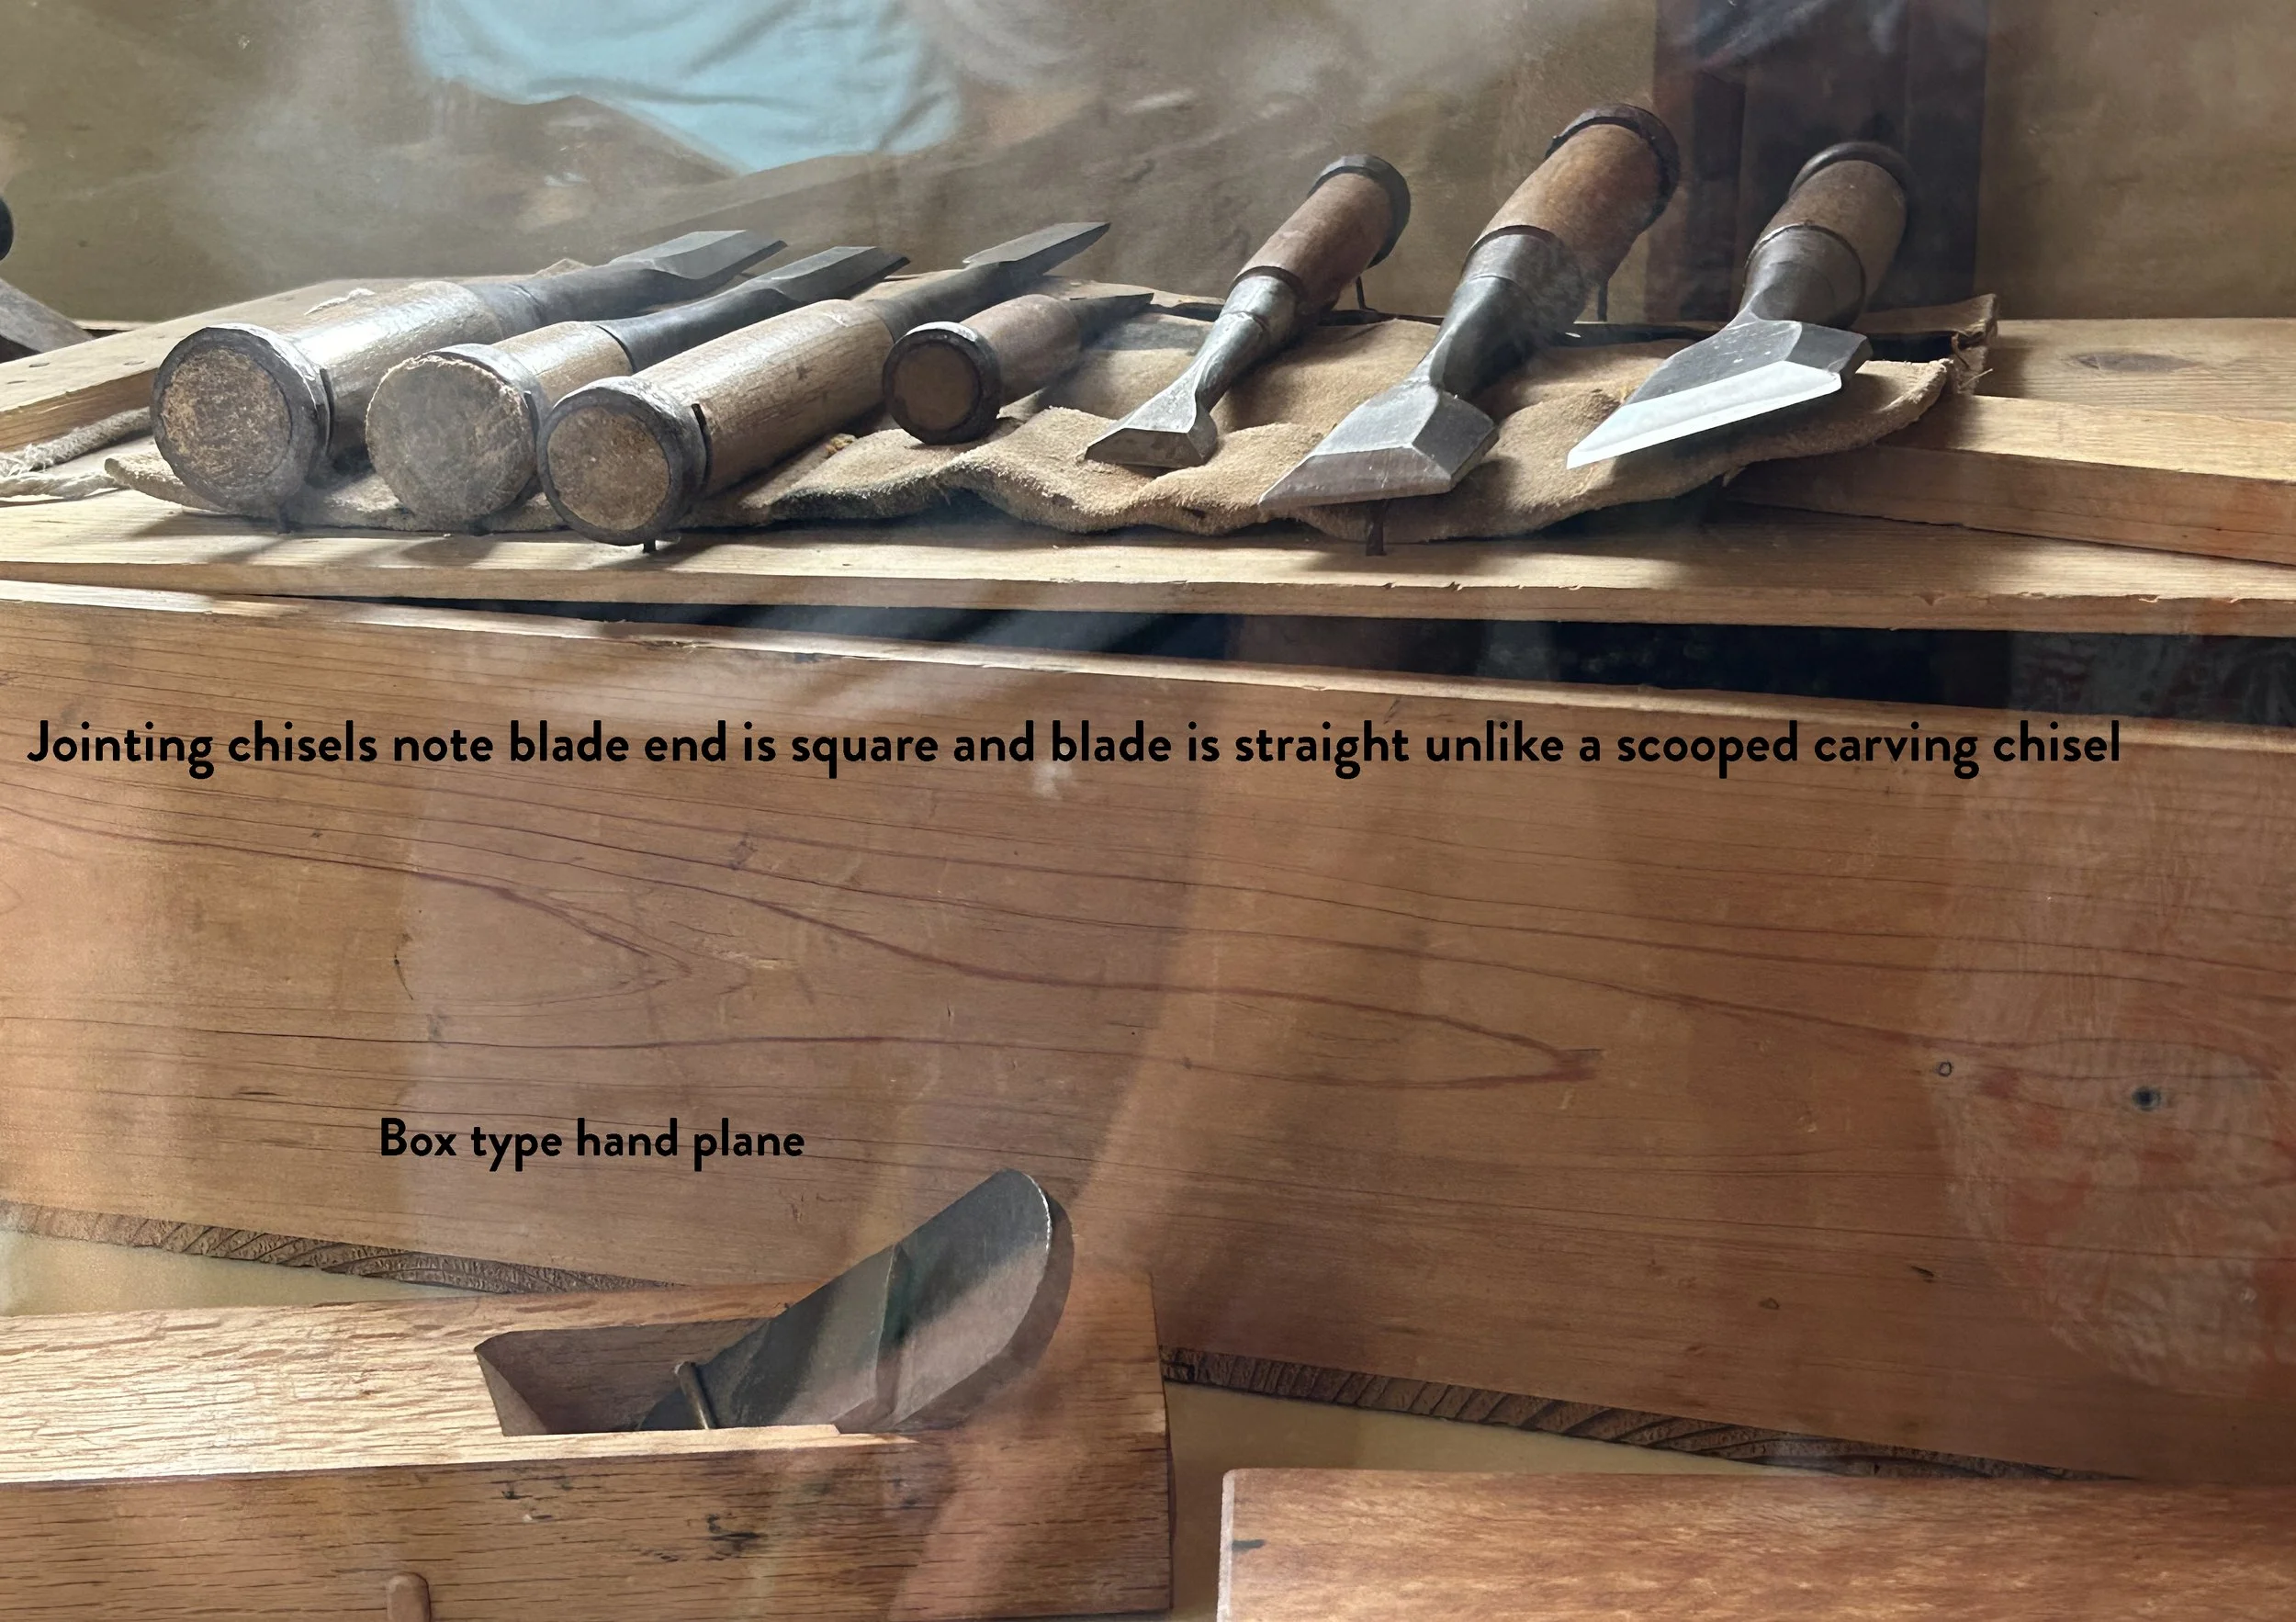
Simple precise wood joints are held together by weight and through careful design without the need to add screws or nails. Our background as furniture makers gave us a deep appreciation of the hand planes, chisels and spoke shaves on display at the exhibit which are similar in function if not form to the old tools Martin brought with him from England.

 A comparison of the chisels used by the Japanese carpenter from those used in carving shows how that the Japanese tools had a straight acute end ideal for cutting a straight edge into wood used in making tightly fitted joints for beam and furniture construction. By comparison, most carving chisels have curved blades designed for removing and shaping wood. In both instances a mallet would have been used to hit the handle to help push the blade into the wood.

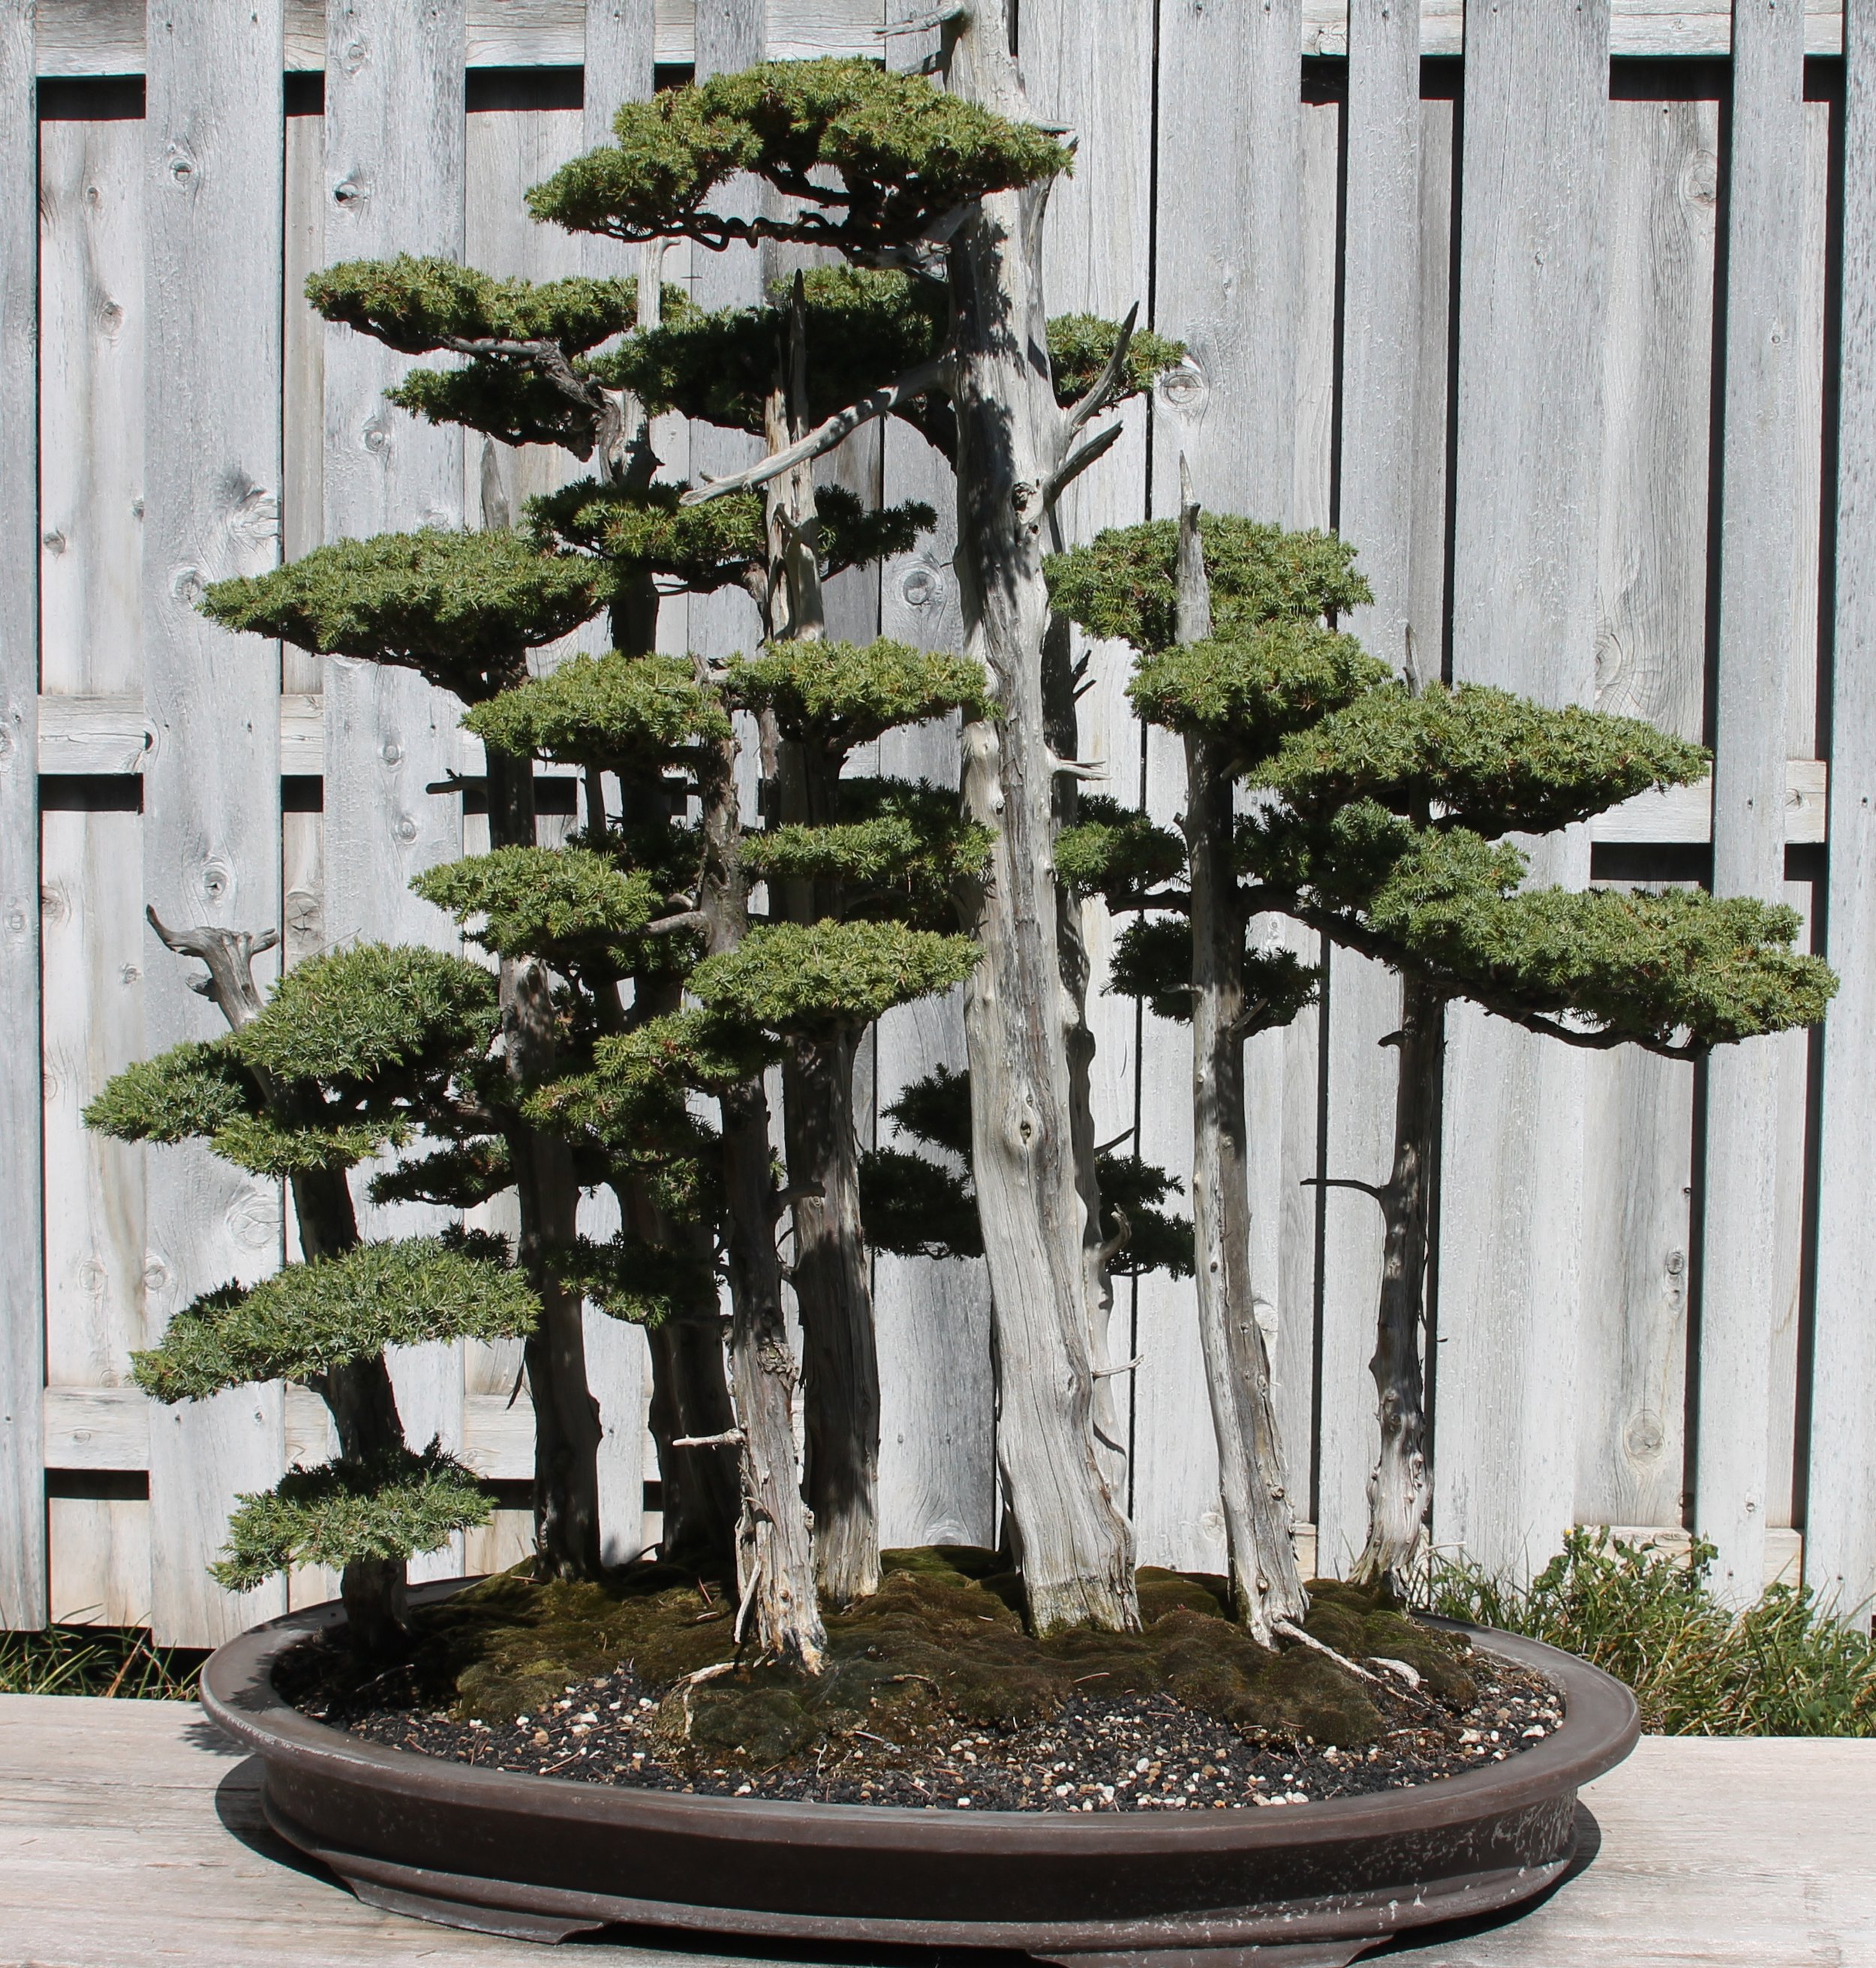
 A visit to the Japanese garden would not be complete without some shots of the amazing bonsai on display. The word “bonsai” is Japanese for “tree in a pot”. It describes trees that are grown and trained to appear as mature miniature replicas of tall older trees of the same species or as a collection of trees. The picture here shows bonsai “Goshin 111” designed by the well-known bonsaist, John Naka and it captures the shape of a small Juniper Forest with 11 trees.

To understand more I visited the site for the Golden State Bonsai Federation and learnt that Goshin 111 or” Spirit of the Guardian” is the third generation of this bonsai but one that closely follows the original design and represents John Naka’s children and grandchildren. In the 1990’s John Naka began training his 11 trees for Goshin 111 which was dedicated to the Huntington in 2001. Like all bonsai, the health of the soil and stability of the root system are key to its survival and must be constantly maintained and repaired. For this reason, only a prime selection of the collection is on display at one time with the balance being in various stages of restoration.

 Bamboo Corridor

There is no better way to approach the Japanese gardens than through the corridor of gently swaying bamboo shown below.

Our collection of plant cabinet pulls includes left and right facing sections of bamboo and a small bamboo stem.

The content of this post is based on information available at the Huntington Gardens site and the Golden Stare Bonsai Federation both well worth visiting.


UV Impact on Colored Patinas On Bronze


Arguably, from a door handle perspective, Florida can be one of the most demanding climates. The state is a peninsula surrounded by sea water and its latitude yields many days of sunshine and not surprisingly is home to many of our clients.

UV Impact on Bronze

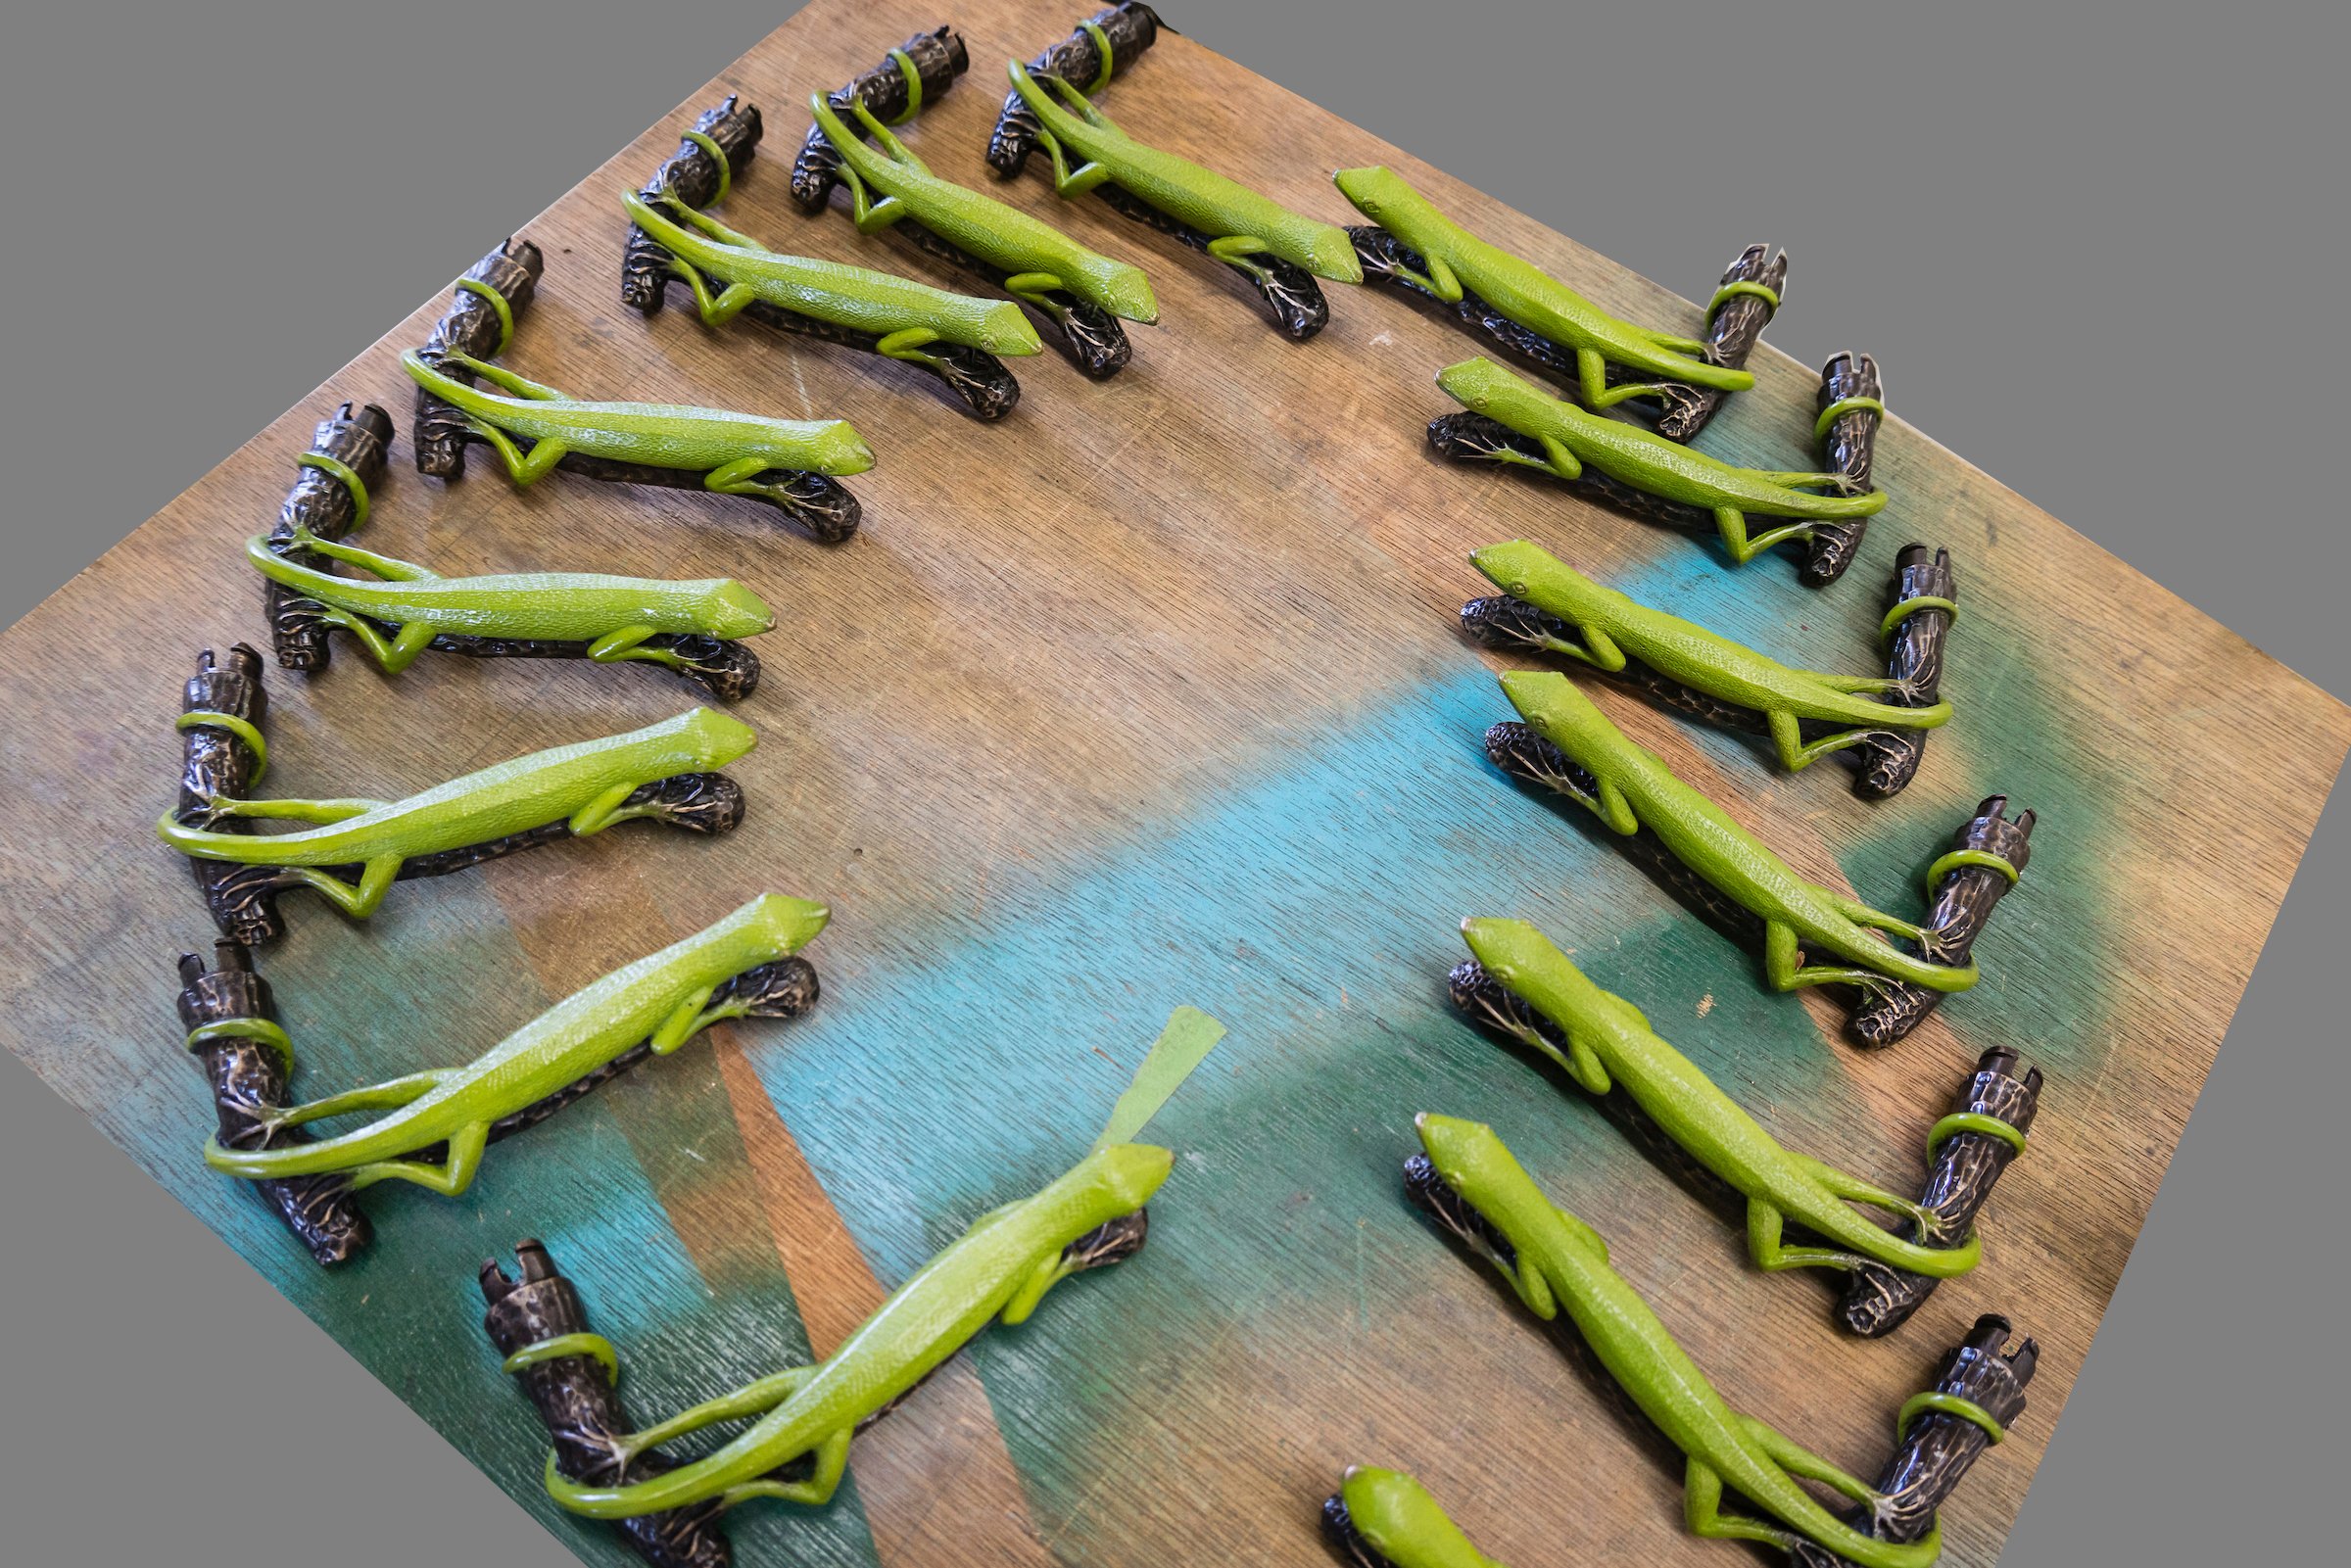
When we hot patina a door or cabinet pull we heat the bronze with a torch and apply successive coats of pigment suspended in water to the metal surface which absorbs the pigment left after the water  evaporates. The patina absorbs UV and this leads to a chemical change that breakdowns the bonds between the pigment molecules making the color appear less vibrant. The lizard levers below will fade over time with UV exposure so what are the options?

Photo of lizards at patina stage before sealant applied. Photo courtesy of the photographer Maria Ramirez-Adams.

 How to lessen UV impact

Clear polyurethane resin and polyester offer 2 different ways of sealing and protecting the color.

Polyurethane acts as a UV blocker and as a resistant physical barrier that shields the color beneath. It blocks the UV by absorbing, deflecting and scattering the UV away from the metal surface thereby slowing chemical changes in the patina.

Clear polyurethane resin also creates a physical barrier that shields the layers beneath from UV and also from salt and environmental contaminants that can degrade the patina. The resin is typically sprayed onto the surface and air dried rather than baked.

 Polyester versus powder coat

Polyester is also an excellent sealant for protecting metal from UV and salt and environmental degradants. The practical difference lies in how they are applied and cured.  Polyester is applied as a powder using an electrostatic process. The piece to be coated is attached to a copper frame or rod which negativley charges it. The applicator, which is like a spray gun is positively charged and when fired the gun sprays powder onto the surface of the object. In simple terms think of physics 101 when a magnet is used to attract iron filings. The powder bonds to the surface of the object. To make the bond more permanent the coated object is baked  to a temperature of 350 to 400 degrees for at 10+ minutes. With polyurethane the finish cures over a longer period often taking 5 to 7 days to complete. The Geckos shown here were both hot patinaed with a green pigmented solution but the top gecko was first dipped in a cold dark solution and then both were coated with polyester and baked. Polyester makes the pieces a little plastic in appearance but it does offer a resilient seal that will last for years.

Creative solutions for a narrow door stile

Whether an interior door or cabinet door, a narrow door stile can be a challenge. Creative positioning of a door pull can be a solution if you plan ahead. You will need to consider all the dimensions of your pull and not merely compare the width of a pull with the available width of  your door stile. The width, depth and height of many pulls differs throughout  a piece and this is especially so where the piece is not a symmetrical or a standard geometric shape.

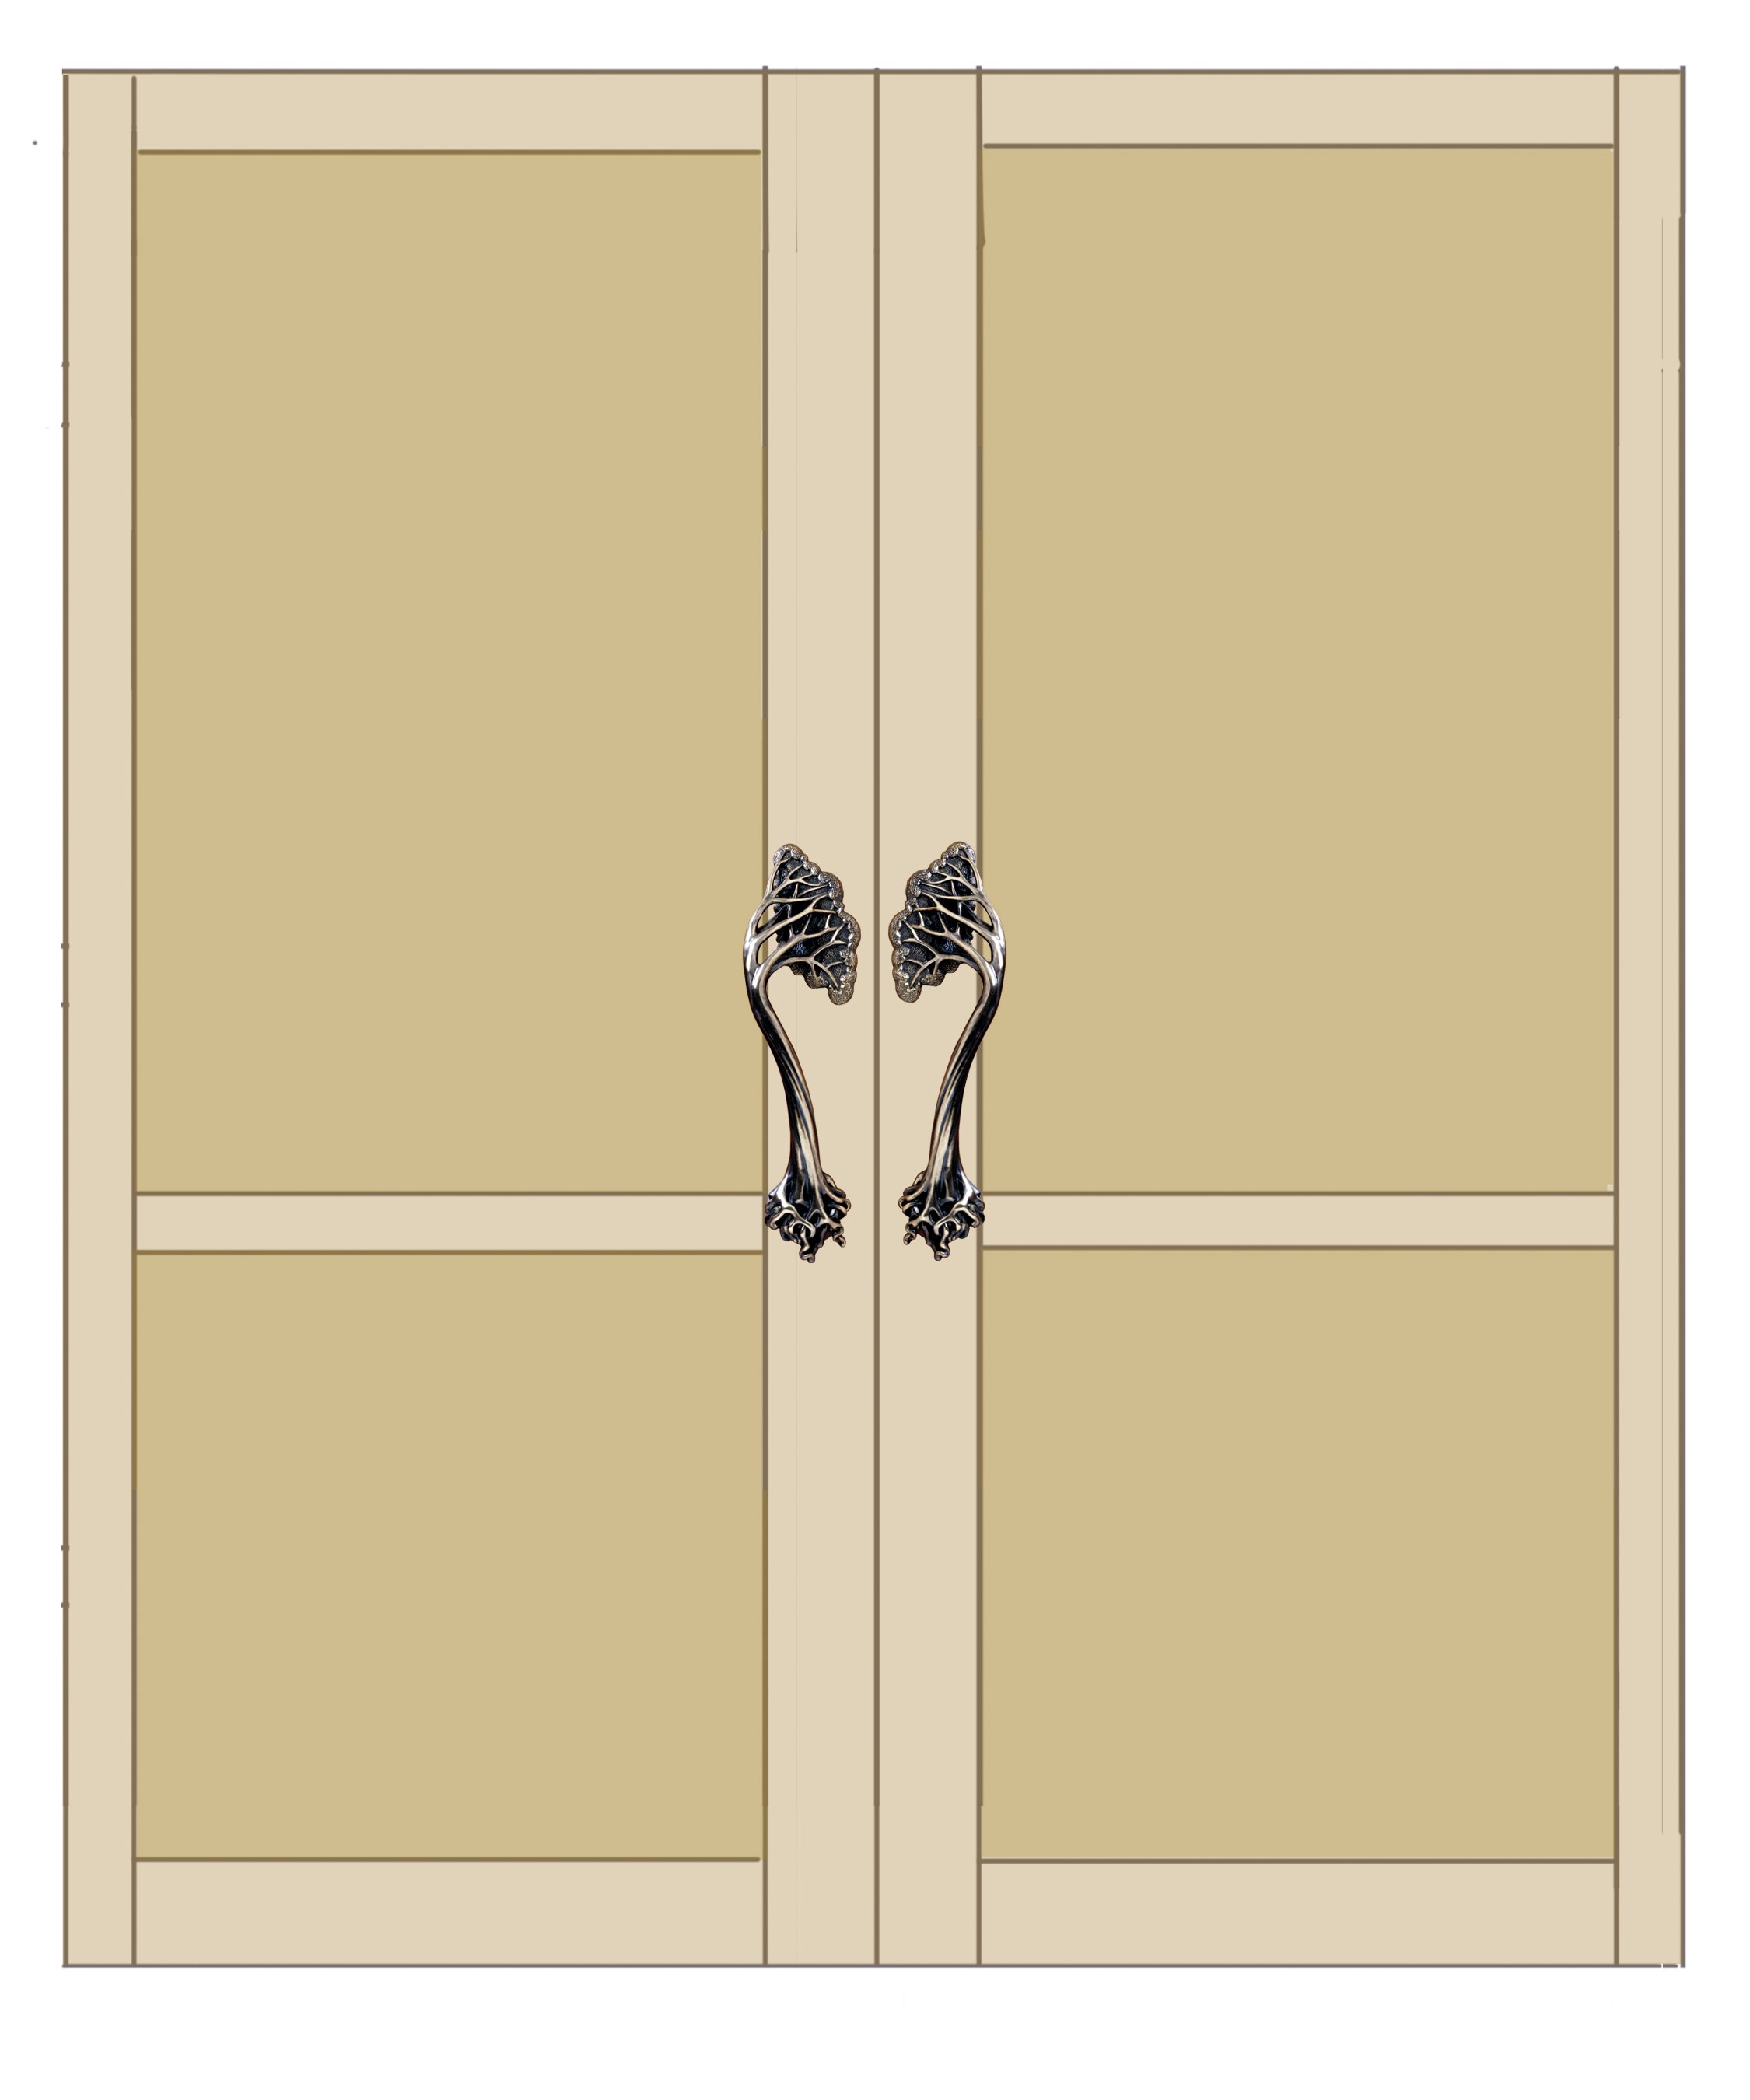
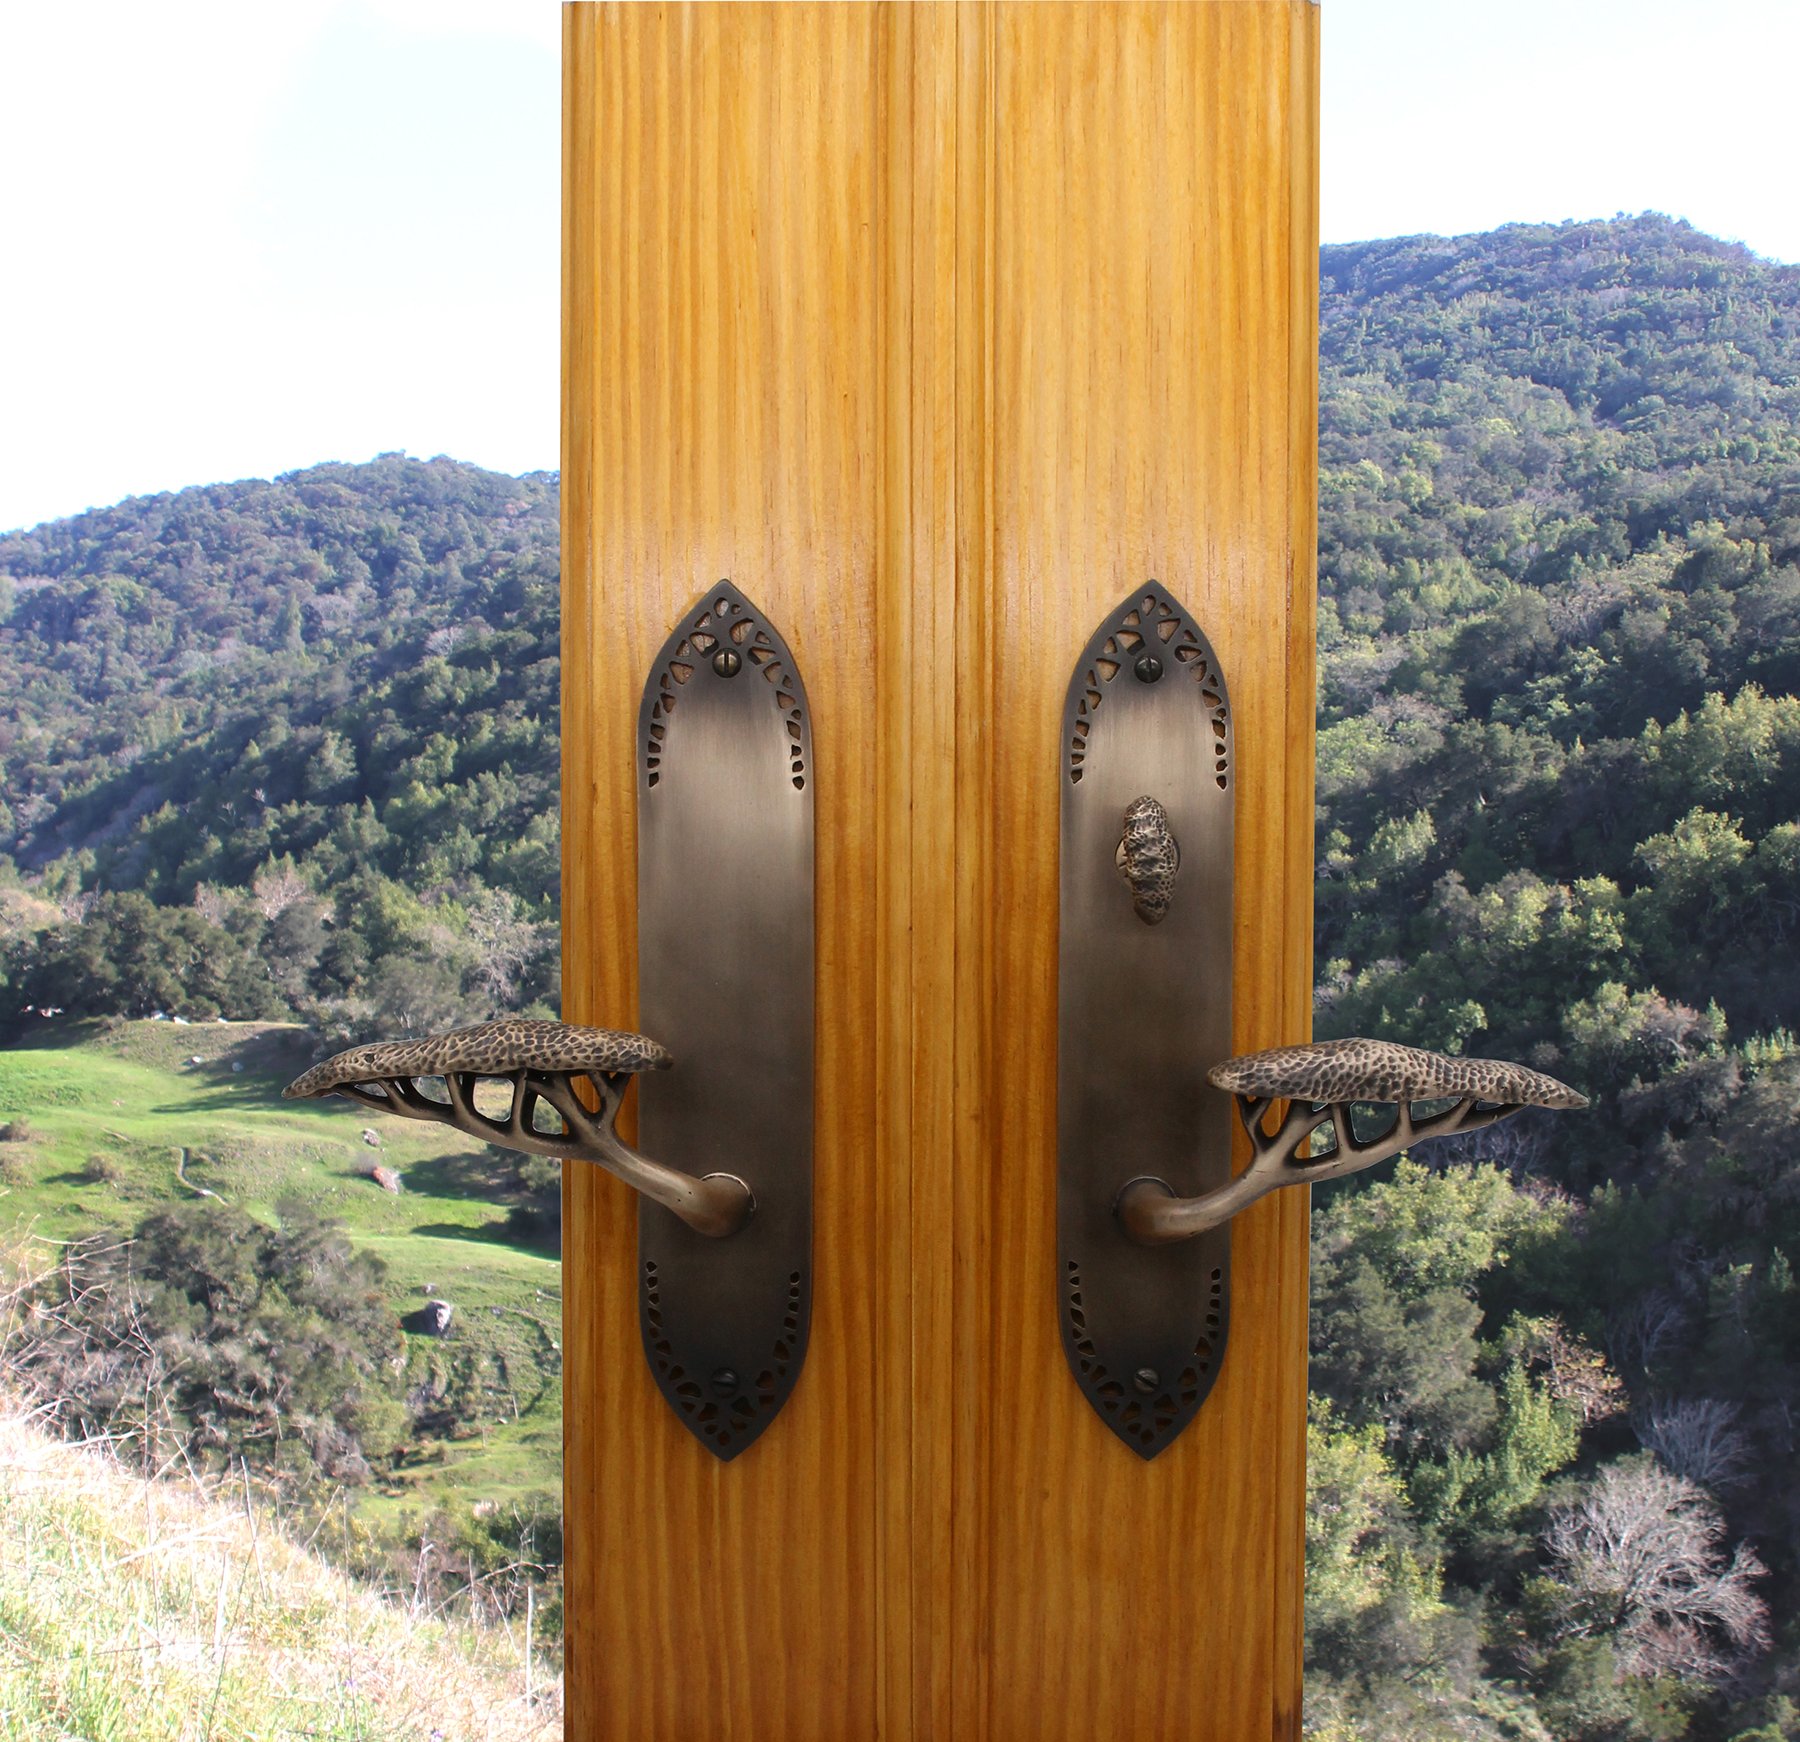
The Hedgerow heroic trees are good examples of the variations within a piece.

Using Directional Pieces

The Hedgerow trees are a pair and the sway of the trunk is how we chose to designate one left and one right. Nature makes no such distinction which explains why these bronze trees can work pointing left or right as the restraints of the door stile dictate. The design and mounting spots  also allows the tree to be positioned a few degrees  off perpendicular which is helpful when positioning on a narrow stile.

The mock-up below shows a door with a 5” stile so by flipping the direction of the tree the sway of the trunks prevents knuckle collision. As the pull projects out by 1 1/2” it has ample clearance from the face of the door panel for a comfortable grip.

 Re-configuring the pull

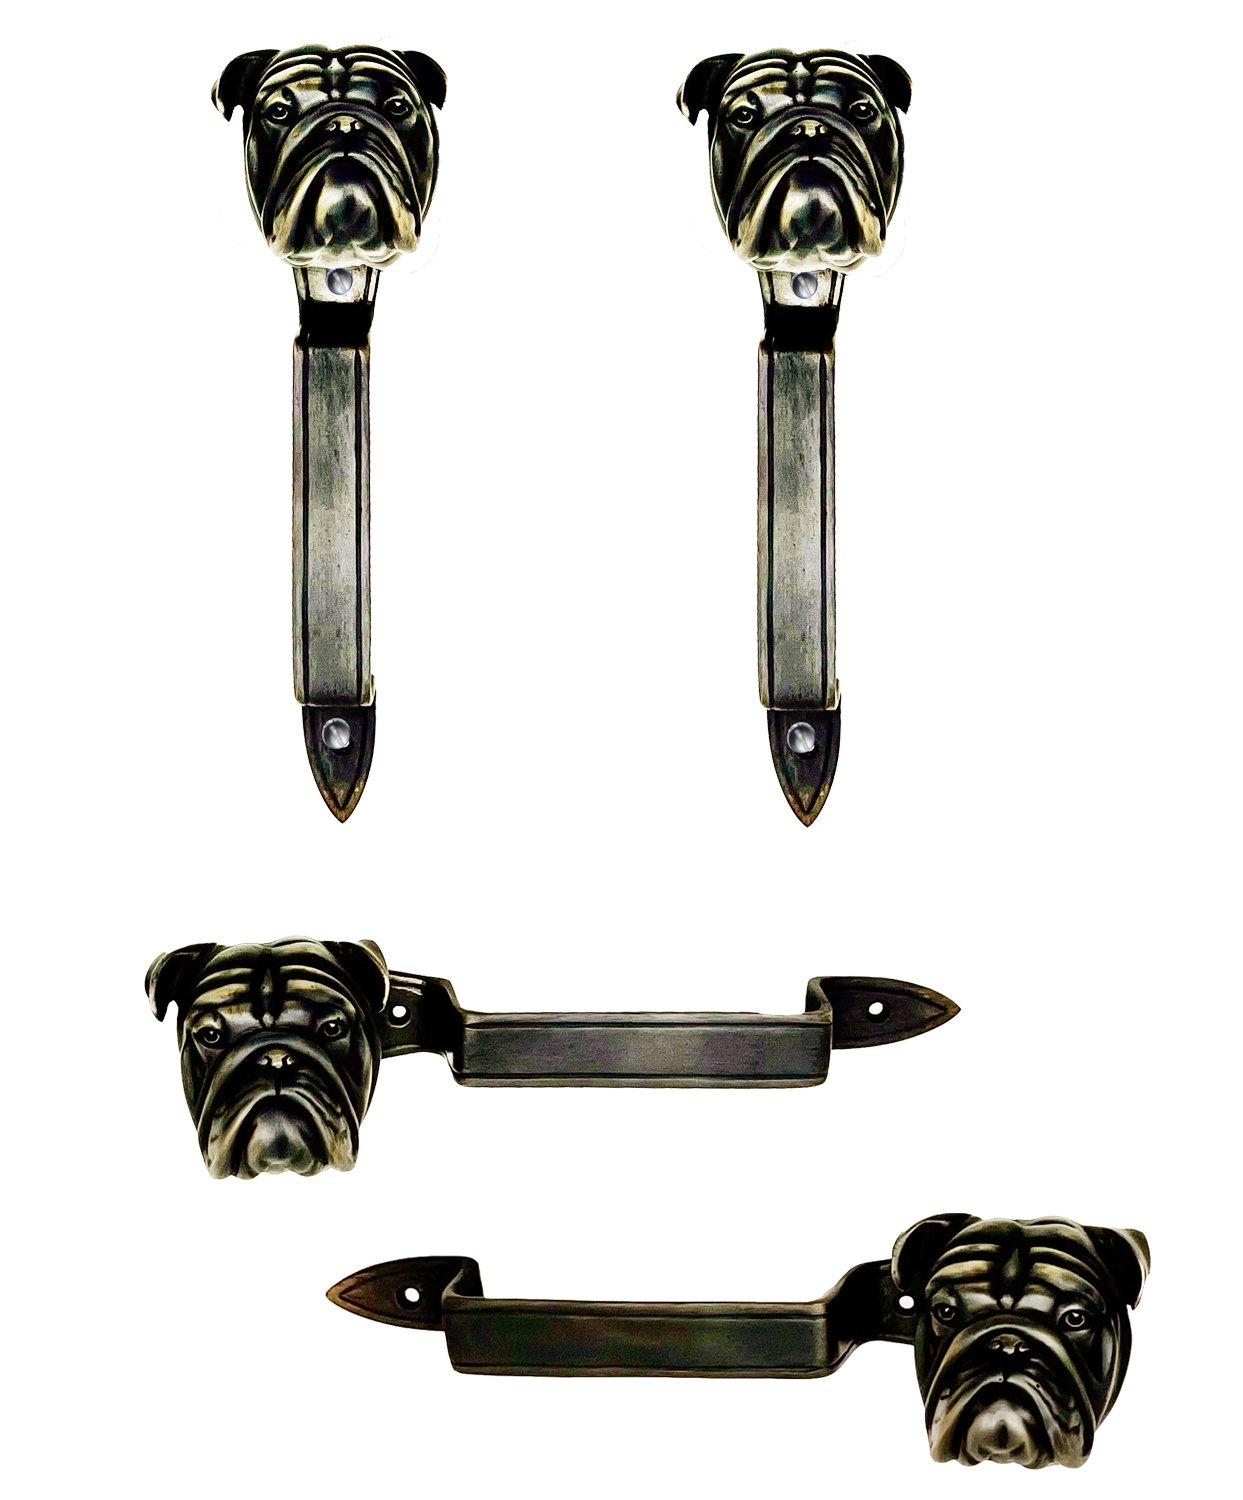
Many of our pulls and handles are made in parts which are welded together. All of our dog door knobs are made with the head cast separately to the escutcheon or pull. For a narrow door stile, we recently re-configured the location of the head so that the pull could be positioned horizontally. In the mock-up below the door stile is a narrow 3” but the door rail at  41/2” allowed the dog head to be positioned upright.

Left: reconfigured dog head location Right: playful use of the standard dog head location

With a 3 1/4” distance between ears some planning ahead is needed for a narrow door stile

Classic Entry Door Handles

Thumb latch handle sets are often used in  traditional styles of door hardware to make a  grand entry statement. The thumb piece on the front side of the door is usually one small decorative detail on a much larger back-plate. The Hedgerow, Grapevine and Willow collections all contain a thumb-latch entry set and we have designed to be an integral part of each set.

We also use the same mechanism on the Lizard entryway set where a less traditional butterfly is the thumb piece.

Understanding the function of the thumb piece

The thumb piece is used to activate the door latch that keeps the door closed. Our thumb latch sets have been designed for use with mortise locks which house the latch and deadbolt mechanism within a solid 6”H x 3”D x ½”W metal case installed inside the body of the door. The thumb piece has a seesaw motion so pressing down on the exposed thumb end pushes up the end that sits within the mortise box underneath the toggle area. When pushed up by the thumb piece the toggle plate pivots backwards which triggers a hammer plate backwards thereby releasing the latch and spring which kept the latch extended and the door closed. The hammer and spring, when released allow the latch to return into the body of the mortise thereby allowing the door to be pulled open.


Oil Rubbed Bronze

We are revisiting ways we show our collection of Willow entry door knobs and interior handle sets. The trend is moving from old darker traditional finishes to lighter oil rubbed finishes.

The Willow collection, while inspired by swirling willow leaves and tendrils, still reflected the classical lines of older European architecture that Martin and I knew in England. Indeed, Martin’s training as a wood carver required him to carve more formal flowers and  leaves as relief carvings and this education served him well when carving the very detailed facets of the Willow collection.

 By moving away from dark oiled bronze to a lighter patina the detail of the piece is now able to shine through. We hope you will like this new direction but should you still be looking for a more Baroque or Victorian finish we are continuing to offer this collection in darker tones.

The photos here show  the before and after appearance of the passageway, privacy and entry knobs and lever sets.

To create the light and dark patinas we follow the same process of finely buffing away  imperfections visible on the surface of bronze and then immersing the piece into a premixed oxide. The oxide creates a fine dark film as it adheres to the surface but it is immersed twice to create an even and strong bond. The oxidized bronze is then re-buffed or sanded thereby removing the dark patina to expose the bright champagne tone of the silicon bronze.  The difference between these 2 finishes reflects how much and what areas of the oxidized film are removed by buffing.

The degree to which the surface is sanded and polished also impacts the level of contrast this is done prior to the casting being oxidized. In the darker piece the willow leaves were polished to a higher luster than the back plate which was left as a satin finish and which when oxidized creates a greater contrast. By comparison the lighter piece was more evenly polished to a satin finish and the effect is a more universal tone.

Choosing New Hardware For an Old Door

Clients typically order our work because they appreciate it’s unusual and unique quality. Occasionally customers turn to us for help finding door hardware that will work with an existing door’s bore and screw holes. I recently received an inquiry from a customer who had repainted her entry door and now was searching for a  handle set that would compliment her entry and  either conceal or make use of the existing holes. What she discovered is that most hardware manufacturers have set dimensional choices with no leeway for customization.

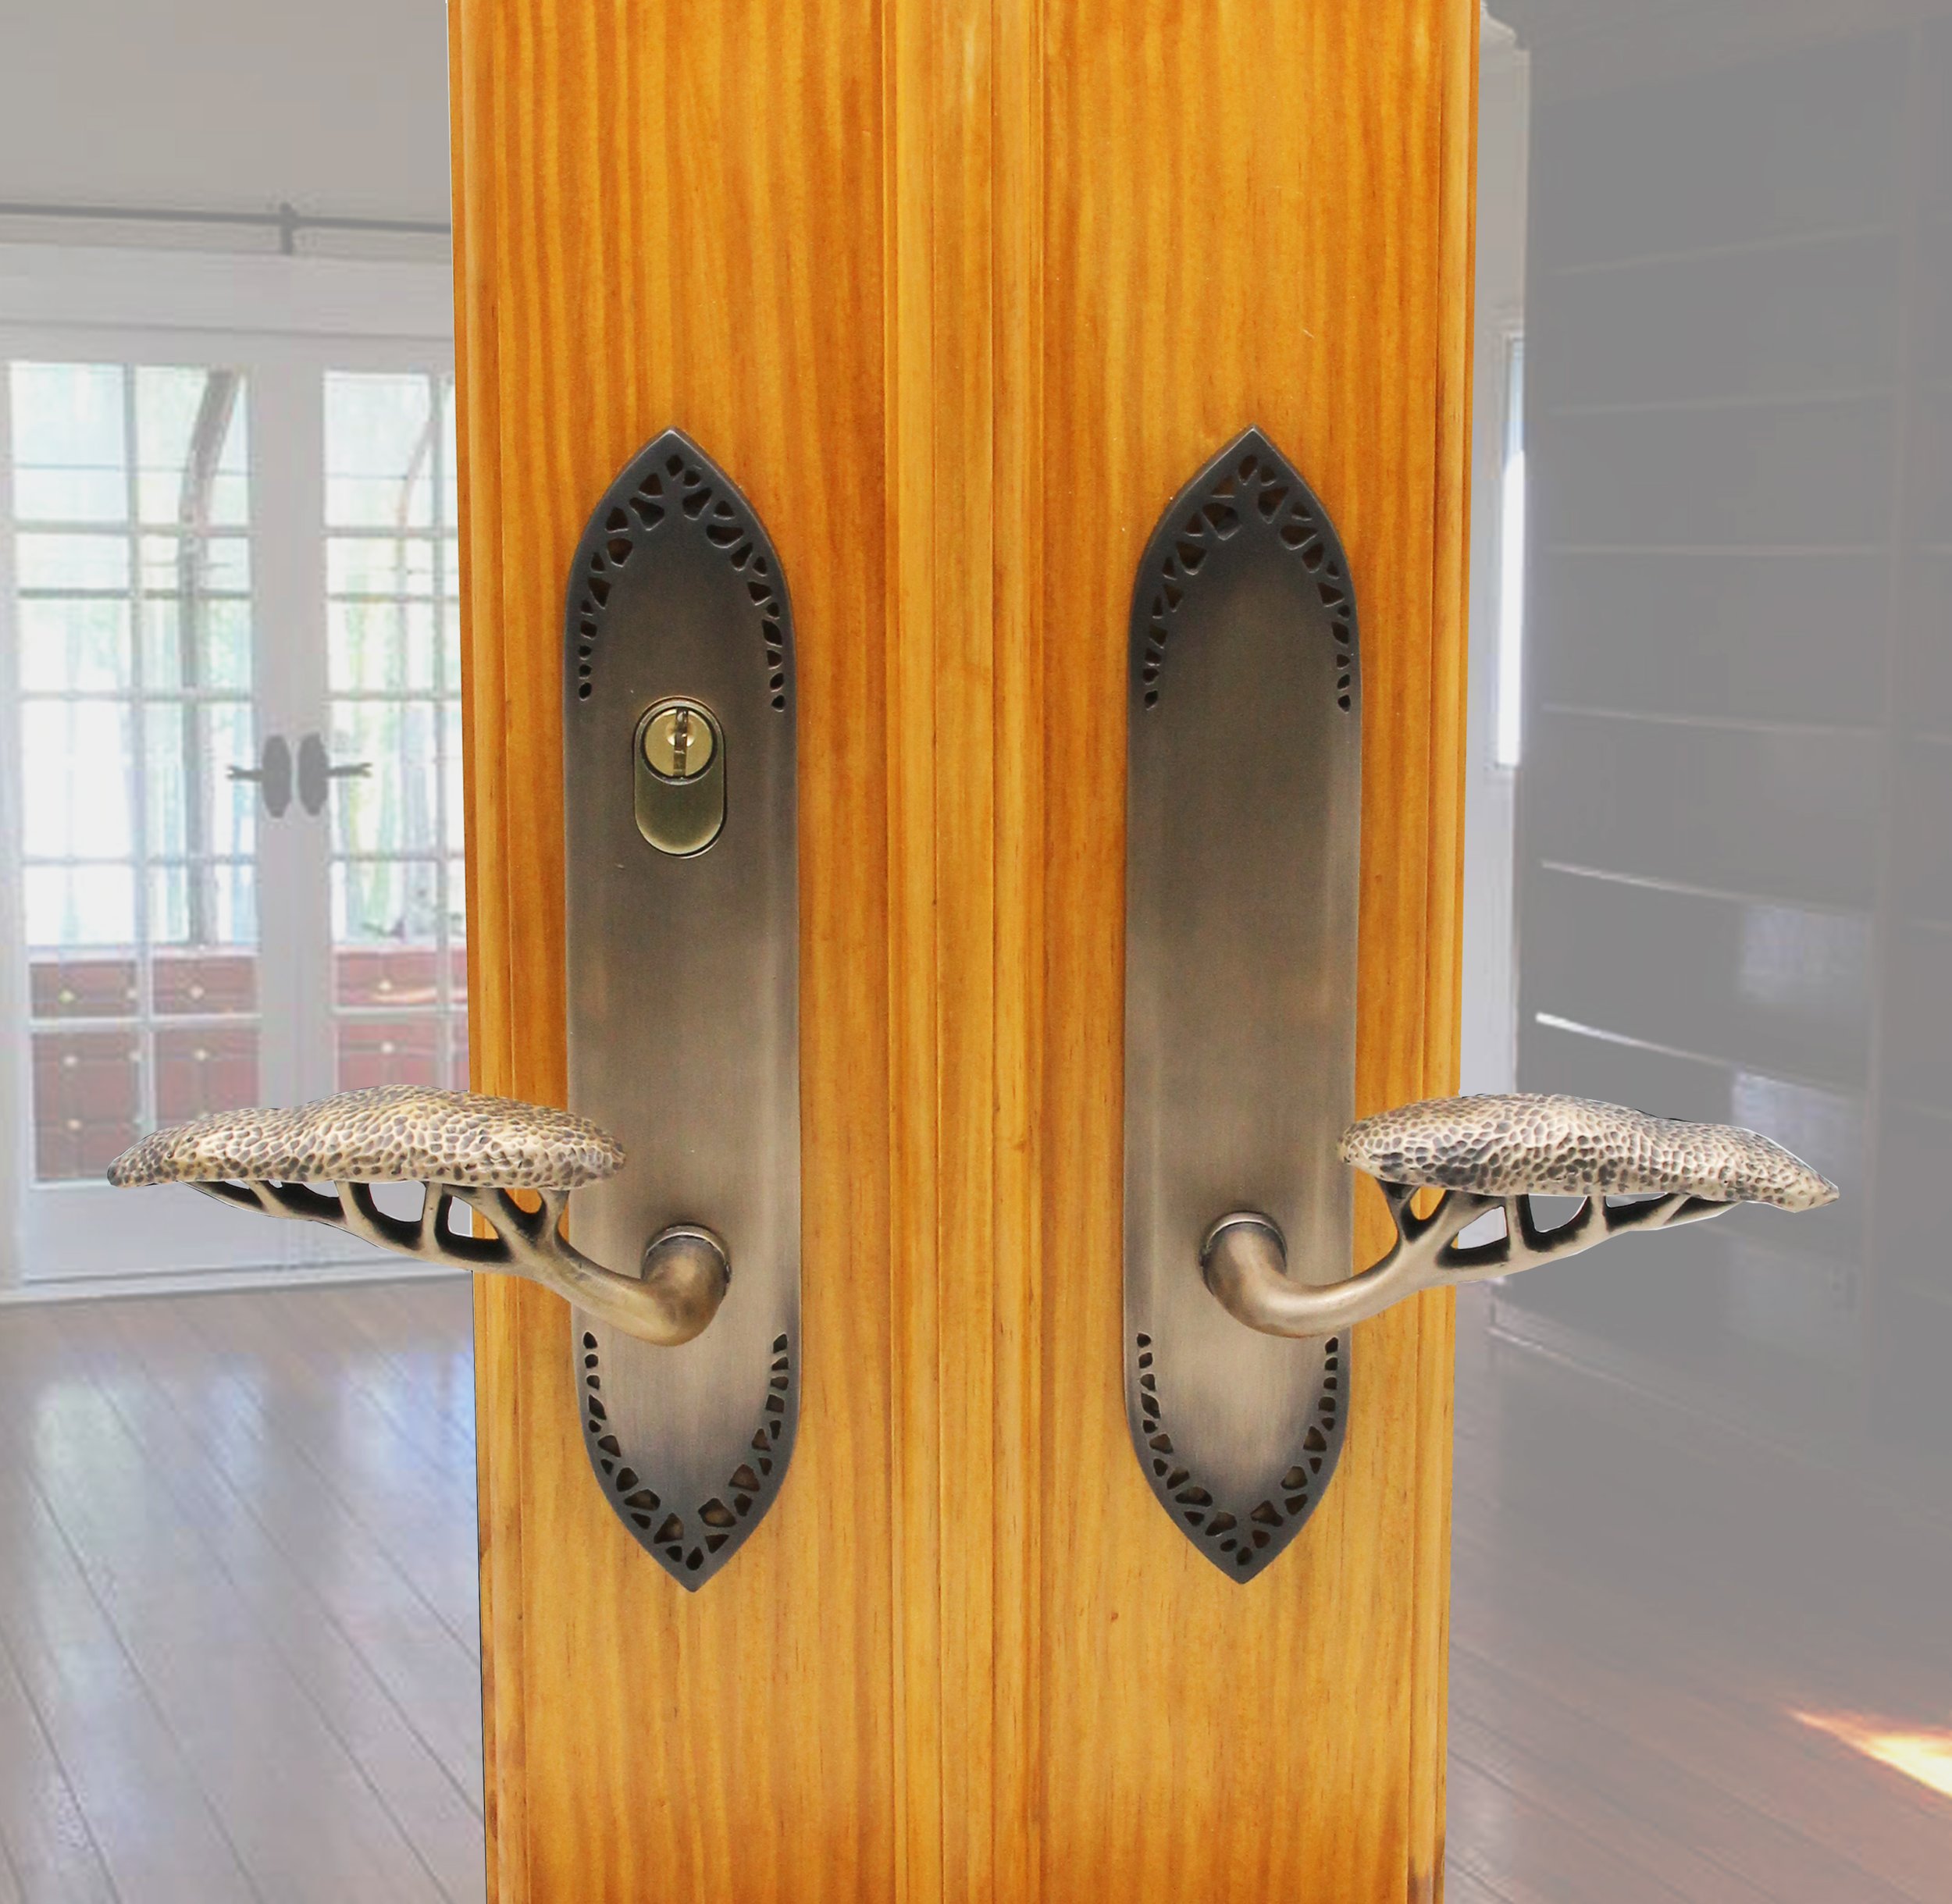
Doors are generally made with preset drilled holes, typically one for the keyed cylinder and one for the lever or knob. The distance between these 2 bore holes is referred to as the “center to center”. When retrofitting a door with a new entry set these existing holes can be difficult to fill and conceal if the door is natural or stained wood. Some doors may have more holes to deal with as would be the case with the Hedgerow entry thumb latch set shown here which requires 4 holes to be drilled.

The Hedgerow set however has a large backplate and at 20” in height and 3” in width would cover most pre-existing door holes. Our backplates are machined after they are cast giving us the ability to customize the center to center to work with existing bore holes. The additional holes that this set requires for the mounting posts will be drilled into the door when our handle set is installed.

We also have the flexibility of changing the location of the mounting posts as we cast these separately and later weld them onto the back of the plate.

Orchid Door Handle

Last year I had the pleasure of working with Kellie Beaubelle a designer in Orinda, CA who was  looking for unusual hardware, what followed was a highly imaginative collaboration of design talents.

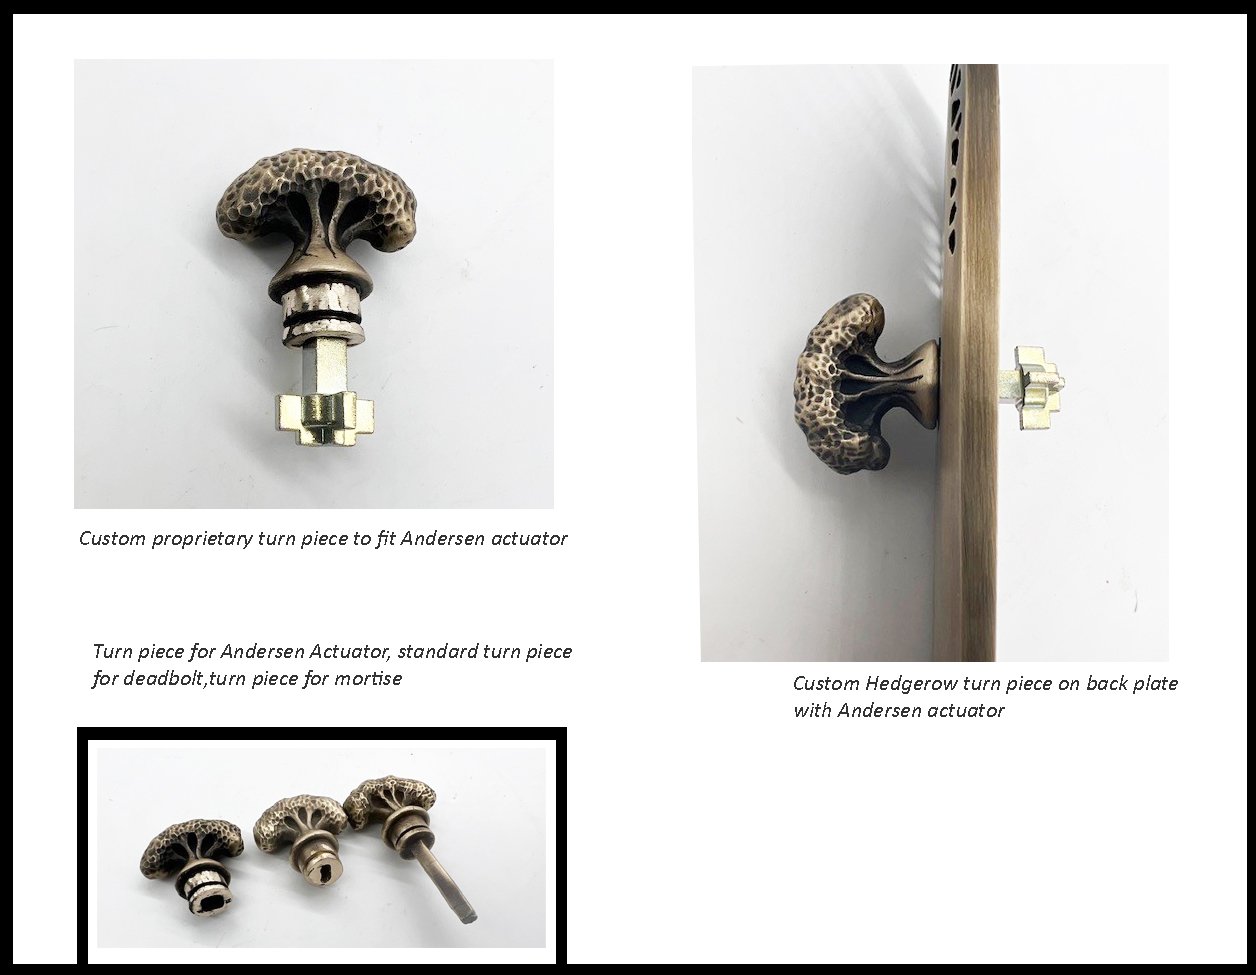
The project began with a finite plan for one entry  handle set, but once installed, the scope was expanded to include all the exterior doors that were fabricated by the door maker with Anderson multi-point locks. To accommodate the multi-point mechanism, we created a new turn piece design that has been added to our Hedgerow and Willow multi-point sets and which we will be expanding  to our other multi-points collections.

The project did not end with the entry doors as once the creative genie was out of the bottle Kellie wanted to see what artistic pieces could be added to the master and guest bedrooms. In a previous post we have documented how the Venus slipper orchid was redesigned by Martin Pierce to create a grand scale door pull which for Kellie’s project has been used for 3 large vanity drawers.

Once the concept was approved, we worked with Kellie’s vanity plan to create a mock-up idea showing how the orchid would look on the cabinet drawers. The pattern development and mold creation have been documented in 2 previous posts but now we can share photos of the piece cast in bronze and also nickel plated in a satin finish.

Plan drawing courtesy Kellie Beaubelle

Orchid handles added by Martin Pierce

The Venus slipper orchid has a pronounced stamen and labellum that project out from the body of the flower and in the casting, it is these points that are gripped to pull open the door or drawer.

CREATIVE NEW YEAR 2023

Our New Year’s goal is to continue to be creative and to share our ideas for original door handles and cabinet pulls with the design and home owner communities. We wish you all a Happy Healthy and Creative 2023 and look forward to helping you create inspiring settings.

These succulents, commonly known as red hot pokers brighten up our sidewalk where we planted them 7 years ago and where they thrive with minimal water. I am always amazed when they bloom as it is difficult to fathom how such intense color and beauty require such little sustenance.

Our bamboo cabinet pulls are also inspired by plants that thrive with little water.

Custom Multi-Point Hardware

We are pleased to announce that we have created two new pieces that will make our existing Willow and Hedgerow multi-point trim suitable for installation with Andersen’s current multi-point lock.

Hedgerow Multi-Point trim interior view showing new turn piece designed to work with an Andersen multi-point lock

 Overview of multi-point lock

The multi-point lock and the mortise lock provide good alternatives for making an entry or patio door secure and which you chose will depend on several factors the most critical being that the multi-point lock usually needs to be installed when the door is being made. The multi-point lock is also designed to be activated by a lever rather than knob or thumb-latch and this is a critical factor in choosing suitable hardware trim.

The multi-point  has 3 locking points when the door is a single door and 5 when there are double doors.

The  multi-point system has 2 main components. A rod extension mechanism that has an  upper and lower section that is installed inside the door during manufacture and a deadbolt unit that the extenders are attached to.

The extenders are activated by a decorative lever that  is installed into the central deadbolt unit. When the lever is pushed upwards the extenders act as locking bolts and are thrown upwards and downwards into header and threshold securing the door at these 2 points. A decorative knob or turn piece is installed in the deadbolt box and when turned throws the tongue of the deadbolt into the door jam or in case of a double door into the non-active door.

Decorative Levers Escutcheons and Turn Pieces

Given that the multi-point mechanism is pre-installed during door manufacturer many consumers assume that this means they must also order the trim from the multi-point lock manufacturer, a fact that is far from the truth.

Willow and Hedgerow adapting for multi-point

Our standard turn piece that is used with Accurate’s mortise lock is cast with a fixed spindle that is on the diamond. Our standard turn piece for a deadbolt is cast on the square with a slot. Neither turn piece was suited to the Andersen deadbolt so we created 2 new turn pieces both square and with a square hole designed for Andersen’s activator. The photo shows how our new Hedgerow turn piece aligns with the activator. As we design and make all our work locally in Los Angeles we are well positioned to adapt our designs to suit different multi-points manufacturer by third parties.


Thanksgiving 2022

Wishing all of you a Happy Thanksgiving.

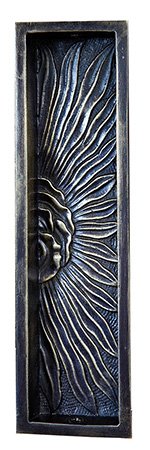
To create a seasonal collage, we decided to use the Willow flush door pull and the Willow sprig cabinet pull.

The Willow recessed handle is typically used as a barn door pull and is visible on the side of the door which would be routed out to accommodate it’s 3/4'” depth.

You will have to look closely to find out how we incorporated this piece in the banner collage to create a diamond shaped accent.

Since the pull displays only half of a flower head, we created a copy in Photoshop which we then rotated to make a whole flower head.

The Willow sprig required less assistance and was easily colored a bright green.

Patina Artistry

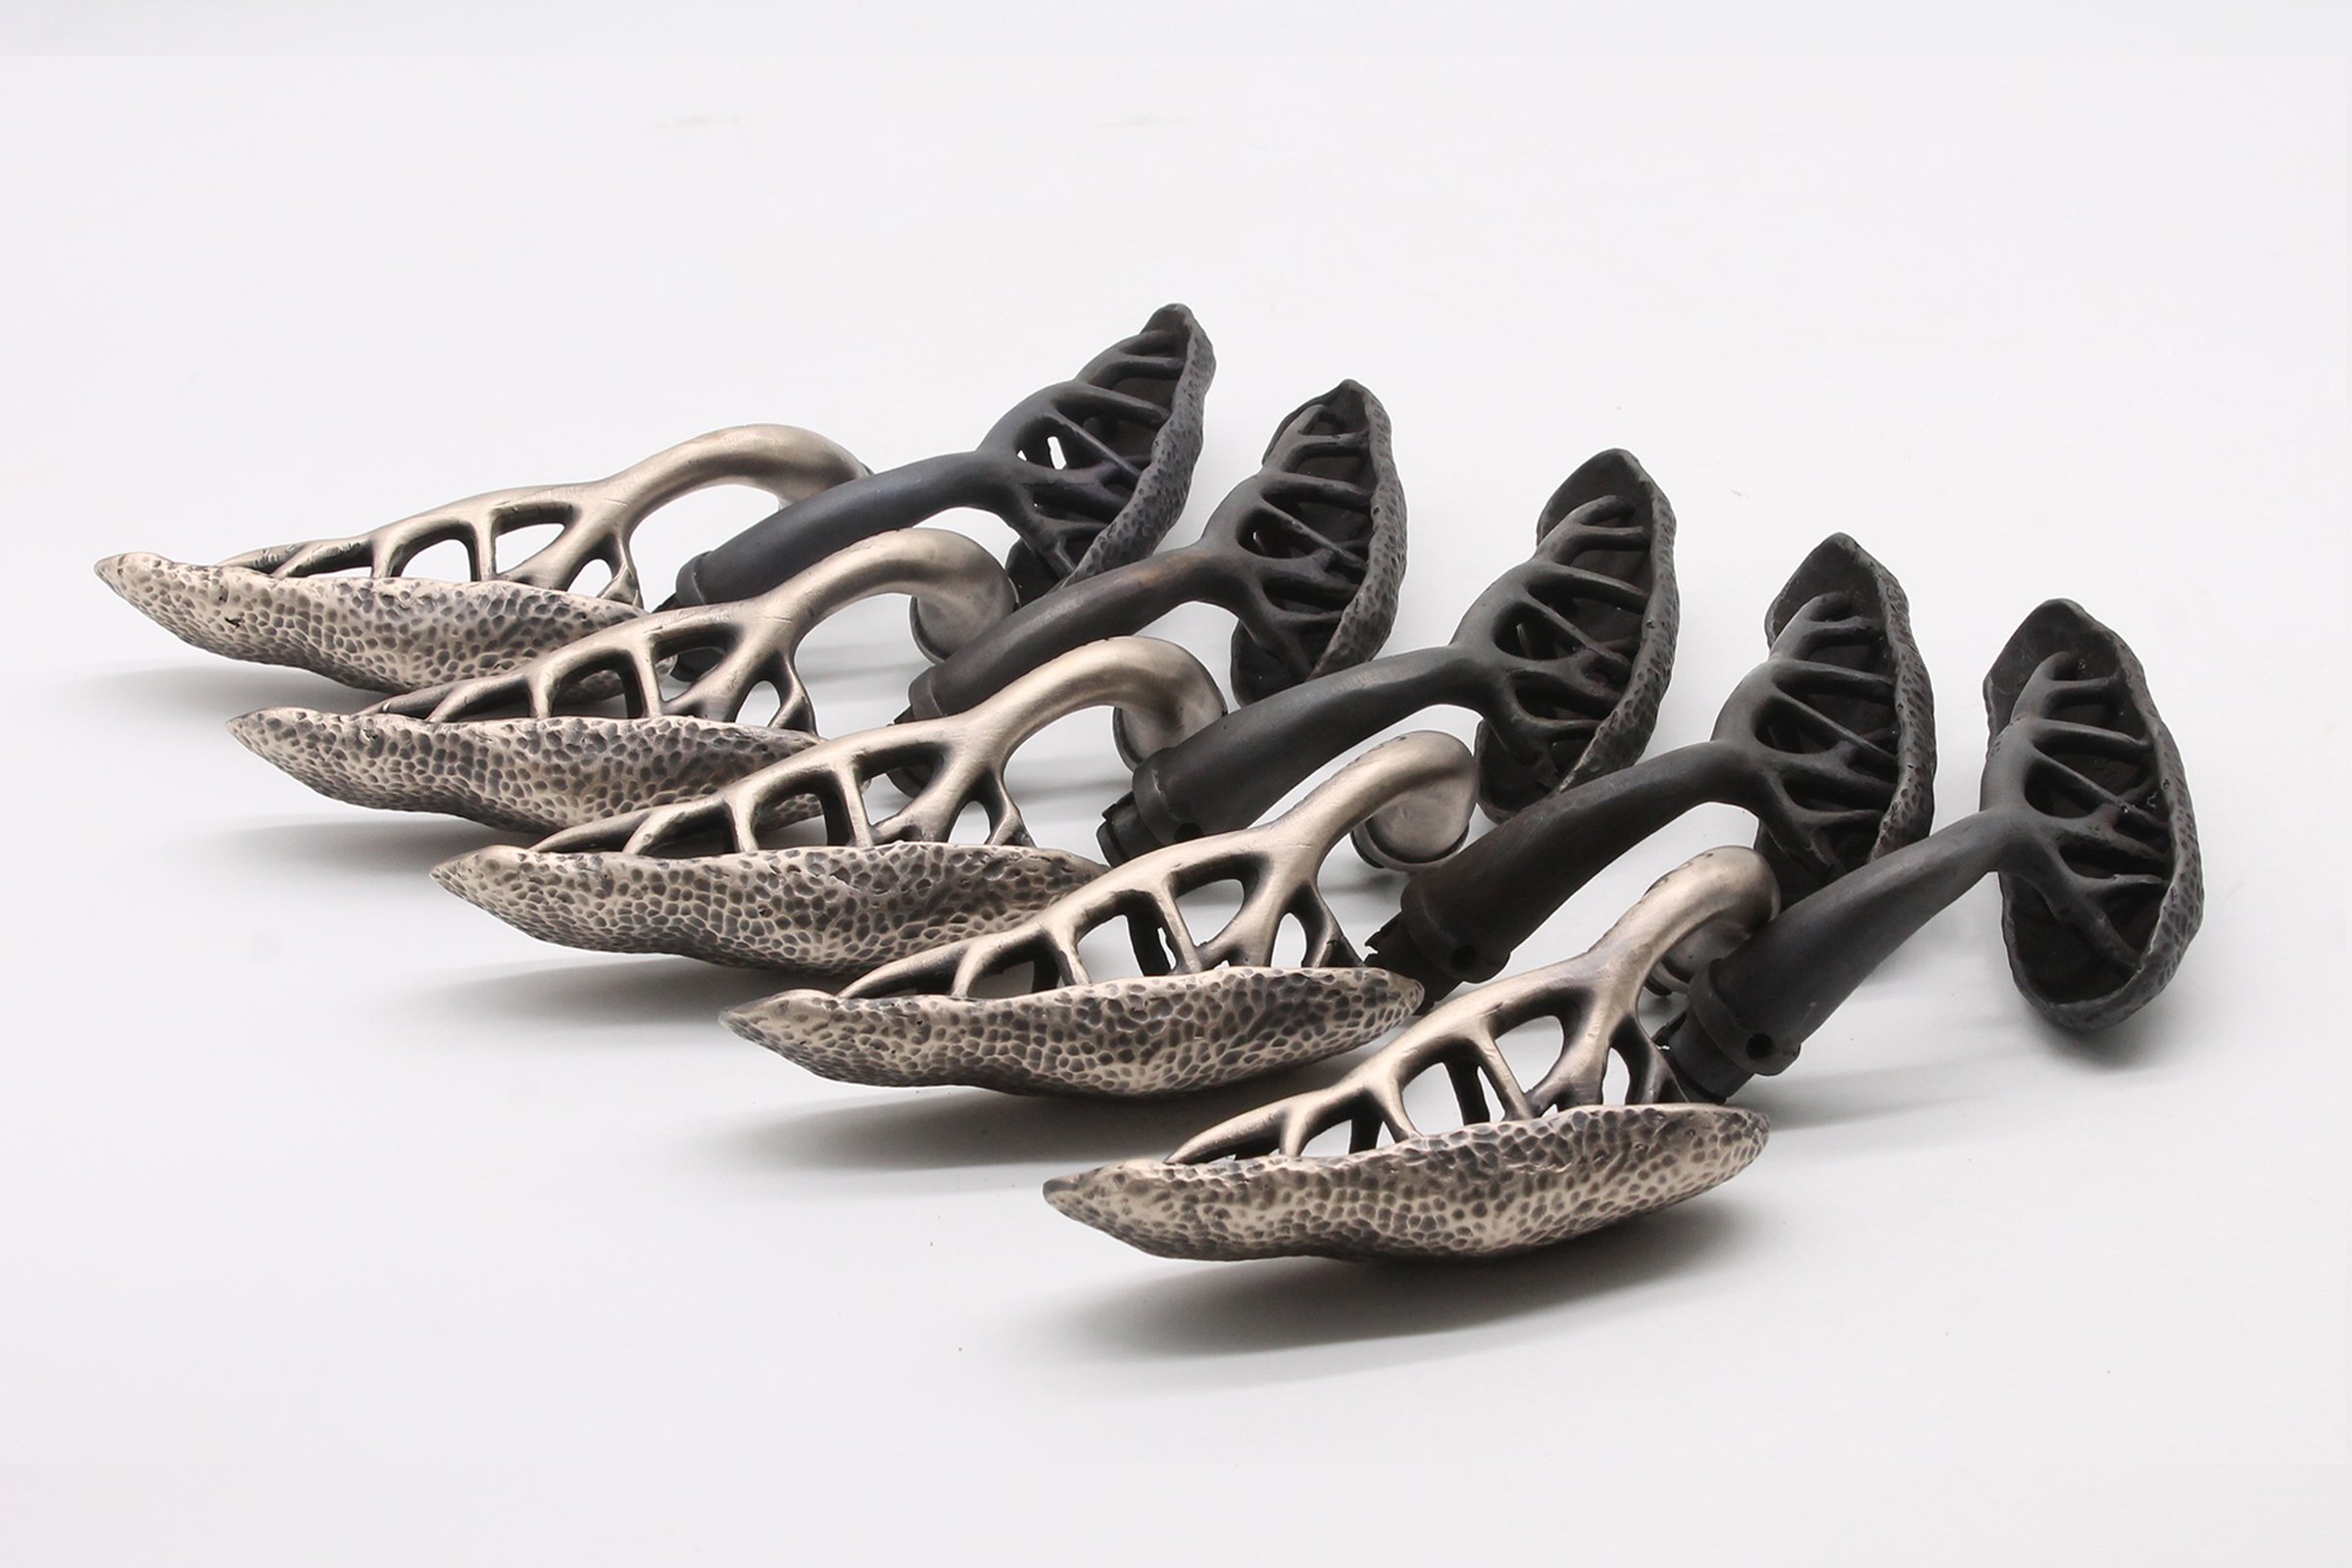
In the course of the working week as I pass through the small studio here at Martin Pierce, I am often captivated by the workmanship of our patina artists. The assembly of like pieces that I see are images I wanted to capture as they are both very beautiful and can be captured in our small photo light box.

We started photographing our work as a way of keeping a diary of the different projects and new developments and with the help of a professional photographer learned some of the basic techniques of how best to shoot our work. Our photographs are taken with a Canon EOS Rebel T3 with a zoom lens inside a 5-sided white light box using  rows of small LED lights for an evenly dispersed downward light beam. The light box is housed inside a small dark room with almost no natural light. For stability the camera is placed on a small tripod. The camera is not state of the art and an equally good photograph could be created using a mobile device but what is critical is the light box and even distribution of light.

The willow friends shown above are being prepared for a new home in northern California and they are part of the handles we are making for 11 pairs of double doors that will be locked with an Anderson multi-point system. The Hedgerow and Willow collections were specified for the doors and the cabinet pull selections have been from the orchid and beetle and willow collections. In subsequent posts I will detail how we created 2 custom turn pieces to work with the Anderson lock.

Made in America – Changing Designs

As the global supply chain challenges are still with us we, like many, are finding ways to re-tool some hardware designs so that we are not reliant on overseas suppliers.  All of our work, meaning our castings are made locally by us here in Los Angeles. From the initial creation of the pattern to mold development, to pouring wax and then bronze or steel the process is local and the materials if not local are certainly American made.

There is one area though where we have relied on LED components in our illuminated door handles and so are transitioning away from lighting our handles to finding more creative and less high-tech ways of adding a dash of sparkle to designs, which in their own right, do not actually need embellishing. Simply put we are phasing out colored LED and replacing this with powder coating.

Benefits of new direction

The main advantage is the flexibility with which a piece can be powder coated. Powder coating can be applied to almost any part of a handle which allow for color to be integrated in a much more artistic and organic way. This is especially the case with the Morphic pieces.

When we created the LED pieces we had assumed that eventually we could move away from direct wired electric power to  long life batteries that would be small enough to fit inside the fixture. This did not occur and the resulting market was very small.

By moving away from LED products we are able to lower the consumer price just a little as we no longer will be buying the components and we will no longer be paying the costly testing and regulatory fees charged by UL.

Detailed Door Hardware

Occasionally we have the pleasure of working with a design company that shares the same detail-oriented focus and commitment to exceptional door hardware as we do. Over the last year we have had the pleasure of working  with Chiara de Rege and her all female team to develop custom pieces for her discerning clients. Based in New York, the company’s clientele spans both coasts with design services for residential and corporate clients.

 Our collaboration with Chiara de Rege  on an Upper East Side residence resulted in the creation of a unique collection of door push plates and door levers. The traditional  Willow series was whimsically re-invented and enhanced with flying creatures from our animal  collection of cabinet knobs. The resulting door push plates and interior door handles were selected from several initial designs that paired smaller insect, bird and frog pulls with the Willow back plates.

The design team were renovating a residence using the existing doors that had astragals and panel mullions  that reduced the workable free area of the door and limited the backset depth of the latch.  With these considerations in mind, we focused on the Willow and Hedgerow exterior backplates, both being narrow and having smooth areas that could be enhanced by the addition of a small creature .


Some of the designs considered are shown below. Once the design genie was released, we had a lot of fun experimenting with different cabinet knobs and with insects flying in different direction. While our preference and that of Chiara’s design team was on flying insects, leaves and flowers could work equally well for those who have an insect phobia.


Wine Cabinets – Hardware Discussed

For serious wine collectors keeping those liquid gems at a temperature and humidity  where they live happily until consumed is a crucial factor both in the design and construction of a wine closet and in  choosing suitable door hardware.

LEFT: Doors with tubular latch cabinet center divide RIGHT: Fixed handles cabinet doors flush no divide

Wine kept for future consumption needs to be in a cool dark cabinet that is kept to a temperature of 45-65 degrees with a controlled humidity of about 70%. It is also important to keep wine free from vibration as this will disturb the sediment in the bottle as well as setting off a chemical reaction that decreases the wines acids thereby dulling the wines flavor. While minor vibration may be easier to control, in California the vibrations are often seismic!

Do the specific requirements for wine storage limit the customers choice of door handle?

The simple answer is no, choosing the right type of handle for a wine cabinet door should be no more taxing than selecting a handle for any interior door. The same factors need to be considered and questions answered;

Door handing

Functioning latching handles versus fixed

Width of door stile

Door Handing

Looking at the door from the outside, doors that hinge on the left are left-handed and those that hinge on the right are right-handed and this holds true for double doors. Some wine closets are made with a pivot hinge that attaches to the top and bottom of the door with a pin rod, see photo below.

Whatever the hinge type it needs to be strong enough to ensure that the door(s) when closed, tightly fit into the cabinet frame to help maintain a constant temperature. Wine cabinets and wine racks are often made to pitch backwards  which helps prevent the wine from touching the cork and also gives a gentle gravity tug that helps the doors to firmly close.

 Functioning or non-operative levers/pull

This brings up the question of cabinet construction and the presence of a center divide. A center divide is a wood divide that runs from the top to the bottom of the cabinet frame. A center divide of at least 1 1/2”is critical for double doors if they are required to latch with a tubular latch. A tubular latch is activated by the lever which throws the latch tongue into the strike on the side of the divide. Cabinets can be made with  a hydraulic hinge closure which creates a tight hermetic seal that does not require a latching operational handle. If  the double doors are flush without a divide then magnetic latches attached to the top and bottom of the doors and cabinet frame are a good option. Roller latches are another option but the roller ball and strike tend to wear out and the roller springs tend to loose their tensile strength so will need to be adjusted periodically. The plan view in the above diagram shows how the tubular latch and magnetic differ.

Stile Width and Backset

Our standard backplates are 3” wide and require a net stile width of 5” for a 2 3/8” backset. For smaller stiles our multi-point backplates are 2 1/8” or 2 ¼” wide and require a 3 ½” net stile. The width is referred to as net to denote the free flat surface of the door frame without any door molding or astragal.

Photos courtesy of Susan Diamond Location Residence of Susan Diamond and Andrew Fletcher

Hedgerow Multi-point Sets Used as Fixed Handles

 I wrote this piece in response to a consumer whose tenacity and diligence proved indispensable in the correct ordering of our vine door handles. Ordering door handles should not require a degree in engineering and should not be an arduous task so my advise is to check and double check the door specs supplied and don’t hesitate to ask the hardware manufacturer for help in ordering the right type of handle and latch.
Exterior Door Handles – Lock Types & Door Preparation

Unravelling the words used to describe simple door handles.

I recently spoke to a modest but tenacious person who had decided to purchase a door handle set for her new wine cellar. She had spent the previous week grappling with the odd terminology of door handing ,lock backset and door stile and was now ready to place her order.

Exterior doors are made secure by locks that vary in price, strength, and degree of difficulty when being installed. Our handles can be configured for a wide range of locks so choosing the type of lock should not be a barrier to buying whatever style of handle you like. Word of advise, make sure that any lock that is installed on location is done by either a qualified lock smith or competent contractor.


3 Types of door locks not including electric and digital  locks

Keyed Cylinder – a simple way to lock the door with minimal door preparation. A 2” hole will typically be cut into the door by the door manufacturer. You will need to understand the term backset which is the distance from the side or edge of the door to the center of the cut hole and can be anywhere from 2 3/8” to 5”. The distance will largely depend on the width of your door stile, which is  the flat area of the vertical door frame  and typically 2 3/8” or 2 ¾”. The cylinder on the outside of the door is activated by your key which when turned throws a  metal tongue into the door jam. The key throws the lock usually when it is turned clockwise and retracts it when turned anti-clockwise. On the inside of the door the turn piece performs the same function of throwing and retracting the tongue. This type of lock also has a double keyed cylinder option and a key is used to activate either cylinder.

Mortise Lock - Arguably the strongest type of lock this requires a lot of door preparation ideally performed by the door manufacturer. Here a very sturdy good gauge of  steel is used by the lock manufacturer to create a box that houses the intricate locking mechanism and from which a large heavy duty latch and bolt are released. We use the Accurate mortise lock box that is approximately 6”H x 3 ½”W x 7/8”D.

The mortise lock and keyed cylinder locks both release a metal tongue approximately 1” into the door jam for a single door or the non-operating door in the case of a double door.

Multi-point - This type of lock also provides a high level of security achieved in part because the mechanism throws 3 bolts, one into the top the door jamb one into the door sill and the third into the center of the door jamb or other door if this is a double door. Like the mortise the mechanisms are housed in a central metal box. The top and bottom bolts are typically ½” flat rods that pass through a pre-cut channel that runs the length of the door. As this type of lock requires extensive door preparation the doors are usually sold with the lock already installed.

The multi-point lock box and escutcheon that cover it are usually narrow and I am guessing this is because they are used on French doors aka patio doors designed with glass pane(s) for maximum light. Whatever the historical reason, like most hardware makers, we offer a narrow back-plate to suit this type of lock for most of our door handle collections.