Blog - Martin Pierce

custom cabinet pulls and knobs

Silver cabinet pulls for a Luxury London Residence


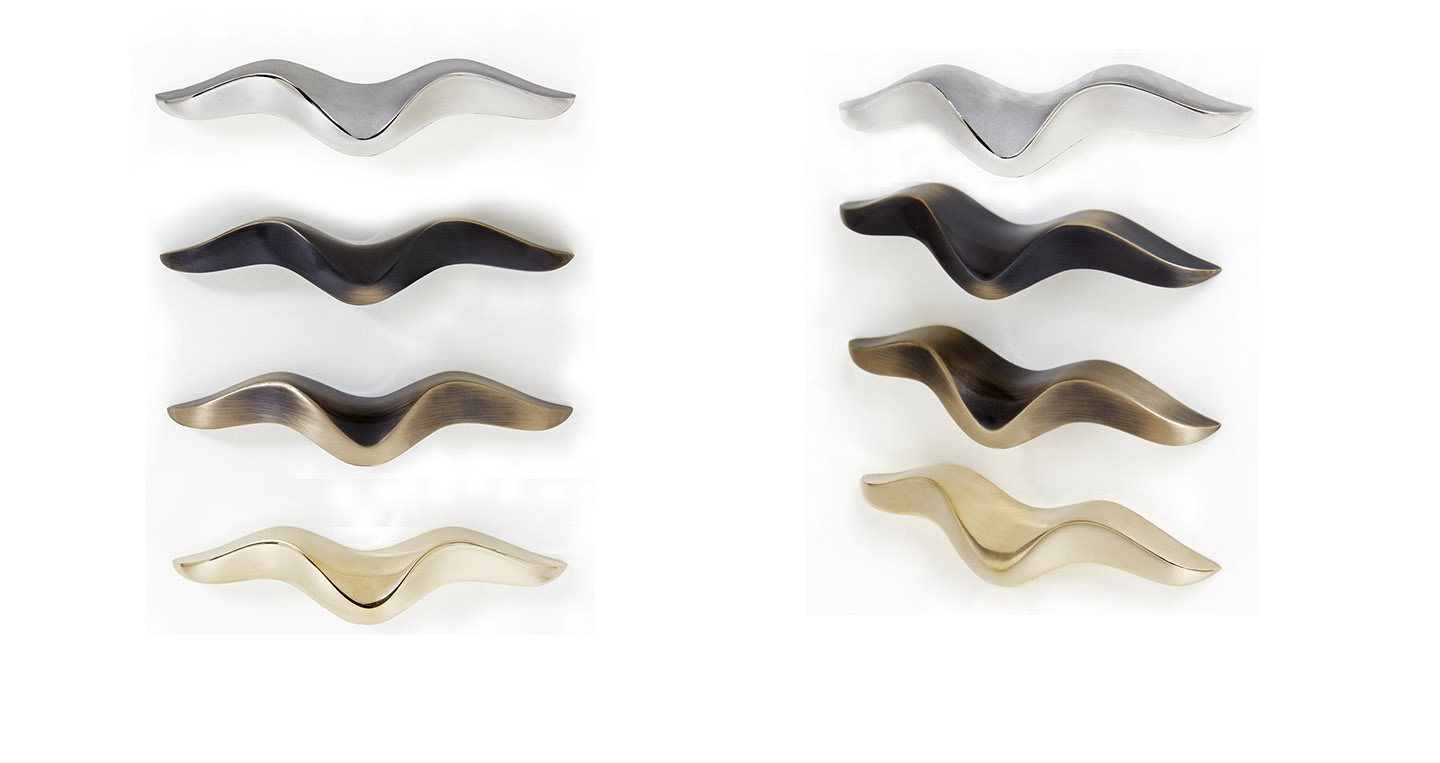
Silver and gold are unusual choices for cabinet handles but when integrated into a credenza design they can become the finishing touch. Our first silver plated pulls were commissioned by interior Design Anna McPherson when she was with the international developer Candy & Candy. On that occasion we silver plated our dragonfly, geckos and frog handles. More recently Anna has used silver plating to add sparkle to our sycamore leaves for a custom credenza being made by the furniture craftsman, Thomas James in Worcester, England.


While Martin Pierce designed these leaves to function as left and right pulls, each was made as a unique cabinet handle, reflecting the reality one finds in nature where no 2 leaves are identical.

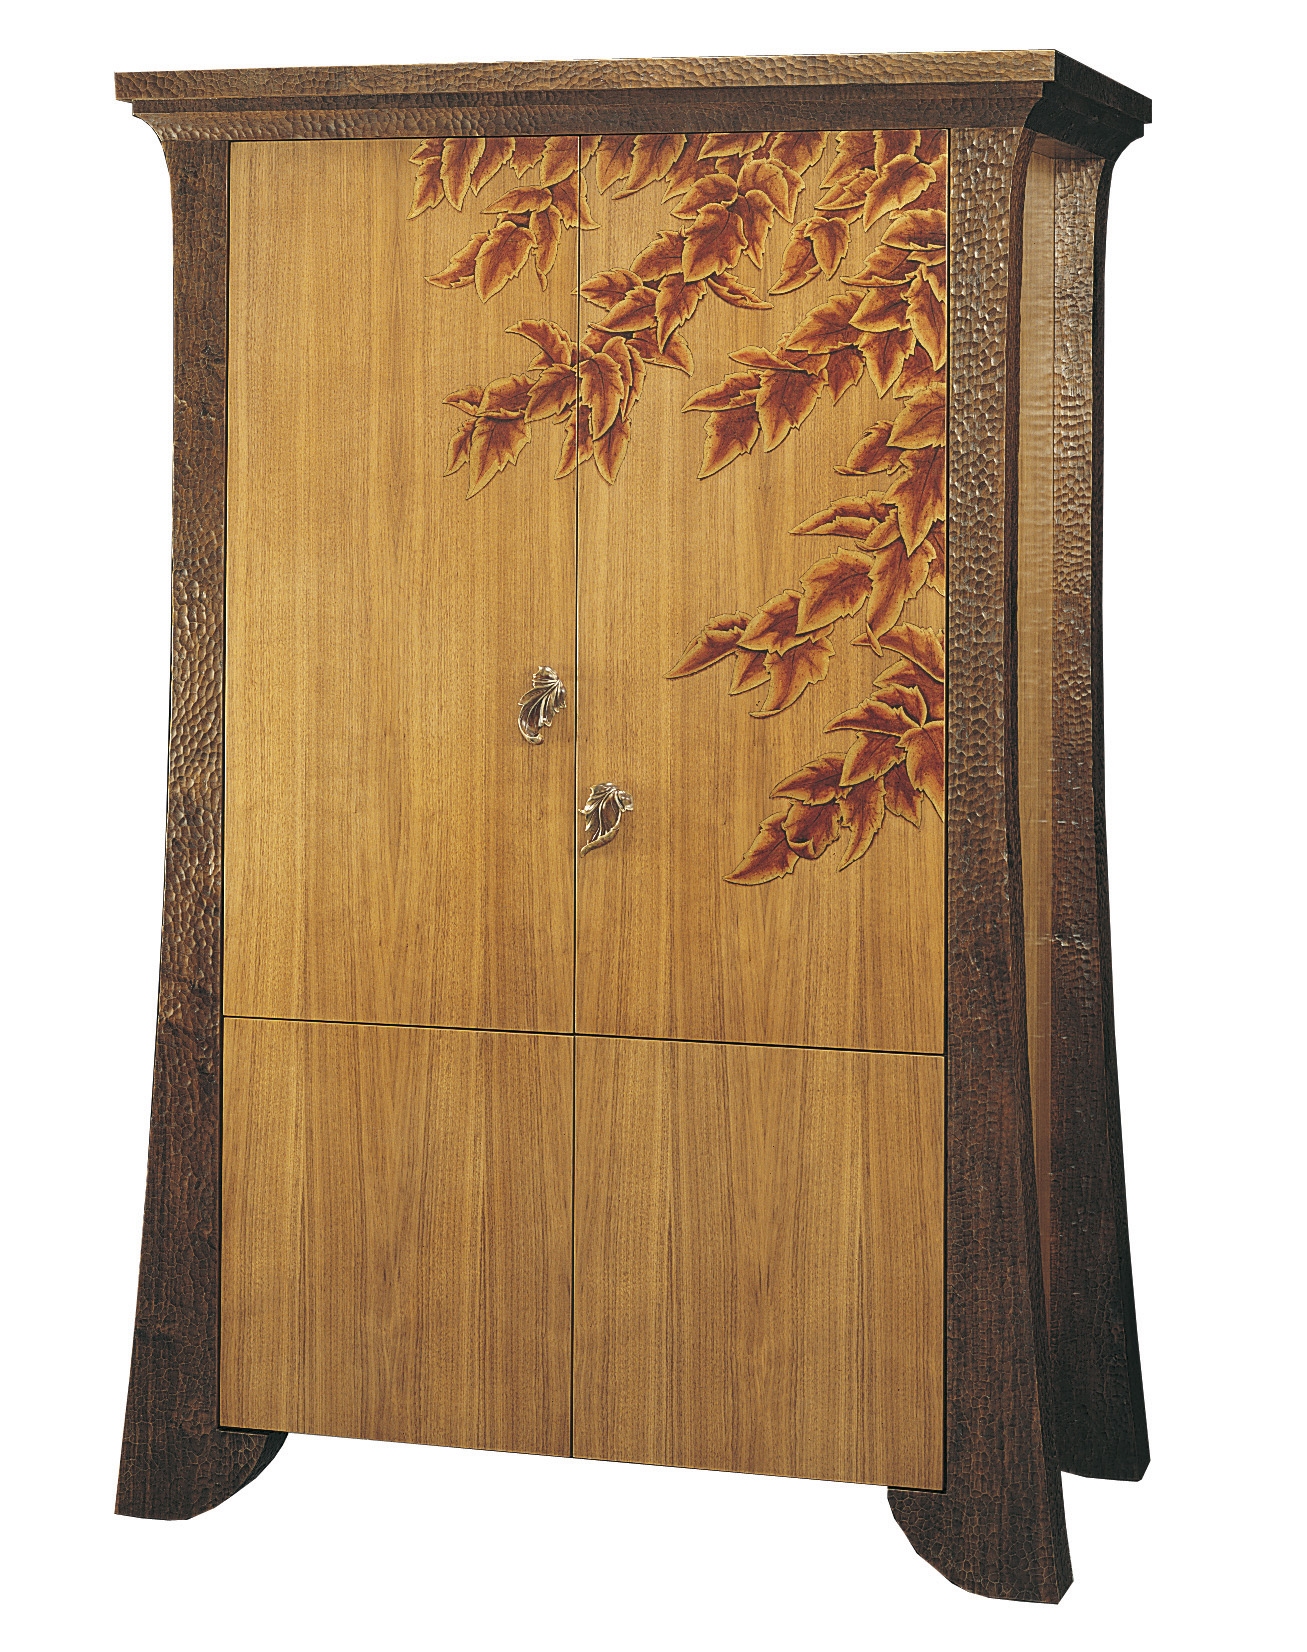
The first sycamore leaves were made for the Ascot armoire, a limited edition piece that Martin Pierce Furnishings our sister company makes. The armoire as you can see is decorated with a scene of autumnal leaves rendered in gold leaf and glazed with layers of translucent pigment. The handles were simply buffed and left as natural bronze to provide a subtle compliment to the leafy scene.

Ascot Armoire_8200 high res.jpg

To add depth to the bronze leaves we add a dark patina to the buffed metal and re-burnish select areas on the edges and higher sections and then we oil and wax the surface to help fix the finish.

For a more dramatic colorful finish we use a brown chemical patina which needs to be applied to a hot surface which we achieve by heating the piece with something akin to a blow torch.


Spring Has Sprung the Ladybirds have arrived

We recently visited Idyllwild, a small town with impressive mountains, forests and a prolific ladybird population. On first sight my mind was confused by the sheer number of ladybirds which conservatively numbered into the thousands and which were all huddled together on rocks, tree branches and fence posts.

I have wondered about the curious name of this beetle and visiting www.wikipedia.com discovered that the name originated in Britain where the insect came to be called “Our Lady’s bird”. The beetle it seems is part of the Coccinellidae family of beetle, a name that is derived from the Latin word for scarlet which was a color often used in early paintings of Our Lady’s cloak. In the United States the name was adapted to Ladybug.

Whatever the exact origins of this beetles name it is still a colorful and beneficial addition to any garden as it preys on herbivorous aphids and so helps keep our plants free from foragers.

Lady birds.jpg

We are keen fans of most insects and have been inspired to use them as cabinet pulls, turn pieces and as decorative medallions to cover dowelled joints in our furniture pieces. The cluster of bronze beetles shown here are ones that are used in our Rickshaw lounge chair and they decorate the dowel that joints the chair arm and leg. These small beetles can also be used to decorate holes when a door pull is secured with a through screw or bolts.


Cabinet Pulls in Brushed Steel and Brushed Bronze

We have in previous posts discussed how to create colorful patinas and oil rubbed finishes on bronze hardware, but we are often asked to create more understated finishes and are able to do so by brushing or sand-blasting or polishing the surface of the piece.

While the Ergo cabinet pull is contemporary in design it takes on a jewel like appearance when highly polished and becomes subtler when brushed or sand blasted to a low luster.  As with most of our cabinet hardware this cabinet pull can also be ordered in silicon bronze which is a warmer golden toned alloy. Natural bronze, like stainless steel can also be highly polished for a mirror finish or brushed for a subtler effect.

Once the right amount of luster has been achieved color and highlights can then be added either by creating textural tones with polished and non-polished areas or by applying colored patinas to all or part of the cabinet pull.

In the group photograph the Ergo pull is shown in 4 quite distinctive finishes. The top view shows this 7” wide piece cast in stainless steel and finished in a two-tone luster with the face highly polished and the balance in a softer fine sand blasted finish that accentuates the shape of the wave design. The bottom picture shows the pull cast in silicon bronze and finely brushed. The center pictures demonstrate how the bronze tone can be developed from a light antique to an almost iron black finish using cold patinas that are sealed in place using with oils applied with a soft fine cloth.

How to make a simple mold for lost wax casting

Over time all things age and the longevity of a mold will depend on the composition of the mold material and frequency of use. We make a variety of  molds some require metal or fiberglass reinforcement and are not ideally suited for home use but others are possible to make at home provided you are patient and dexterous.

Our frog cabinet pulls are a popular item but we still make these by using a simple gravity pour rather than injection method to create the wax replicas for our lost wax castings.

The frog mold is a 2 part mold that is held together by simple peaks in one half of the mold and troughs in the other half mold that act as keys to tie the mold together. The troughs or holes are created using a drill bit or punch which is pushed into the modeling clay that holds the pattern in place. As this is a 2 part mold the skill comes in delicately building up the modeling clay up one half of the pattern without breaking of the small frog digits.

Once the frog is secure in modeling clay and all undercuts have been filled in we apply 3 or 4 coats of silicone rubber with a paint brush, we use Mold Max 30 by Smooth-on. After the silicon rubber is set we reinforce the mold with a more rigid plaster compound called Plasti Paste 11 by the same manufacturer.

stages of mold making .jpg

Next we make the second half of the mold which will have the peaks that align with the troughs. First we spray on a mold release agent onto the female mold, we use  Ease Release 200 by Mann Technologies. We then apply more of the silicon rubber to the mold which will collect in the troughs.  We repeat the process described and once we have created a rigid case in Plasti Paste we are ready to start using our mold to create waxes. The release agent allows the 2 halves of the mold to separate, we then can remove the pattern and now we have a hollow space to receive the wax.

Useful sources

https://www.smooth-on.com/

www.moldreleases.com