Blog - Martin Pierce

hawaiian cabinet knobs and pulls

How to make a simple mold for lost wax casting

Over time all things age and the longevity of a mold will depend on the composition of the mold material and frequency of use. We make a variety of  molds some require metal or fiberglass reinforcement and are not ideally suited for home use but others are possible to make at home provided you are patient and dexterous.

Our frog cabinet pulls are a popular item but we still make these by using a simple gravity pour rather than injection method to create the wax replicas for our lost wax castings.

The frog mold is a 2 part mold that is held together by simple peaks in one half of the mold and troughs in the other half mold that act as keys to tie the mold together. The troughs or holes are created using a drill bit or punch which is pushed into the modeling clay that holds the pattern in place. As this is a 2 part mold the skill comes in delicately building up the modeling clay up one half of the pattern without breaking of the small frog digits.

Once the frog is secure in modeling clay and all undercuts have been filled in we apply 3 or 4 coats of silicone rubber with a paint brush, we use Mold Max 30 by Smooth-on. After the silicon rubber is set we reinforce the mold with a more rigid plaster compound called Plasti Paste 11 by the same manufacturer.

stages of mold making .jpg

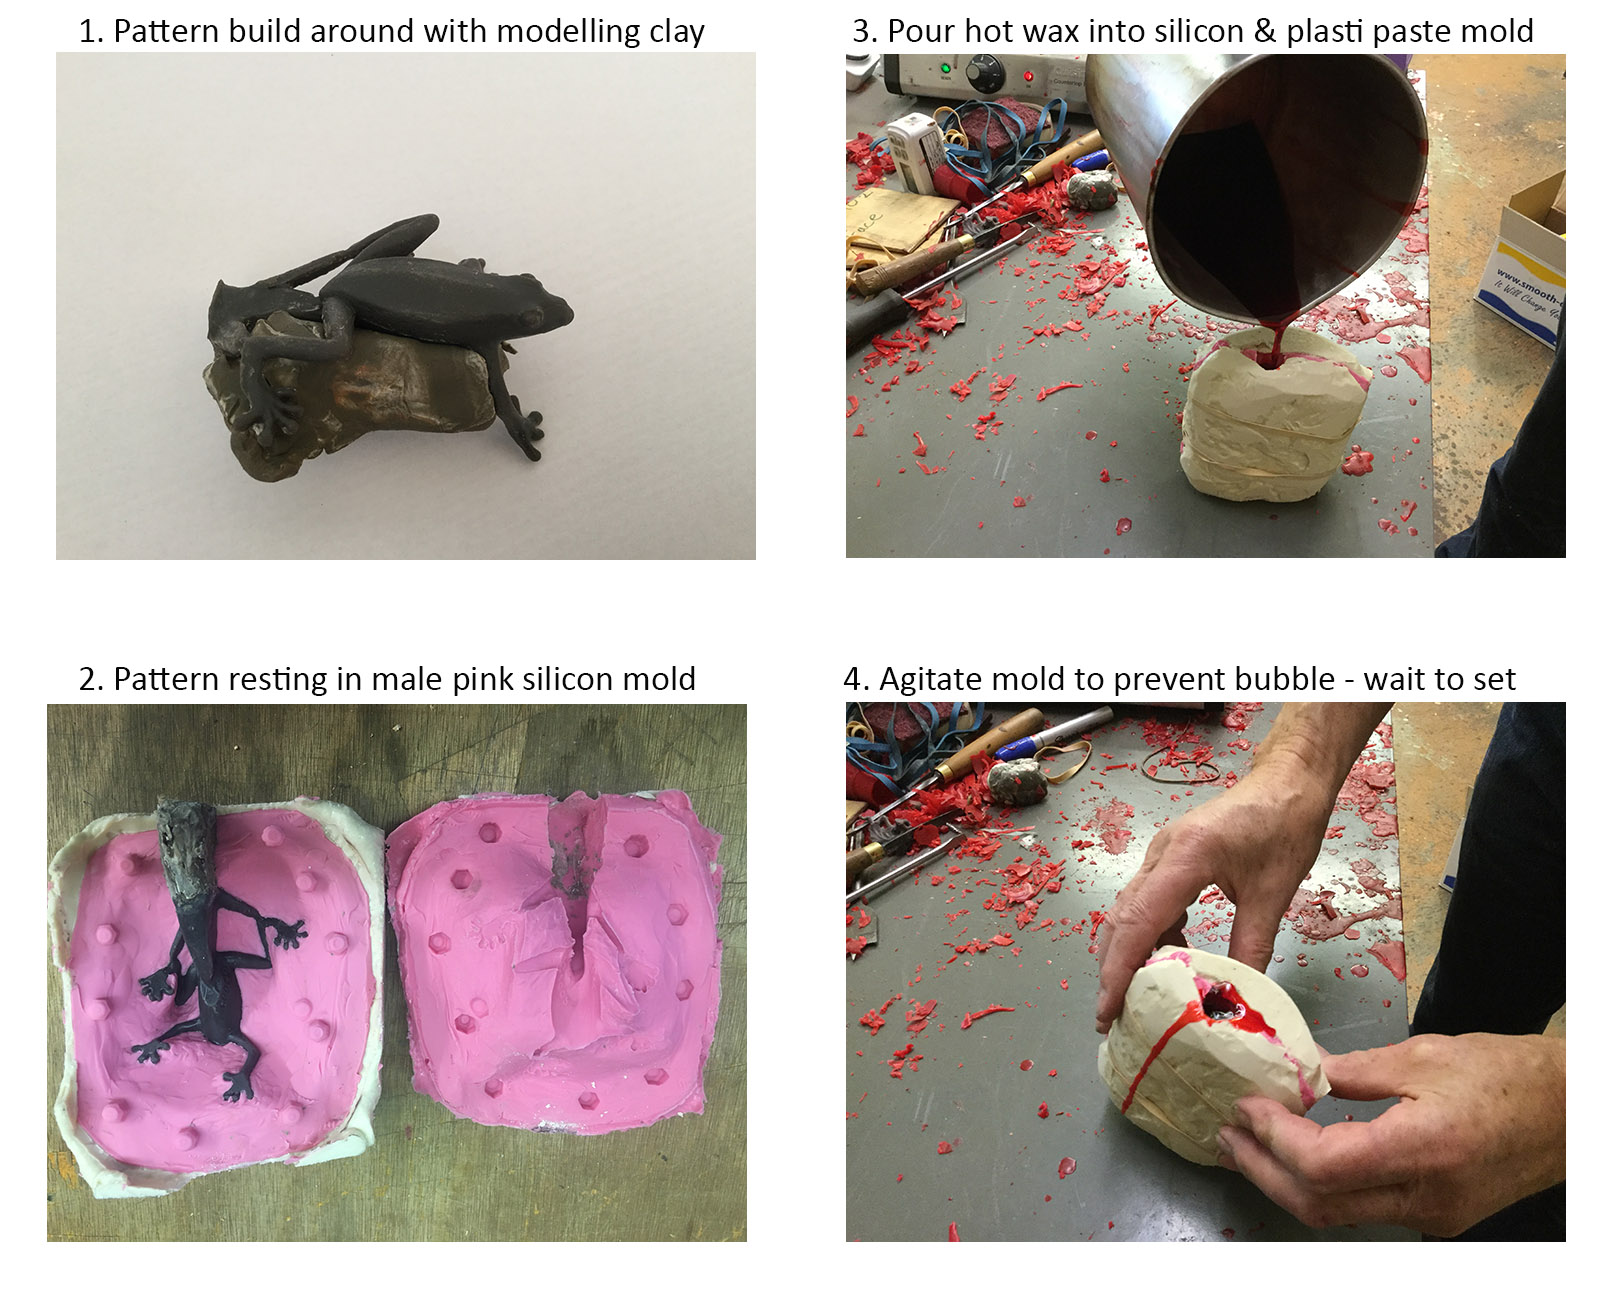
Next we make the second half of the mold which will have the peaks that align with the troughs. First we spray on a mold release agent onto the female mold, we use  Ease Release 200 by Mann Technologies. We then apply more of the silicon rubber to the mold which will collect in the troughs.  We repeat the process described and once we have created a rigid case in Plasti Paste we are ready to start using our mold to create waxes. The release agent allows the 2 halves of the mold to separate, we then can remove the pattern and now we have a hollow space to receive the wax.

Useful sources

https://www.smooth-on.com/

www.moldreleases.com

Colorful Door Hardware - How to Use Hot Patinas

Nature is a strong and continuous source of inspiration for our door handles and cabinet pulls so I wanted to complete this series of posts with a few pictures that illustrate this as well as providing information on how our yellow and maroon color patinas are made.

The dragonfly cabinet pull is an example of a hot chemical patina created with Sculpt Nouveau’s red and yellow dye oxide that are mixed together to create a maroon color.

To create the yellow amber tones of the butterfly we use a yellow and white dye oxide which we apply to the heated butterfly and once the desired color has been reached and after the pull has cooled down we apply small black wing markings with a  fine paint brush and a cold patina M20 product  by Birchwood Technologies.

The process for all of our hot patina finishes is the same;

Buff the bronze pull by hand or by using a buffing wheel buffing wheel and buffing disks, progressing as needed, from medium grit to fine grit disks. The disks we use are made by Standard Abrasives and made from a tough resin reinforced nylon fiber with aluminum oxide which acts as an abrasive element. Since the nylon web is un-woven it is more flexible and so will follow the contours of the bronze.

Dragonflies.jpg

To remove fiber particles, dust or other surface impurities we clean the piece with an air pressure hose.

Blend the liquid oxides in a non-reactive container to achieve the desired color.

Heat the pull to about 200° and apply the dye oxide blend to the areas you want to color with a very fine paint brush.

After the casting has cooled re-buff any areas that need to be re-worked or where you want to expose the golden color of the raw bronze.

Seal with a clear wax or use tinted waxes to create to add a different hue.

Sources:

www.sculptnouveau.com

www.birchwoodtechnologies.com

www.birchwoodtechnologies.com