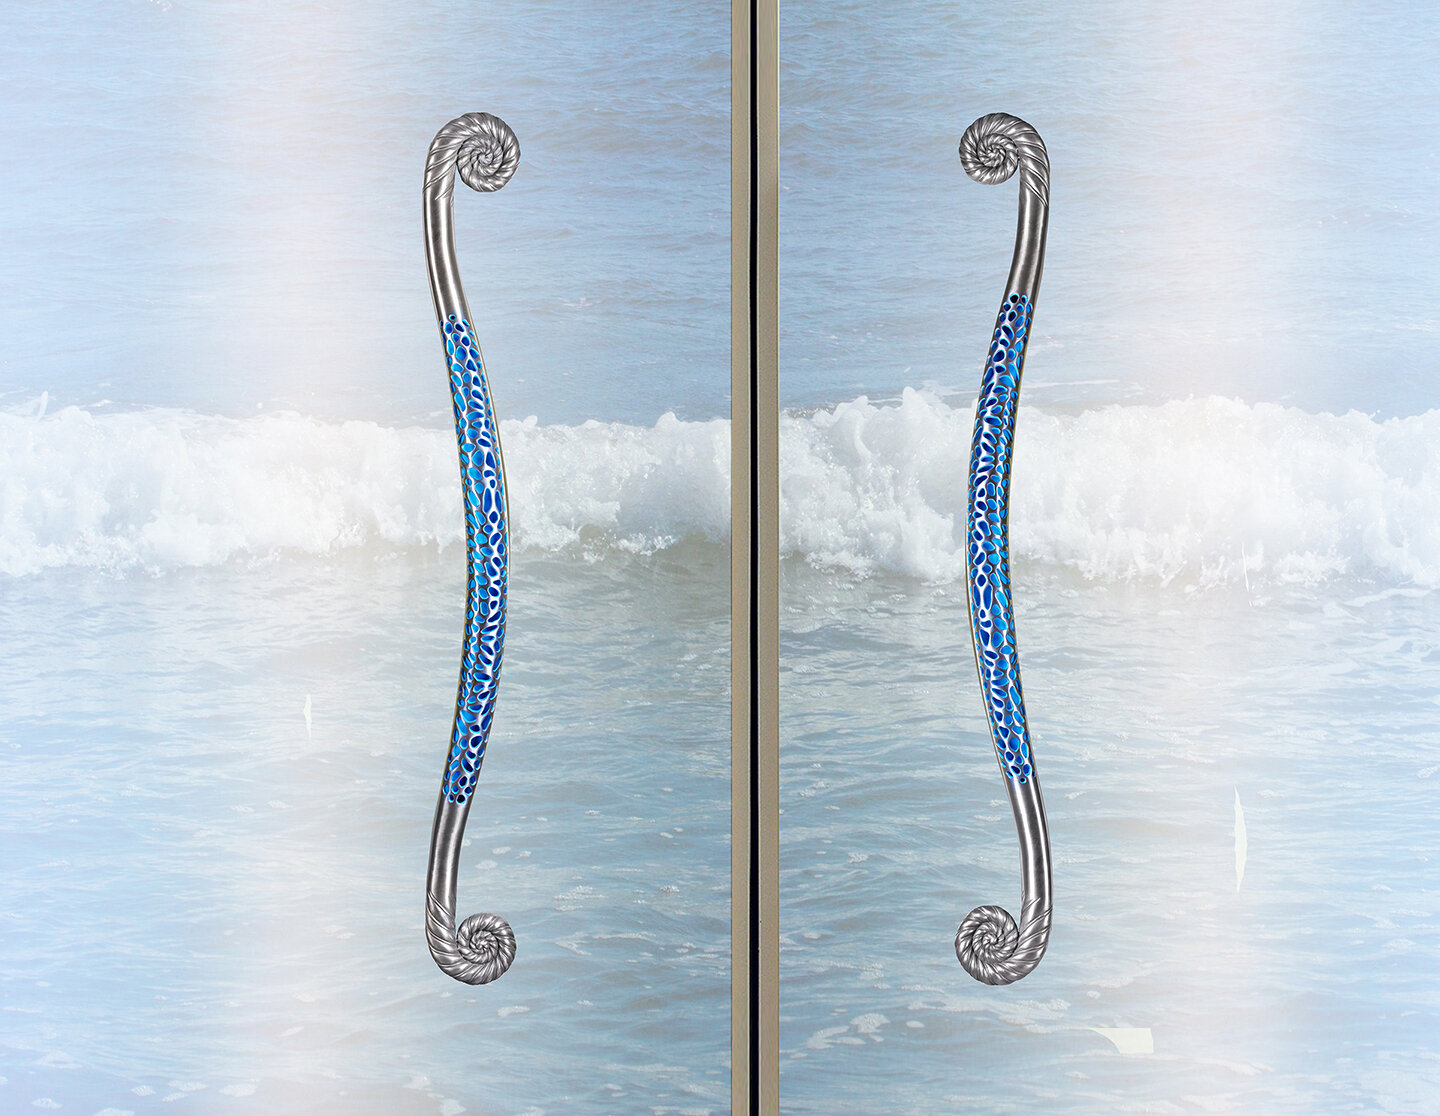
Neptune's Treasure - Ocean Front Door Handles

The scroll serpentine handle was designed for Baha Mar, a beach front resort in Nassua the Bahamas and was created in response to a request from Michael Hong Architects who were the architects and designers for this project. The long curvaceous pull is part of the Morphic collection but the coral inspired design needed to better capture the oceanic nature of this resort. We chose to fashion the ends of the pull on the moon snail shaped seashell thereby making the piece more like the trident spear used by Neptune God of the Ocean in classical mythology.


The oceanic theme was further reinforced by a blue powder coat which we added to inside of the handle. At a height of 40” the new piece was appropriately scaled to suit the grand entry doors to the SLS resort Hotel.

The handle is cast in 3 sections and the 2 scroll ends are welded to the coral stem to form a seamless piece. Cast in stainless steel, the handle is both durable and rust resistant and as with all exterior hollow vertical grips there is a “weep” hole at the lower end for rainwater to drain through.

We are currently completing an order for this piece and have been inspired to design a new set of handles using the snail shaped ends. The scroll ends will be free standing handles and at a height of 6” will be well suited for more modestly scaled residential entry doors. Stay tuned to see or perhaps sea how this piece evolves.

When Creative Minds Collaborate

The result can be a wonderful surprise as I just discovered when I came across the entry way door to an Encinitas residence designed by the very talented Joseph McCarter, the Principal Designer at J.W. McCarter & Associates. I happened upon a close-up shot of our green patina lizard set which was posted on Instagram and reached out to JWM to find out more.

What I discovered was an entry way grand in scale that seamlessly married the skills of wood artisans, glass makers and bronze sculptors to create a unique entry experience. The close up shot of the Lizard handle set only hints at the puzzle like design of the door and frame that was Joseph McCarters’ creative solution to a shortage of long boards of Mahogany.

See More from Our Lizard CollectionPhotographer Nader Essa, Photos Courtesy J.W.McCarter & Associates

See More from Our Lizard Collection

Photographer Nader Essa, Photos Courtesy J.W.McCarter & Associates

The puzzle design accentuates the scale of the entry and it is a playful theme that is carried through with our whimsical gecko pull mounted as an incidental accent on the right side of the door. Nature is clearly the driving force for this entry statement and the tropical monstera adansonil “cheese plant” fabricated in stained glass by Glass Light Studio is the vine that weaves from the top to the bottom of the door tying together the parrot, gecko and lizard.

The entry door acts as a bridge from exterior to interior. The grandeur of exterior is achieved in part through the scale of the mahogany puzzle sections and by the upward shining light manufactured by ELA. The treatment of the door interior is more familiar with the door being integrated with the surface of the interior walls and mounted art.

Nader Essa Photography (3)  (1).jpg


The photographs shown here are courtesy of J.W. McCarter & Associates and the photographer was Nader Essa who specializes in architectural and interior design photography

The door was fabricated by Busch Woodworking.

Insect Art and The Gilding Process

Martin Pierce is currently creating 18 gilded panels which will be used as decorative door panels for the front door of his home. Similar framed panels will be available for sale thereafter and we hope to announce those details soon.

Martin is currently at the gilding stage of the process which is what we show in this post. The raised panels are all beetles and the 5 distinct shapes are all from the gymnetis family of beetle. The beetles were chosen for their different body and wing shapes as well as color and will be applied to the door to create an artistic pattern.

The gilding process is used by Martin to create a bright iridescent surface which roughly simulates the iridescence that in beetles is created by the cell structure of their exoskeletons and the way it reflects light. Color will subsequently be added through translucent pigmented glazes.

Gilding brush used to pick-up with gold leaf Brush used to position leaf over wondersize

Gilding brush used to pick-up with gold leaf Brush used to position leaf over wondersize

Once a smooth surface has been created by applying and then sanding a layer of casein (see earlier post) the panel is then painted with a layer of semi-clear wondersize which acts like glue to fix the leaf in place. As a practical matter Martin paints the entire panel and water spots most of the outer area  before he begins gilding, this way he does not have to paint around small legs and antennae and the water spots that fall on the insect body can be easily removed with a cloth.

burnishing and 2 complete.jpg

Custom Bar Door Handles - Sophisitcated powder coating

We were recently commissioned by Meg King Design to make 4 Serpentine door handles in stainless steel for a very creative client she is working with. Meg wanted to add a custom dimension to the handles for her client’s barn doors and suggested we add a black accent. It would have been too mundane to add black to the entire piece so inspired by a photo Martin had taken of a black crested bulbul we added a powder coated crest to the top and bottom of the grip.


As mentioned in previous posts, stainless steel being a hard and dense metal does not readily absorb chemical patinas as they tend to slough off the surface. However, this alloy does work well with powder coating a process where color is added to the surface and then baked on creating a very durable finish. The range of colors and degree of luster available in powder form is extensive and most are also available in aerosol of liquids, so Meg was able to use the same black tone on the door astragals and barn door track. To pinpoint the right black, I turned to Dan Regan my trusted powder coating expert who is the owner of Primo Powder Coating in Huntington Beach who helped us select a matt black (10% gloss) BK120 powder manufactured by Cardinal Paint.

The bulbul shown here was photographed in the succulent section of the Huntington Gardens in Pasadena, a destination well worth visiting for its rich variety of native and exotic plants.

bul bul and morphic.jpg

Roller Latches for Stunning Door Handles


A tubular latch is used to hold a door or double door closed. The latch has a tongue that is thrown into the door strike when the lever is depressed, or knob is turned. A roller latch performs a similar function but does not require a lever or knob to be activated which is an attractive option where you have stunning door pulls and do not want anything to detract from their beauty.

Roller latches come in a variety of configurations some perform a simple closing function and Imperial Lock makes a series that also will lock a door. Whatever the configuration they share a simple roller that is a metal ball which projects into a recessed hole in the strike when the ball is sprung. Well-designed rollers are adjustable, and you can decide how far you want the roller to project out from the edge of the door using a long projection to create a tighter closing door that will require more force to open.


Roller latches vary as to how difficult they are to install. To fit a mortise roller latch you will need to cut a substantial rectangular area into the door to house the mortise box which is a job best left to a skilled carpenter or locksmith. In the photos shown here we installed a much simpler roller latch for our bedroom double doors so that our Hedgerow tree pulls could be shown in their full glory. The roller latch only required a shallow small rectangular area for the face plate which was done using a router and a smaller round hole for the roller which was easy to drill out.


roller-latch-fro-stunning-door-handles.jpg

Creating A Custom Appliance Pull Using the Lost Wax Process - the Wax Stage

We are currently working with a local designer who has specified many of our Willow cabinet pulls but who also needed a taller version of our Willow Sprig for use as an appliance pull. The client’s kitchen, not surprisingly, only required 3 large pulls and did not warrant the cost of a new patterns and mold. As our work is made using the lost wax method, we were able to create 3 new pieces by hand and by combining wax models.  Please refer to our earlier post to see how the new pull was designed using a left and right facing Willow Sprig.


Step 1

A total of 3 Willow sprigs were created in wax. A left and right wax sprig were made for each end of the new piece and a section of a second left sprig was used to make a connector between the 2 ends. Picture below shows melted red art wax made by Westech being poured into the sprig mold, the wax has a relatively low meting point of 160 degrees.

Spirg 1.jpg


Step 2

The mold is held together until the wax has cooled and solidified at which point the mold is pulled apart and the wax pattern thereby released.

Spirg 2.jpg


Step 3 and 4

The section to be used as a connector was cut from the wax sprig using a heated blade and then further heated with an air torch so that it could be bent to the correct shape.

The ends of the left and right sprig were cleaned and refined with a hand chisel.

3 and 4.jpg


Step 5

The ends of the left and right sprig were cleaned and refined with a hand chisel and then joined to the connector using a heated blade which melts the wax enabling it to be melded together to form one continuous piece.


Shining Light On 2020 by Taking Stock Of Interesting Hardware Pieces

The end of the year means we literally must take stock of all our products and this in turn hopefully gives us a clue as to what to focus on in 2020. This necessary accounting nightmare does have a silver lining and counting turn pieces, door levers, roses and back-plates is almost a therapeutic chore akin to clearing out the hall closet. What we found in so doing was quite an assortment of odd items that we rarely make which I thought I would share with you to see if you could spot their function.
Take the picture below and hazard a guess as to its use.
The length of the willow sprig provides the clue to its function as a window lever used for a custom residence to open and lock a window which was situated high at arm’s length reach.

Willow Window Lever

Willow Window Lever


The size of the lever below and the child sized back plate do not help identify this piece as a lever and escutcheon for a lift and slide locking window which we first came across in Venice and which was ordered recently for a San Francisco residence.
The slim back-plate and the position of the lever to hardware buffs should make this trim’s use for a multi-point door obvious. For those not familiar with multi- point locks they are frequently used on French doors and tall doors to latch the door into the frame at several points and thereby provide added security. The multi-point lock runs the full length of the door and the lever’s acts to release bolts into both the header and sill of the door and to lock the door in place.

Willow Multi-point trim for French Doors Willow Trim for Lift and Slide Window

Willow Multi-point trim for French Doors Willow Trim for Lift and Slide Window


The pieces below may look like head wear or fashion accessories, but they are very small 2” castings used to secure the top and bottom of a sliding willow bolt used in a similar way to the multi-point above but decidedly less mechanical in function.


Happy New Year from Idyllwild

We have enjoyed the Christmas break in Idyllwild a short 2 hour journey from Los Angeles and one recommended to anyone needing to recharge their creative battery. Idyllwild is a small town that enjoys a diversity of terrain and climate. The altitude ranges from 4,000 to 7,000 with snow covered mountains on the northern front and dessert dry chaparral on the south.

Located in the San Jacinto mountains there are plenty of trails for exploring the habitat and we chose the Perimeter and Hillside trails in Idyllwild Park to spend our first day knee high in snow.

For a change of scenery we took the South Ridge trail which is on the southern Hemet side and which offers the hiker a steep hike over sandy rocky soil surrounded by Manzanita trees and shrub oaks and holly bushes. While the trail was dry there was enough moisture for the lichen and moss to take root on rock surfaces to form a variegated green collage.

The trail was deserted but paw prints and scat marked the path traversed by the native coyotes.

30E3D164-51A6-4065-BAC7-A8EE52A3B47D.jpeg
27578BAA-F74D-4788-B8D6-2FFDE9115A07.jpeg

The trail was deserted but paw prints and scat marked the path traversed by the native coyotes. If you compare the photos here it is clear that the Manzanita berries are part of this coyotes diet.

Small red brown remnants of the manzanita berries

Small red brown remnants of the manzanita berries

Bright red berries before consumption

Bright red berries before consumption

Other indications of the wild life could only be appreciated by our pit bull Iris who savored the scent of the local population with her hovering focused snout.

57DE8E62-51D4-4F4F-AD82-A3A032785760.jpeg

Our oak leaf cabinet pull is based on the leaves of the Live Oak the inspiration for which came from the wine country of Paso Robles.


Insect Art - Next Stage For Beetle Panels

Martin Pierce begins his scarab panels by using the sketch shown in the last blog which he traces onto the surface of a paint primed plywood panel.
Using the same sketch Martin traces the body of the beetle onto a 1/8” thick of basswood which is then cut out using a scroll saw. Martin then rounds the edges of the beetle outline using a chisel which he also uses to add lines and indentations to the wing casings which gives the beetle a more 3-dimensional appearance. The beetle is then finely sanded and glued onto the primed panel and clamped in place to form a secure bond. After the beetle is firmly attached any excess glue is scraped away with small chisels.
Using his finger Martin smooths gesso onto the surface and into the pores of the basswood and working with a damp cloth removes any unwanted gesso as he goes.

Bettle Art .jpg

For the legs and antenna Martin has made a small tool using a short piece of 1/8” round dowel with a chamfered end. The tool is similar in function to a pen quill and fine enough to be used to spread very small beads of thin gesso onto the primed panel to simulate the sections of the beetle’s legs and antennae. Once set any excess gesso is removed with a chisel and then the completed beetle and panel are sanded with very fine 400 grit sandpaper. The panel is then sealed with sanding sealer and is ready to be gilt and glazed.
Insect themes are also used by Martin as cabinet pulls and thumb latches and are central to many of his hardware designs.


New Morphic Door Pull - One Size Does Not Fit All

When designing a cabinet pull the smaller size of cabinet drawers and doors requires that the pull be appropriately scaled. The size of the pull should not over-power the cabinetry but at the same time must not appear wimpy.
When we began designing our Ergo collection of contemporary hardware the designs for the cabinet doors were very different to those for the entry and interior doors. However, over time our small 12” cabinet pull has undergone substantial scale revisions and is now available as both a 35” and 54” entry door pulls. The demand for different sizes of this piece continues and we are currently designing a 25” piece. To the untrained eye this may appear to be a simple revision but in reality, the new size will require a three-dimensional pattern to be made so that the newly proportioned piece be as fluid as the original design. The sketch here shows how the scale of the new pull when compared to the 54” pull will look on tall 7’ 5” closet doors.

Left: Doors New 24” High Ergo Pull Right: Doors 35” High Ergo Pull

Left: Doors New 24” High Ergo Pull Right: Doors 35” High Ergo Pull

Our Morphic cabinet pull also lends itself to scale modifications and is currently being re-designed as a 24” door pull. To function well as a door pull, we are modifying the outer edge and straightening the curvature so that it will fit on narrow door stiles. The back of the pull that attaches to the door is a mere 2 ½” and the decorative curved face is 3 ½’.


Large Morphic Pull sketch.jpg

Insect Art by Martin Pierce

The technique of Japanning is one we used extensively as furniture makers to adorn our case-goods with natural themes. We have also used this technique to create an animal carnival on a commissioned toy chest and more recently to create smaller scarab wall tiles which will soon be available for purchase.

insect wall tiles.jpg

In the scarabs depicted in our wall tiles the body shape is based on the gymnetis family of beetle. This class of beetle has large wing casings which provide a prefect natural canvas for bright iridescent colors.
For our ongoing home remodel we will be using the scarab tiles to add an artistic touch to our front door where 18 tiles will be laminated to the 18 raised door panels. We have chosen 5 distinct bugs ranging from the round from of the lady bird to the elongated shape of the buprestid and will be using an abundance of artistic license to paint them in a variety of colors.
The beetle shapes will be cut from 1/8” Masonite and then built up with a thin layer of casein to form a smooth surface which will be gilt with gold leaf. The gold leaf once sealed will provide the backdrop for the beetles markings which be created with oil paint diluted with a solvent to create a thin translucent color. Once applied the oil paint will be sealed with lacquer so that successive layers of color can be added. As the layers of color are heavily diluted the lustrous gold shines through to create an attractive iridescence albeit one that is vastly inferior to that seen in nature.

bettle+tiles.jpg

Search for Longer lasting compact batteries for LED door handles

Our illuminated door handles were designed for the hospitality sector and are often used on exterior and interior doors where their color changing ability and organic design create a dramatic statement.
As public areas receive greater use than would be the case in a typical household we designed these pieces to function as hard wired handles connected to low voltage wiring and thereby capable of providing continuous light for many months with the lifespan being limited only by the durability of the LED components. Most of our commercial projects are either new construction or major remodels where new doors are designed to carry low voltage wiring.


Some smart newly constructed homes will have wiring built into the door frame but if not trying to get power into an existing door can be a challenge. For the commercial sector, frameless glass doors are also unsuitable for hard wired handles and so find ourselves searching for a battery alternative. Can any reader suggest a battery that would work?

You may find our quest surprising, but the problem always comes back to finding a battery that is small enough to fit into a 1 ½” x 4” cylinder and that has a long-life span. Our single-color white spot uses 350mA and while this is a small amount of energy so too is the life capacity of smaller batteries. Batteries are measured in part by the Ah or amp hours so a 1Ah battery can power a 1Amp device for 1 hour or power our white LED spot for just under 3 hours.

Some small batteries have an 8.5Ah which would power our handle for 24 hours and make some sense if the light were not constantly on but motion triggered for short 10 second bursts.

Re-chargeable batteries are another option especially for exterior use where a small solar panel could be attached to the cap of the handle.

We will continue to search for battery alternatives and will be exploring both motion and light activated uses as well as rechargeable batteries and welcome any thoughts from readers.


Seasonal Colors for Door Hardware

While the seasons may appear elusive in this sun- shine state, the slight chill in the air reminds us that autumn has arrived and with it our sense of color naturally drifts to the rich colors of autumn.

Visitors to the wine country in Paso Robles will now be able to see the wide variety of reds, yellows and brown that color the vines of their favorite varietal.
For the less fortunate we hope that our custom hot patinas when applied to our plant pulls will provide a reminder of what this season brings.


For our vine cabinet pull we used green, red and brown dye oxides applied as liquid patinas to create a gradation of colors to the hot surface of our bronze pull. To ensure that the pigmented liquid adhered to the surface we sand blasted the casting prior to heating. As the patina is translucent the golden hues of the bronze still shine through.
The dye-oxides we use are available through SculptNouveau who also offer a full range of sealants suitable for most metals.With our pear and oak leaf cabinet pulls we omitted the pea green dye oxide.


In our earlier career as furniture makers we used a similar technique when creating our japanned vine leaves. The iridescent quality of the leaves was achieved by applying gold leaf to the motif before adding successive layers of translucent color.

Custom Designs Made by Adapting Existing Cabinet Pulls- Pragmatic Considerations Part 11

We are currently adapting our large Willow cabinet pull so that there are fewer fanned leaves at the ends. The request is to make the piece to be visually lighter while retaining the integrity of the design.

The design adaptation raises the question whether to make a new mold or whether to modify each piece. Our door and cabinet handles are cast in the lost wax method, meaning that each bronze casting first took shape as a wax model. The wax model is made by pouring melted wax into the cavity of the mold which is left to cool and then extricated from the mold. This process is like the way one makes jelly rabbits and other shapes using melted gelatin and inverted animal molds which are refrigerated so that the gelatin sets. The molds we use are typically made in 2 snug halves that are tightly clamped together so that the wax will remain in the hollow cavity until it is solid, the 2 halves are then de-clamped and removed leaving the wax replica.

In the image you can see that the red wax willow pull has been modified so that there are fewer leaves than is the case with the standard bronze pull. The image shows the original pattern that was carved in wood and then painted with a grey coating to fill in the wood grain or pores. As we did not want to permanently modify our one pattern, we chose to modify all 37 waxes so that we could then cast 37 bronze pulls.


The bronze castings made in the lost wax method are essentially the third generation of a design, moving from carved pattern to wax replica to bronze replica. With each generation there is a subtle loss of detail and size and both aspects need to be factored into the making of the pattern. The pattern needs to be larger than the proposed piece as shrinkage occurs at both the wax and bronze stages. Undercuts and design lines need to be sharper and deeper in the pattern as these will be less defined in the wax and bronze.


Oil rubbed bronze door hardware and living finishes


The corrosion resistance of bronze makes it an alloy well suited for exterior door hardware. Over time with exposure to the elements bronze develops a patina which will continue to age and become darker. This living patina is a film of oxide which develops on the surface and helps to protect the bronze substratum.

We can simulate this process by applying an acidic solution to our prepared bronze (see other posts on Birchwood M20). The acidity of the solution will rapidly darken the bronze creating a film of oxide in a matter of minutes rather months or years. However, even though the bronze has been patinaed the oxidation process will continue and the patina will continue to darken and even become verdigris in color hence the phrase “living patina”.


Can the patina be fixed so that the color of the bronze does not change?
The oxidation process can be slowed down by sealing the surface with wax or by baking on either a clear enamel of lacquer finish. The latter method is one we turn to for more commercial projects and public areas where our handles will be touched constantly.

The knob or lever of a bronze handle set will become naturally burnished in those area where it is touched to open or close a door. As the escutcheon plate typically doesn’t get touched to the same degree, this area will continue to become darker. For our more textured handle sets we simulate this effect by using different acid immersion times for the knob and plate and further accentuate this contrast be burnishing key areas like the lizard’s body shown here.


Frogs and Toads for Halloween Treats

 Frogs are one of 3 creatures in our door hardware collection that spring to mind as spooky Halloween draws near. Our Raven and Bat sculptures will make their appearance in later posts but now the spotlight shines down on our amphibian friends of the warty and smooth varieties.


Our frog doorknob bears warts that are more typical of their dry skinned shorter legged toad cousins. When Martin modelled the frog doorknob, he wanted to add a textural element that would also give the frog a grumpier persona and for the naturalists amongst us it should be noted that in nature quite a few frogs do have bumps. 

Halloween Frogs 1.jpg

The Halloween connection for Frogs is attributed to Shakespeare’s song of the witches from Macbeth where this ill-fated creature is added to the cauldron for the witch’s brew. In folk lore, contact with the bumpy epidermis of frogs when accompanied by the right spell could inflict warts on one’s victims.

The frog doorknob shown hear is mounted on a wreath of entwined willow leaves and being cast in bronze can be finished with a simple oil rubbed patina or with a hot patina to create verdigris.

Frog Halloween RED.jpg


Our smooth skinned frog cabinet pull is equally versatile and with the right hot patinas can be transformed to look like the poisonous dart frog found in the rain forests of central and south America.


How to add some fun to your kitchen remodel

How to add some fun to your kitchen remodel

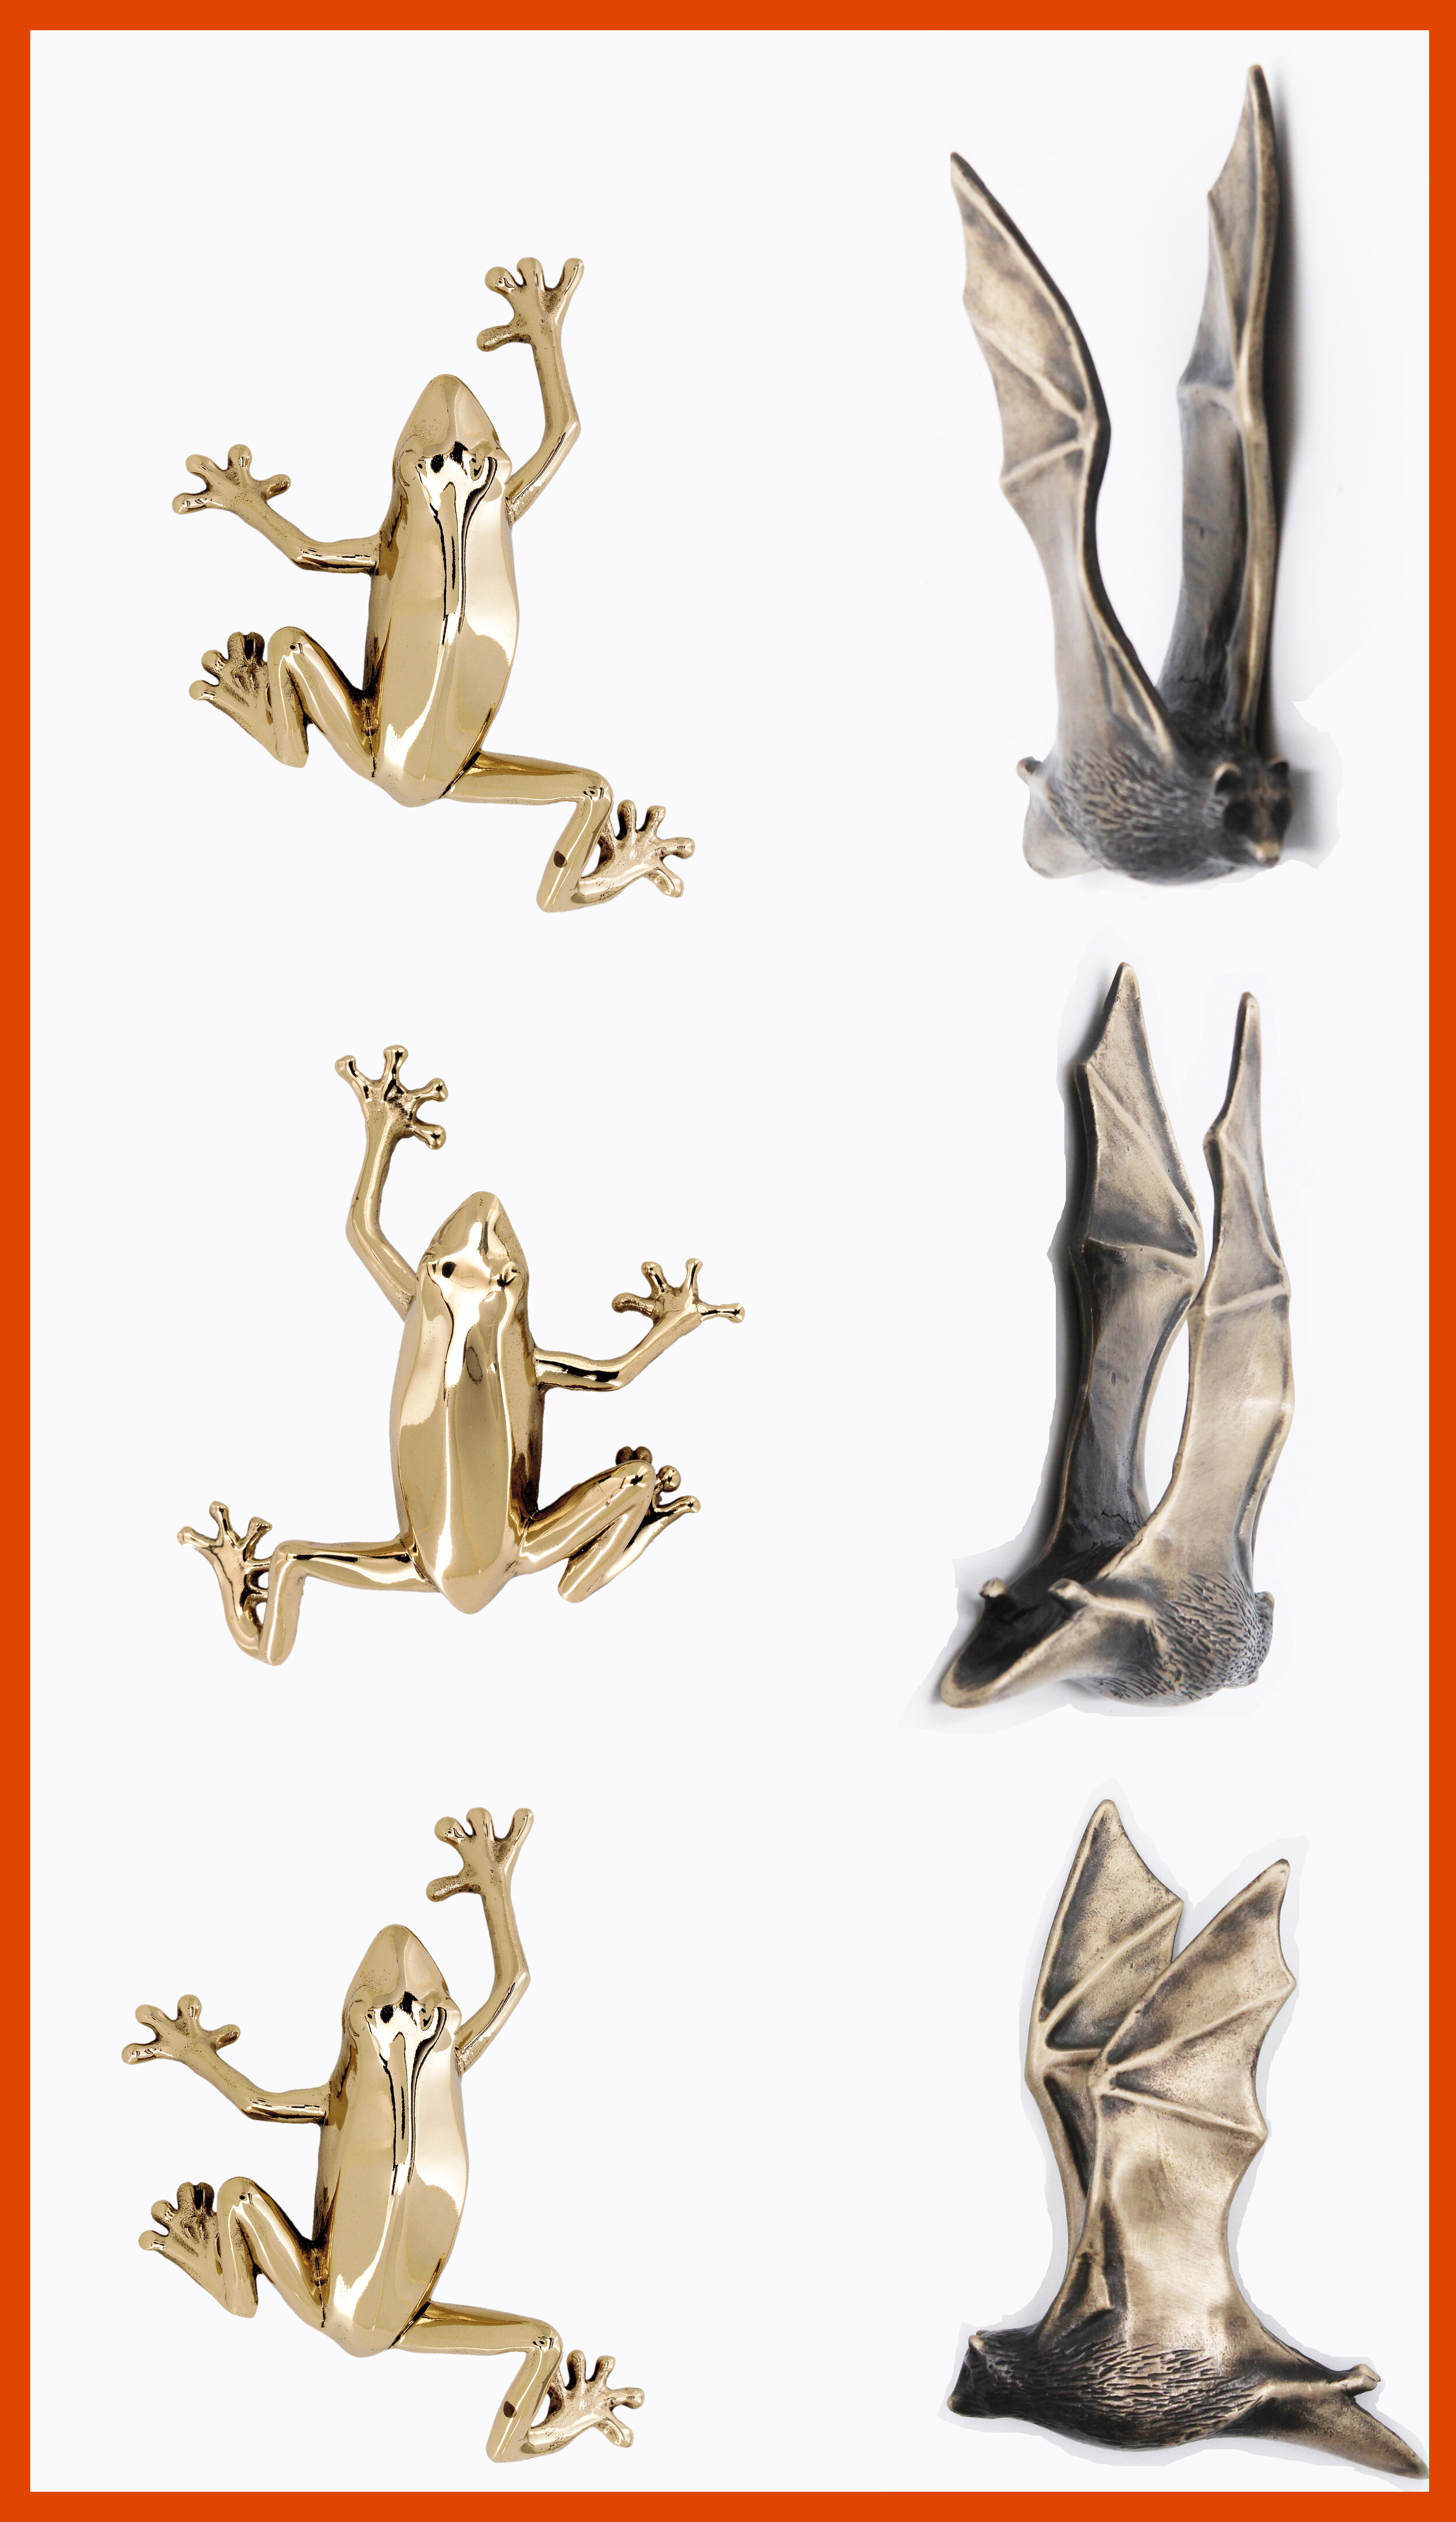
To provide a better understanding of our small insect and reptile cabinet pulls we will over the next few months be photographing these little creatures form different perspectives. The hope is that this will help homeowners plan how and where to use these pieces and have a little fun in the process. We have typically photographed these pieces straight on and not surprisingly this is how they have been used on cabinet door and door fronts.


Cabinet pulls are typically thought of as being directional pieces but in nature tree frogs which our sculptures are based on are not directionally restrained.
The first image shows the profile, rear and aerial view of the left and right frog sculptures.

The second image shows how these 2 frog sculptures could be arranged in a leap-frog formation going up and down the cabinet door and drawer fronts. Given the whimsical nature of these pieces we feel you can indulge your sense of fun when tackling the more serious task of a kitchen remodel.


Frog leaping.jpg


The frog pulls shown here were cast in solid bronze and finished with a light antique patina which we strategically removed to create highlights which accentuate the very 3-dimensional nature of these pieces. All our cabinet pulls are sculpted as three-dimensional art pieces and each facet is refined to create a piece that is attractive from all sides.

Artistic kitchen ideas,Frog pulls,Pulls for kitchen cabinetry,Whimsical door pulls,animal cabinet pulls


New Trends in Door Hardware

As a small, hands- on company, it is not difficult to spot trends at their out-start.
This is certainly the case with recent orders for barn door handles that are two tone with black or very dark brown accents. Our large door pulls, or grips are available in silicon bronze, an alloy that is golden or champagne in its unadorned state and in 316 stainless steel, an alloy which is a cool grey when cast.
Both alloys are durable, rust resistant and high- quality mediums but their density dictates how each can be color accented. Stainless steel is a much harder medium than bronze and its surface is more difficult to penetrate so liquid patinas will tend to slough off and not adhere to the metal. While bronze is a strong alloy its surface is easier to buff so liquid patinas can more easily penetrate and bind to the alloy.
Black is the color of choice for most tracking currently being sold for sliding barn doors which explains why we are seeing an increasing demand for black highlights to be added as custom finishes to our steel and bronze door grips. As our large door handles are dramatic organic designs, we feel it is important that the color accent be integrated into the design. When we are adding a dark patina to bronze handles, we immerse the piece in a chemical solution until it reaches the required darkness and then we halt the process by immersing the handle in water. Once dry, we re-work the piece by hand sanding and buffing the piece in select areas to remove the dark patina. The process can be repeated so that different depths of color are created. Once complete the color is fixed with penetrating oils and with a hard-wax topcoat. For high traffic projects the handle can be further protected by baking on a clear enamel coating.

Repeated immersion into patina to develop depth of color - highlights created by removing patina

Repeated immersion into patina to develop depth of color - highlights created by removing patina


We add color to stainless steel by baking on a powder chosen for color and iridescence. The handle is buffed or polished to the desired luster and areas that are to be free of color are masked off from areas receiving color. The color powder is sprayed on to the piece and then baked. Determining the accented area is crucial as once baked it is extremely difficult to rework the finish without stripping the piece back to the base metal.